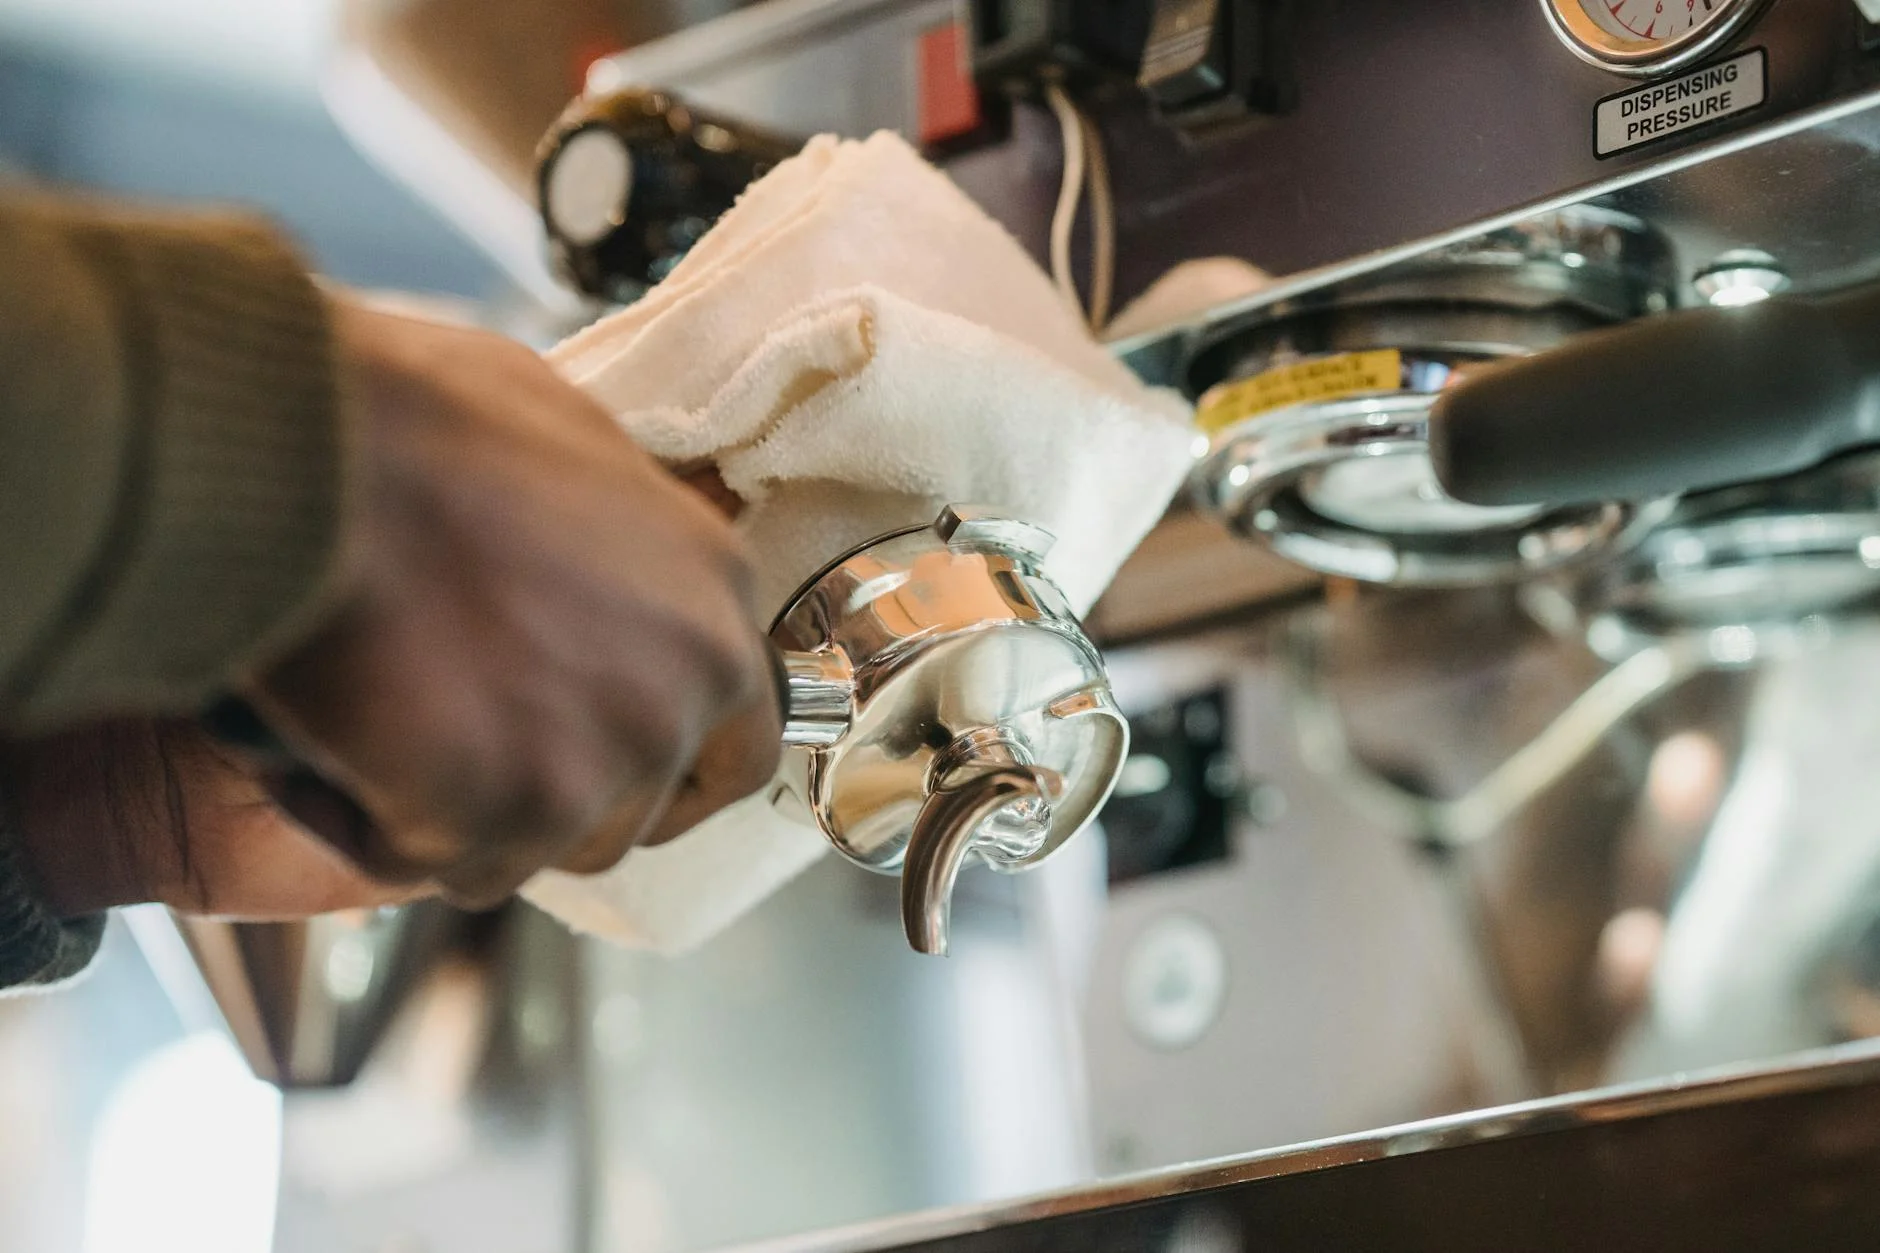
The iconic E61 group head is a hallmark of prosumer espresso, beloved for its temperature stability and timeless design. However, owners of these fantastic machines will likely encounter a common issue: a persistent hissing or dripping from the top of the boiler. This is almost always a sign of a leaking vacuum breaker valve. While it might sound alarming, this is one of the most frequent and easily fixable maintenance tasks you can perform. This article will serve as your comprehensive guide to understanding what the vacuum breaker does, why it fails, and most importantly, how to clean, maintain, and prevent it from leaking. Empowering yourself with this knowledge will save you time, money, and ensure your machine runs smoothly for years.
What is a vacuum breaker and what does it do?
Before we can fix the leak, it’s essential to understand the part we’re dealing with. The vacuum breaker, sometimes called an anti-siphon valve, is a small but crucial safety and performance component typically located on the top of your espresso machine’s steam boiler. Its job is twofold.
Firstly, during the machine’s heat-up cycle, it acts as a pressure release valve. As water heats and turns to steam, some air gets trapped, creating what’s known as “false pressure.” This can affect the machine’s operating temperature and pressure. The vacuum breaker stays open, allowing this air to escape with a characteristic hissing sound. Once all the air is purged and only steam tries to escape, the pressure pushes a small internal piston upwards, sealing the valve. Secondly, when you turn the machine off and it cools, it prevents a vacuum from forming inside the boiler. This is vital because a vacuum could potentially siphon milk from a steam wand back into the clean boiler, a significant hygiene risk. In short, it ensures proper pressure during operation and prevents contamination when the machine is off.
The primary cause of leaks: Mineral buildup
So why does this simple valve start to leak? The answer, in over 90% of cases, is limescale. The constant interaction with steam and hot water, especially in areas with hard water, leads to the accumulation of mineral deposits. The vacuum breaker has two critical sealing surfaces: the tiny O-ring or seal on the piston and the brass seat it presses against.
Here’s the process:
- Minute particles of limescale begin to form on the piston and, more critically, on the valve seat.
- This buildup creates a rough, uneven surface.
- When the machine heats up and the piston rises, the scale prevents it from forming a perfect, watertight seal against the seat.
- As a result, a tiny amount of steam continuously escapes, which manifests as a constant hissing sound or a drip of water that often evaporates on the hot boiler, leaving behind a chalky white or greenish residue.
While a worn-out rubber or silicone seal can also be the culprit, mineral buildup is by far the more common offender. This is excellent news because it means the problem can often be solved with a thorough cleaning rather than an immediate part replacement.
How to clean and service your vacuum breaker
Fixing a leaking vacuum breaker is a straightforward maintenance task that most home users can perform with basic tools. Follow these steps to get your machine back to running silently and efficiently.
Tools you’ll need:
- An appropriately sized wrench (often 14mm or 17mm)
- A small container for a descaling solution
- Food-safe descaling solution (citric acid or a commercial product)
- A soft cloth or pipe cleaner
- Optional: Food-safe silicone lubricant
Step-by-step instructions:
- Safety first: Unplug your espresso machine and allow it to cool down completely. The boiler and its components are extremely hot and under pressure when operating.
- Locate and remove: The vacuum breaker is a small brass or stainless steel valve on top of the boiler. Place your wrench on the nut at its base and turn it counter-clockwise to unscrew it from the boiler fitting. Be gentle but firm.
- Disassemble: The valve typically unscrews into a few pieces: the body, a cap, and the internal piston assembly which may include a tiny pin, a seal, and sometimes a spring. Take note of the order for reassembly.
- Descale the parts: Place all metal components into a small bowl with your descaling solution. Let them soak for 15-30 minutes. You should see the solution fizz as it dissolves the mineral deposits. Avoid soaking any rubber or silicone seals for too long, as the acid can degrade them.
- Clean and inspect: After soaking, use a soft cloth or brush to scrub away any remaining residue. Pay close attention to the piston and the inside of the valve body. Inspect the small seal for any tears or deformities. If it looks worn, it’s best to replace it. While the parts are soaking, use a damp cloth or pipe cleaner to carefully clean the valve seat on the boiler fitting itself.
- Reassemble and reinstall: Rinse all parts thoroughly with fresh water. You can apply a tiny amount of food-safe lubricant to the seal to ensure smooth operation. Reassemble the valve and carefully screw it back onto the boiler. It only needs to be hand-tight plus a final quarter-turn with the wrench. Do not overtighten, as this can damage the threads or the seal.
Once reinstalled, you can plug in and turn on your machine. You should hear the initial hiss as it heats up, which then stops completely, leaving you with a quiet, leak-free machine.
Long-term prevention and troubleshooting
Cleaning your vacuum breaker is a great reactive fix, but the best strategy is proactive prevention. Since limescale is the primary enemy, the single most important thing you can do for your E61 machine is to use properly filtered and softened water. Using water with the correct mineral content (not distilled, but low in scale-forming minerals) will dramatically reduce how often you need to perform this service. Regular, full-machine descaling cycles, as recommended by your manufacturer, will also help keep internal components like the vacuum breaker clean.
Even with perfect maintenance, parts can wear out. Here’s a quick guide for when a cleaning isn’t enough.
| Symptom | Likely Cause | Solution |
|---|---|---|
| Constant hissing or dripping after cleaning. | The O-ring or seal is worn, cracked, or deformed. | Replace the seal. They are inexpensive and easy to find online. |
| Valve sputters or opens/closes erratically. | The piston is sticking due to debris or pitting on the metal. | A deep clean may work, but if the metal is pitted, replace the entire valve. |
| Leaks from the threads after reinstallation. | Valve is not tight enough, or the thread sealant/gasket is damaged. | Tighten slightly. If it still leaks, unscrew and apply new Teflon tape or a new copper/fiber gasket. |
By understanding how to both treat and prevent the issue, you take full control over your machine’s health.
In conclusion, a leaking vacuum breaker on an E61 espresso machine is a very common and highly manageable issue. We’ve seen that its function is critical, releasing false pressure and preventing boiler contamination. The leak itself is almost always caused by mineral scale buildup, which prevents the internal piston from creating a perfect seal. By following a simple, step-by-step cleaning process, you can easily resolve the hissing and dripping. However, the ultimate solution lies in prevention. Using properly softened water is the most effective way to protect not only your vacuum breaker but the entire hydraulic circuit of your machine. Regular maintenance is key to enjoying delicious espresso and ensuring your investment lasts a lifetime, and tackling the vacuum breaker is a perfect first step into home espresso machine care.

 No products in the cart.
