How to use pressure decay to diagnose puck integrity
For the dedicated manual espresso enthusiast, the pursuit of the perfect shot is a study in variables. We control grind size, dose, temperature, and time. Yet, one of the most insightful diagnostic tools, pressure decay, is often overlooked. Understanding how pressure behaves after reaching its peak offers a direct window into the structural integrity of the coffee puck. It allows us to move beyond simply observing a shot’s flow and instead diagnose hidden flaws like micro-channeling or poor edge seal. This guide provides a technical framework for using pressure decay as a method to refine puck preparation, leading to more consistent, balanced, and expressive extractions without relying on guesswork.
What is pressure decay?
In the context of manual espresso, pressure decay refers to the rate at which pressure declines after the user stops applying force to the lever. Once peak pressure (e.g., 9 bar) is reached and the lever is held static, the pressure will not remain perfectly constant. It will naturally decrease as water flows through the coffee puck. This rate of decrease is the “decay.” A flawless, uniformly dense puck will offer consistent resistance, resulting in a slow, steady, and predictable pressure decay. Conversely, a puck with structural flaws will be unable to maintain this resistance, causing the pressure to drop more rapidly or erratically. This behavior is a direct indicator of water finding paths of least resistance, bypassing uniform extraction.
The link between pressure and puck integrity
The coffee puck is a porous medium designed to resist the flow of pressurized water. This resistance is what allows for the extraction of soluble solids from the coffee grounds. Puck integrity, therefore, is the measure of how uniformly and consistently it can provide this resistance across its entire structure.
- A uniform puck: In a well-prepared puck, the coffee grounds are evenly distributed and compacted. Water is forced to saturate the bed uniformly, encountering consistent resistance at every point. This leads to a slow, even extraction and, consequently, a slow and stable pressure decay.
- A compromised puck: If the puck contains channels, cracks, or a poor seal around the basket’s edge, water will exploit these weaknesses. This is because water follows the path of least resistance. Instead of saturating the entire puck evenly, it rushes through these flaws, leading to localized over-extraction and widespread under-extraction. This rush of water results in a rapid and significant drop in pressure, indicating a failure in puck integrity.
How to perform a diagnostic test
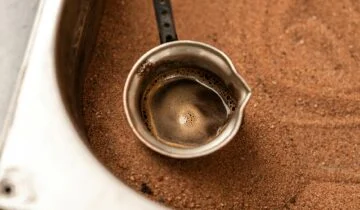
Measuring pressure decay requires a manual lever machine equipped with a pressure gauge. The process is a modified extraction procedure focused on observation rather than producing a drinkable shot. The goal is to pressurize the puck and then hold the lever stationary to observe the gauge.
- Prepare the puck as usual: Follow your standard workflow for puck preparation. Consistency here is key to generating useful, comparative data over time.
- Pre-infuse and ramp to pressure: Engage the lever to pre-infuse the puck and then ramp up to your target peak pressure, such as 9 bar.
- Hold the lever and observe: Once you reach peak pressure, hold the lever perfectly still. Do not apply any additional force. Your focus should now be entirely on the pressure gauge.
- Monitor the decay: Watch how the pressure reading on the gauge changes over the next 5 to 15 seconds. Note the speed and character of the needle’s movement. Does it drop quickly? Is the decay steady or does it accelerate? A slow, graceful decline from 9 bar to 7-8 bar over several seconds is often indicative of a solid puck.
This test provides a clear, data-driven insight into the quality of your puck preparation, moving beyond the ambiguity of visual shot diagnosis.
Interpreting pressure decay patterns
Different rates and patterns of pressure decay correspond to specific flaws within the puck. Learning to read these signatures is crucial for targeted problem-solving. While exact numbers depend on the coffee, basket, and grind size, the general behaviors are universal.
| Decay Pattern | Potential Puck Integrity Issue |
|---|---|
| Slow, steady decay | Indicates a well-prepared, uniform puck with no significant flaws. |
| Rapid initial decay | Suggests severe, early-onset channeling or a poor edge seal around the basket. |
| Stable, then a sudden drop | Points to a channel forming mid-extraction, where a section of the puck collapses. |
| Consistently fast, linear decay | Often a sign of a grind that is too coarse or a dose that is too low for the basket. |
By identifying a specific pattern, you can adjust your technique accordingly. For example, a rapid initial decay might prompt a focus on distribution and tamping to improve the edge seal, whereas a sudden drop mid-shot might suggest a need to refine how gently you ramp to full pressure.
Conclusion
Pressure decay is more than an abstract concept; it is a powerful diagnostic tool that provides immediate, actionable feedback on puck integrity. By moving beyond visual cues and analyzing the behavior of pressure itself, the manual espresso user can identify hidden flaws in their preparation workflow. Understanding whether decay is rapid, slow, or erratic allows for precise adjustments to distribution, tamping, and other variables. This methodical approach removes guesswork, leading to a deeper understanding of extraction dynamics and, ultimately, a higher level of consistency and quality in the cup. For those dedicated to refining their craft, relevant precision espresso tools that can aid this process are available from retailers like papelespresso.com.


 No products in the cart.
