
How to transition from espresso to milk steaming on a Gaggia
For the dedicated home barista using a manual machine like the Gaggia Classic Pro, the sequence between pulling a shot and steaming milk is a critical workflow juncture. Unlike dual boiler machines that handle both functions simultaneously, a single boiler unit demands a precise, practiced transition. Mastering this process is not merely about speed; it is about managing the machine’s thermal state to ensure that you have adequate steam pressure for creating fine microfoam without compromising the espresso you just extracted. Understanding the technical sequence unlocks a higher level of consistency in your milk-based drinks, turning a potential point of frustration into a seamless part of your craft.
Understanding the single boiler system
The core of a Gaggia Classic and similar machines is its single boiler. This component is responsible for heating water to two different target temperatures: a lower range for brewing espresso (typically 90-96°C) and a much higher temperature for producing steam (well above 100°C). Because it cannot perform both tasks at once, the user must actively manage the transition between these two states. When you finish extracting your espresso, the boiler contains water at brewing temperature. To generate steam, the heating element must engage to raise the temperature of the water in the boiler significantly, causing it to vaporize and build pressure. This heating period is the central technical challenge that the following steps are designed to manage effectively.
The post-shot steaming sequence
A disciplined workflow is essential immediately after your espresso shot is complete. The moment you stop the extraction, the clock is ticking on both the cooling espresso and the heating boiler. The first step is to press the steam switch. This action tells the machine’s thermostat to engage the heating element, which will now work to bring the boiler from brew temperature up to steam temperature. You will typically see an indicator light turn on, signifying that the boiler is heating. While this is happening, you can move your scale, place your milk pitcher nearby, and prepare for the next steps. This brief period of heating is a fundamental part of the process and must be initiated promptly to ensure a smooth transition.
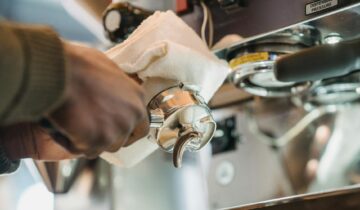
Purging the steam wand for dry steam
Once the steam indicator light turns off, the boiler has reached its target temperature. However, the steam wand still contains trapped, condensed water from the residual heat and the initial heating phase. This is often referred to as “wet steam.” Attempting to texture milk with this wet steam will introduce excess water, making it difficult, if not impossible, to create silky microfoam. To remedy this, you must purge the wand. Open the steam valve for 2-4 seconds, directing the wand into the drip tray. You will observe an initial sputtering of hot water, which will quickly transition into a powerful, dry rush of steam. This purge not only clears the condensation but also helps stabilize the pressure within the boiler for a more consistent output.
Milk texturing and timing considerations
With the wand purged and dry steam ready, you can immediately begin texturing your milk. Submerge the steam tip just below the surface of the milk and open the steam valve fully. The initial phase is for aeration, where you gently lower the pitcher to introduce air, creating the foam. Listen for a consistent, gentle hissing sound. Once you have incorporated enough air for your desired texture, raise the pitcher to submerge the wand deeper. This stops aeration and begins the texturing phase, where the steam creates a vortex to break down larger bubbles into a uniform, silky microfoam. Given the Gaggia’s boiler size, steam pressure may not be as sustained as a commercial machine, so efficiency in your technique is key to achieving the desired result before the pressure drops.
Mastering the transition from brewing to steaming on a Gaggia is a hallmark of an experienced home barista. It requires an understanding of the single boiler’s operation and a deliberate, practiced workflow. The key technical steps—activating the heat, purging the wand of wet steam, and executing an efficient texturing technique—are all interconnected. When performed correctly, this sequence allows you to overcome the machine’s inherent limitations and produce high-quality steamed milk worthy of the espresso you have carefully prepared. While practice is paramount, having the right accessories can support a consistent workflow. A range of professional-grade barista tools can be found at papelespresso.com.


 No products in the cart.
