
Milk steaming techniques for better latte art on the Gaggia Classic Pro
The Gaggia Classic Pro has earned its place in the homes of espresso enthusiasts for its robust build and straightforward, manual operation. While celebrated for its ability to produce excellent espresso, achieving high-quality steamed milk suitable for detailed latte art can present a challenge. Its single boiler design requires a specific workflow to generate the consistent, powerful steam necessary for creating true microfoam. Understanding and mastering this workflow is the key to unlocking the machine’s full potential. This guide provides a technical breakdown of the techniques required to move beyond basic steamed milk and produce a glossy, paint-like texture ideal for pouring intricate latte art designs.
Understanding the single boiler system
The Gaggia Classic Pro utilizes a single boiler for both brewing espresso and steaming milk. This means the boiler cannot perform both functions simultaneously and must be at different temperatures for each task. For brewing, the water temperature is typically held around 93°C (200°F). For steaming, the boiler must heat the water further to produce steam, reaching temperatures well above boiling point. This design necessitates a technique often called “temperature surfing,” where the user actively manages the heating cycle to steam at the optimal pressure. Waiting for the machine’s ready light is a common starting point, but learning the machine’s audio and visual cues provides a more reliable path to consistent results.
A reliable workflow for steam pressure
To achieve strong, continuous steam, the boiler needs to be at the correct temperature and contain a sufficient headspace of steam. A common issue is starting to steam too early, resulting in weak, wet steam that introduces too much water into the milk and fails to create a proper vortex.
Follow this workflow for better consistency:
- Engage the steam switch: After pulling your espresso shot, activate the steam switch. This tells the machine to begin heating the boiler to steam temperature.
- Wait for the ready light: Allow the machine to heat up. The steam ready light will illuminate when the thermostat registers the target temperature. Do not start steaming yet.
- Purge the steam wand: With the steam switch still on, open the steam valve for 2-4 seconds to purge any condensed water from the wand. This ensures you introduce dry steam into your milk. Close the valve.
- Wait for the heating element to re-engage: After purging, the boiler temperature will have dropped slightly, causing the heating element to kick back on. You will often hear a faint click. This is the ideal moment to begin steaming, as the boiler is actively producing maximum steam power.
Mastering aeration and emulsification
Texturing milk involves two distinct phases: stretching (aeration) and incorporating (emulsification). Each phase requires a different wand position and auditory feedback.
- Phase 1: Aeration: Begin with the steam wand tip just below the surface of the milk, positioned slightly off-center. Open the steam valve fully. You should hear a gentle, consistent “tss-tss-tss” or hissing sound as air is incorporated. This phase should be brief, lasting only until the milk volume has increased by about 20-30%. Excessive aeration creates stiff, bubbly foam that is unsuitable for latte art.
- Phase 2: Emulsification: Once you have incorporated enough air, submerge the steam wand deeper into the milk. Adjust the angle and position of the pitcher to create a strong vortex. This whirlpool motion breaks down larger bubbles and folds the aerated milk into the liquid milk, creating a homogenous, silky microfoam. Continue until the outside of the pitcher is too hot to hold comfortably for more than a second (around 60-65°C or 140-150°F).
Immediately after steaming, turn off the steam and wipe the wand with a damp cloth before purging it once more to clear any residual milk.
The role of milk and pitcher selection
The tools and ingredients you use are as critical as your technique. For best results, always start with cold milk in a cold pitcher. The colder the milk, the more time you have to work with it before it reaches its final temperature, allowing for a more controlled texturing process. Whole milk is generally the easiest to work with due to its higher fat and protein content, which contributes to a stable, creamy foam. However, with practice, excellent results are achievable with alternative milks.
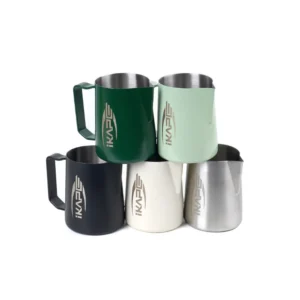
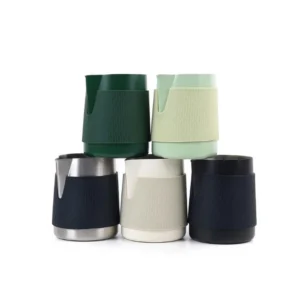
The size and shape of your milk pitcher are also important. A pitcher should be large enough so that the initial volume of milk fills it to just below the base of the spout. This provides adequate room for the milk to expand and for a vortex to form without overflowing. A pitcher with a defined spout is also essential for controlling the flow rate when pouring latte art.
Conclusion
Achieving consistent, high-quality microfoam on the Gaggia Classic Pro is not about luck, but about precision and a repeatable workflow. By understanding the machine’s single boiler operation and actively managing the heating cycle, you can generate the steam pressure needed for superior texturing. The process demands a focus on the distinct phases of aeration and emulsification, listening for auditory cues, and making subtle adjustments to wand position. Mastering these technical skills transforms the machine from a simple espresso maker into a capable tool for creating cafe-quality latte art. Having the right tools, including an appropriately sized pitcher, further supports this process, and a selection of relevant equipment is available at papelespresso.com.


 No products in the cart.
