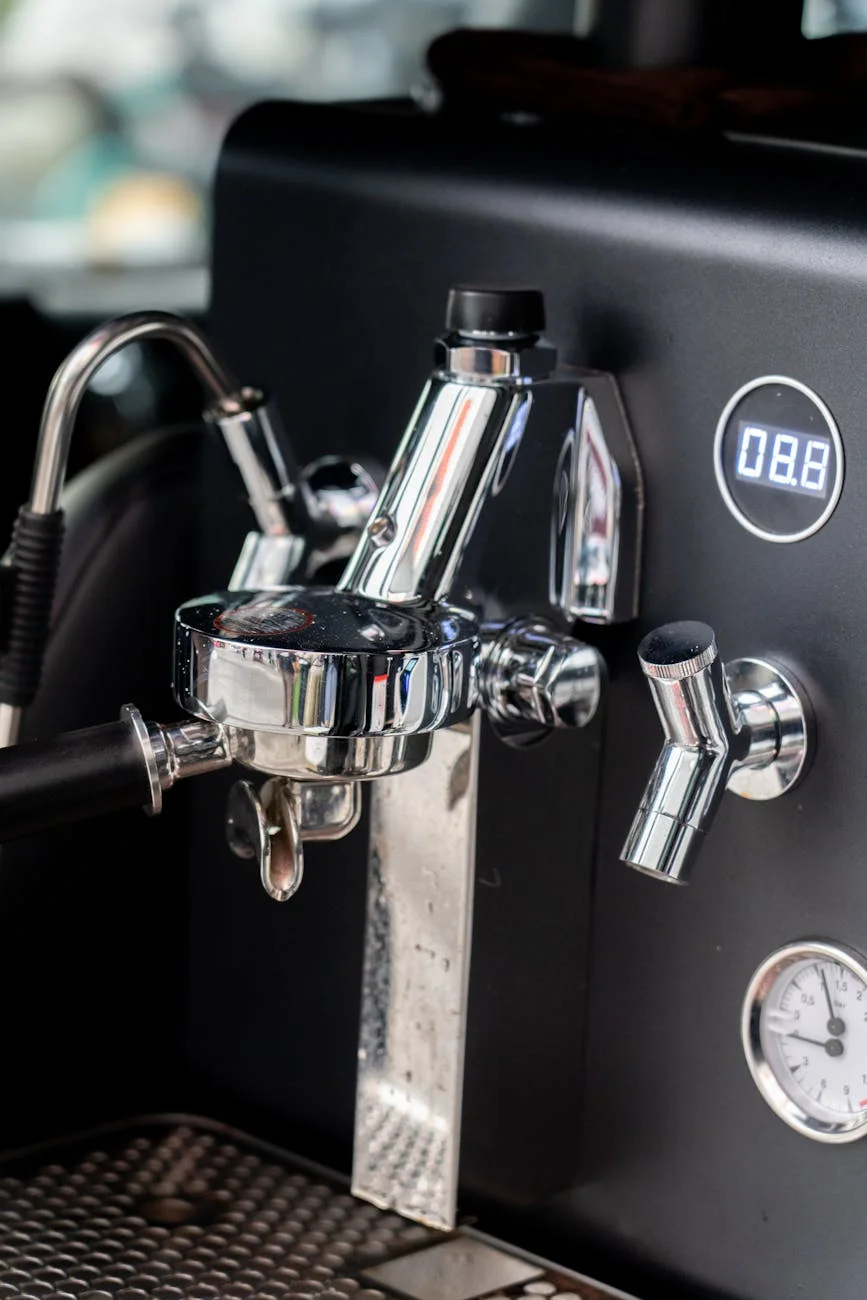
The E61 group head is an icon in the world of espresso, instantly recognizable by its polished chrome and distinctive brew lever. But this lever is more than just an on/off switch; it’s the key to a three-stage brewing process that gives baristas remarkable control over their extraction. For newcomers, the function of its different positions can be a mystery. This article will demystify the E61 lever, breaking down its three distinct stages: the down (resting) position, the middle (pre-infusion) position, and the up (extraction) position. Understanding how each stage works inside the machine is the first step toward moving beyond basic shots and truly mastering the craft of espresso at home.
The resting position: Lever down
Every espresso shot on an E61 machine begins and ends with the lever in the fully down position. This is the machine’s default, or resting, state. When the lever is down, a sophisticated mechanical process is at play. Inside the group head, a three-way valve is open, creating a channel that releases any residual pressure from the portafilter directly into the drip tray. You can often hear a faint “whoosh” sound as this pressure is purged at the end of a shot.
This function serves two critical purposes. First, it abruptly stops the extraction, preventing any extra drips from over-extracting your coffee and introducing bitterness. Second, by releasing the pressure and venting the water, it creates a “dry puck” effect. This makes the used coffee grounds relatively dry and solid, allowing for a clean and easy knock out into your knock box. This stage is fundamental to a clean and efficient workflow, setting the stage for the shot to come and simplifying cleanup afterward.
The halfway point: Pre-infusion at the middle position
Lifting the lever to its middle position, roughly at a 45-degree angle, initiates the most nuanced and impactful stage of the E61 brewing process: pre-infusion. This is where the E61 truly distinguishes itself from more basic machines. In this position, the brew pump is activated, but the valve that allows water into the brew chamber is only partially open. This allows water to flow onto the coffee puck at a much lower pressure than the full 9 bars of extraction.
The goal here is to gently and evenly saturate the dry coffee grounds before hitting them with high pressure. This simple step has profound effects on the final shot:
- Reduces channeling: By settling the coffee bed, pre-infusion minimizes the risk of water finding a path of least resistance and creating channels, which lead to an uneven and sour extraction.
- Improves consistency: A properly saturated puck is more stable and better equipped to withstand the force of full brew pressure, resulting in a more uniform flow and a balanced flavor profile.
- Enhances flavor: This gentle introduction of water can help release more delicate aromatic compounds, leading to a sweeter, more complex, and less acidic cup.
The duration of this stage is a key variable for the barista. A typical pre-infusion might last 5-10 seconds, or until the first few drops of espresso appear on the bottom of the basket.
Full engagement: Lever up for extraction
After a successful pre-infusion, lifting the lever all the way up begins the main event: the full extraction. This action fully opens the brew valve, allowing the pump to deliver water at its target pressure, typically set to 9 bars. The hot, pressurized water is now forced through the saturated coffee puck, dissolving the coffee solids and emulsifying the oils that create the rich body and signature crema of a well-made espresso.
The quality of this stage is almost entirely dependent on the success of the previous one. A puck that was properly saturated during pre-infusion will offer even resistance to the high-pressure water, resulting in a beautiful, syrupy, and centered pour. If pre-infusion was skipped or rushed, the sudden impact of 9 bars of pressure can fracture the puck, leading to channeling and a flawed shot. This is where you witness the synergy between the stages; the middle position prepares the coffee for what the up position will demand of it, ensuring a harmonious and delicious extraction from start to finish.
A summary of the E61 lever stages
To better visualize how these stages work in practice, it’s helpful to see them in a sequence. The barista’s control over the timing of each position directly influences the final taste in the cup. Experimenting with these variables is the key to dialing in the perfect shot for any given coffee bean. The table below provides a clear breakdown of what is happening during each phase of the brewing process.
| Lever Position | Primary Action | Internal Mechanism | Typical Duration | Desired Outcome |
|---|---|---|---|---|
| Down (Rest) | Idle / End shot | 3-way valve open to drip tray | N/A | Pressure released, dry puck |
| Middle | Pre-infusion | Pump on, brew valve partially open | 5-10 seconds | Gentle puck saturation |
| Up | Extraction | Pump on, brew valve fully open | 20-30 seconds | Full pressure brewing |
The E61 group head’s three-stage lever system is a testament to timeless engineering, offering a level of manual control that is still revered today. The process flows logically from a state of rest (lever down) to a gentle preparation phase (lever in the middle for pre-infusion) and finally to the powerful extraction itself (lever up). Each position plays a distinct and vital role in the journey from dry grounds to a perfect espresso. Understanding this sequence transforms the simple act of pulling a lever into a deliberate craft. By mastering the timing and purpose of each stage, especially the subtle art of pre-infusion, any home barista can unlock their machine’s full potential and produce consistently exceptional espresso.


 No products in the cart.
