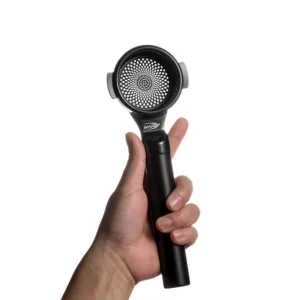
The La Peppina is a marvel of mid-century design, a vintage lever espresso machine cherished by enthusiasts for its simplicity and the exceptional quality of espresso it can produce. However, like any classic machine, it requires regular maintenance to perform at its best. One of the most critical tasks is replacing the group head seals. Over time, these rubber components can harden, crack, and lose their ability to create a proper seal, leading to leaks and poor pressure. This comprehensive guide will walk you through every step of the process, from identifying the problem to reassembling your machine. Following these instructions will help you restore your La Peppina’s performance, prevent frustrating leaks, and ensure it continues to pull delicious shots for years to come.
Identifying the need for new seals and gathering your tools
Before you start taking your machine apart, it’s important to confirm that the seals are indeed the problem. The most common signs of failing group head seals are unmistakable. You might notice water dripping from around the portafilter when it’s locked in, or see water leaking from the top of the group head where the lever enters the cylinder during a pull. Another key symptom is a loss of pressure. If the lever feels spongy or offers less resistance than usual, it’s a strong indication that the piston seals are no longer holding pressure effectively. Once you’ve diagnosed the issue, the next step is to gather the necessary tools and parts to ensure a smooth repair process.
You will need:
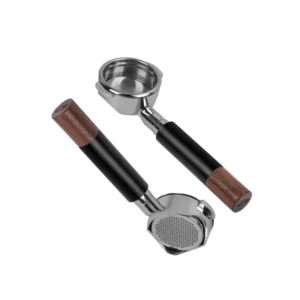
- A new La Peppina seal kit: These are often sold by specialty espresso part suppliers online. Ensure you get a full kit, which typically includes two piston seals and a portafilter gasket.
- A pick or small, dull flathead screwdriver: This is essential for carefully prying out the old, hardened seals without scratching the metal.
- Food-grade silicone lubricant: Do not skip this! It’s crucial for protecting the new seals and ensuring the piston moves smoothly. A product like Molykote 111 or another NSF-approved lubricant is ideal.
- Screwdrivers: You’ll likely need a standard set to remove the group head from the boiler.
- Clean cloths and a small bowl: For cleaning parts and keeping small screws organized.
A step-by-step guide to disassembly
With your tools and new seals ready, it’s time to begin. First and foremost, unplug your La Peppina and make sure it is completely cool. Working on a hot machine is dangerous. Find a clean, well-lit workspace to avoid losing any small components.
The disassembly process is straightforward. Start by removing the lever. On most models, the lever is held in place by two pins with C-clips or screws. Carefully remove these and set them aside, then gently pull the lever assembly away from the group head. Next, you need to detach the group head from the boiler. Look for the screws that secure the group head flange to the top of the boiler. Unscrew these and place them in your bowl. You should now be able to carefully lift the entire group head assembly off the machine. Be prepared for a small amount of residual water to spill out. With the group head separated, you can now access the piston. Simply push down on the piston rod from the top to slide the entire piston out of the bottom of the cylinder.
Removing old seals and cleaning the components
This is perhaps the most delicate part of the job. The old seals will likely be hard, brittle, and stuck firmly in the piston grooves. Using your pick or small screwdriver, very carefully work your way around the seal to pry it out. The goal is to remove the old rubber without scratching or gouging the brass piston. Scratches in the seal grooves can create pathways for water to leak past the new seals, defeating the purpose of the repair. Take your time with this step.
Once the old seals are removed, thoroughly clean the piston and the inside of the group head cylinder. Years of coffee oils and scale can build up in these areas. Use a soft brush and a descaling solution or a simple citric acid bath to dissolve any mineral deposits. Pay special attention to cleaning out the piston grooves completely. A clean surface is essential for the new seals to function correctly. After cleaning, rinse all components thoroughly with fresh water and dry them completely with a clean cloth. A pristine group head is the foundation for a leak-free machine.
Installing new seals and final reassembly
Now for the rewarding part: installing the new seals. To make them more pliable and easier to install, you can soak the new rubber seals in a cup of hot water for a few minutes. After soaking, apply a thin, even layer of food-grade silicone lubricant to the seals. Don’t overdo it; a little goes a long way. Carefully work the new, lubricated seals into the grooves on the piston, ensuring they are seated correctly and are not twisted.
Next, apply a light coating of lubricant to the inside walls of the group head cylinder. This will allow the piston to slide in smoothly without damaging the new seals. Gently guide the piston back into the cylinder from the bottom until it is fully inserted. Now you can reassemble the machine in the reverse order of how you took it apart. Re-attach the group head to the boiler, ensuring the gasket between them is properly aligned. Tighten the screws in a star pattern to ensure even pressure. Finally, re-install the lever. Your La Peppina is now ready for a test run.
| Seal Type | Location | Primary Function |
|---|---|---|
| Piston Seals (x2) | In the grooves of the brass piston | Create pressure against the cylinder wall to force water through the coffee puck. |
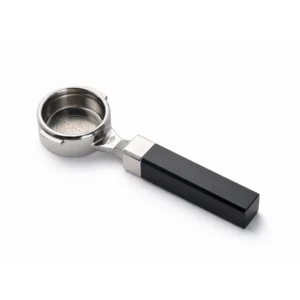
| Portafilter Gasket | Inside the group head, where the portafilter locks in | Creates a seal between the portafilter and the group head to prevent leaks during extraction. |
| Boiler to Group Gasket | Between the group head flange and the boiler | Prevents steam or water from leaking at the connection point. |
In conclusion, replacing the group head seals on a La Peppina is a fundamental maintenance task that any owner can accomplish with patience and the right tools. By following this guide, you have learned how to diagnose failing seals, safely disassemble the group head, meticulously clean the components, and correctly install fresh seals. This process not only fixes leaks and restores the proper pressure needed for excellent espresso but also extends the life of your classic machine. It’s a rewarding project that deepens your connection with the brewing process. Now, with your machine fully restored, you can get back to what matters most: pulling beautiful, delicious shots of espresso and enjoying the unique experience that only a vintage lever machine like the La Peppina can provide.