Solving common espresso distribution mistakes for new home baristas
Welcome to the world of home espresso! You have the machine, the grinder, and some beautiful coffee beans. Yet, shot after shot comes out sour, bitter, or gushes out in a messy, uneven stream. It’s a common frustration, and the culprit is often a single, overlooked step: coffee distribution. This is the art of arranging the coffee grounds in your portafilter basket into a bed of even density before tamping. An uneven bed forces water to find weak spots, a phenomenon called channeling, which ruins the extraction. This guide will walk you through the most frequent distribution mistakes new baristas make and provide clear, actionable solutions to help you pull consistently delicious espresso shots right from your kitchen counter.
Understanding the ‘why’ behind distribution
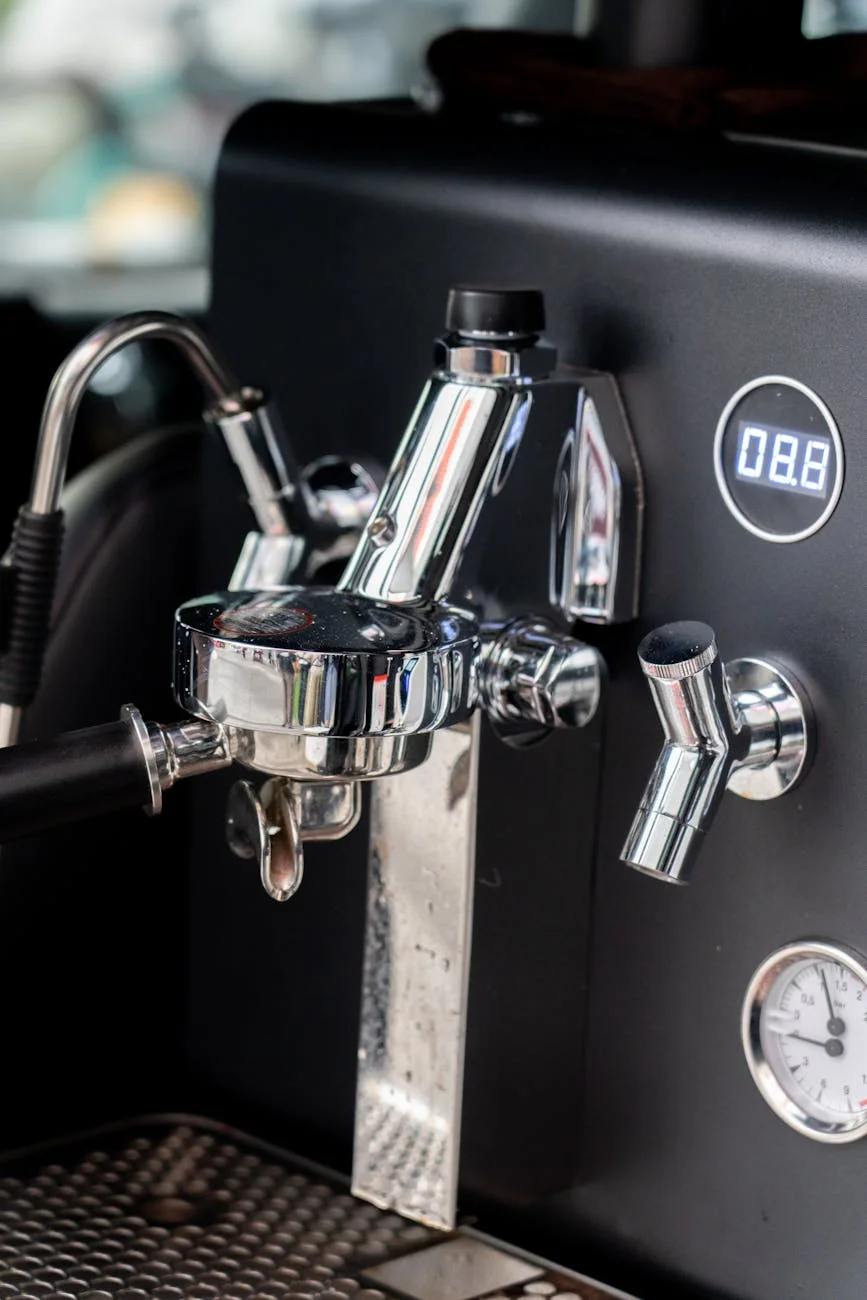
Before we fix the problems, it’s crucial to understand why distribution is so important. When you lock your portafilter into the espresso machine, pressurized hot water is forced through the coffee grounds. Ideally, this water should pass through the entire coffee puck evenly, extracting all the delicious flavors in a balanced way. However, water is lazy; it will always take the path of least resistance. If your coffee bed has dense clumps in one area and loose grounds in another, the water will rush through the loose spots and avoid the dense ones. This is channeling.
The result of channeling is a poorly extracted, unbalanced shot. The parts of the coffee the water rushed through will be under-extracted, lending sour and acidic notes. To compensate, you might grind finer or pull the shot longer, but this causes the rest of the puck to become over-extracted, introducing bitter and harsh flavors. You end up with a single cup containing both extremes, and none of the balanced sweetness you’re looking for. Perfect distribution aims to create a perfectly homogenous puck, ensuring water flows through every particle of coffee equally, leading to a sweet, rich, and well-rounded extraction.
The most common mistake: Clumps and uneven fill
The first and most significant hurdle for any new barista is dealing with clumpy, unevenly distributed grounds from the grinder. Many grinders, especially at the entry-level, produce grounds with significant static, causing them to clump together. Simply grinding into the portafilter, giving it a shake, and tamping will inevitably leave you with a puck full of hidden density variations. You might see a mound in the center and empty-looking space around the edges, which is a recipe for disaster.
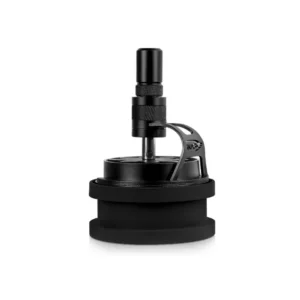
Luckily, the solution is simple and incredibly effective: the Weiss Distribution Technique (WDT). This involves using a tool with very fine needles (like acupuncture needles) to stir the grounds in the portafilter. This action accomplishes two things:
- It breaks up any and all clumps, no matter how small.
- It evenly distributes the grounds across the entire basket, filling in all the gaps.
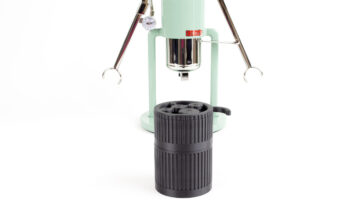
You can make a DIY WDT tool with a cork and some needles, or purchase one of many excellent options online. To perform WDT, simply stir the grounds in circular or back-and-forth motions, making sure to reach the bottom of the basket. To make this process cleaner and more effective, a dosing funnel is an essential accessory. It sits on top of your portafilter, preventing grounds from spilling while you grind and perform WDT, ensuring all your coffee ends up evenly distributed inside the basket.
Tapping and leveling: Good intentions, bad results
A common habit picked up from watching old videos or inexperienced baristas is tapping the side of the portafilter with your hand or knocking it on the counter to “settle” the grounds. While the intention is to level the bed of coffee, this action is highly counterproductive. Tapping causes a process of stratification, where the larger coffee particles rise to the top and the smaller, fine particles migrate to the bottom and sides. This creates a dense layer at the bottom and a loose layer on top, often leading to severe side-channeling where water rushes down the edges of the basket.
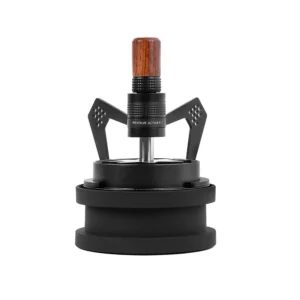
Instead of tapping, you should focus on gently grooming the surface of the coffee. After using your WDT tool, the grounds should be fluffy and relatively level. To create a perfectly flat surface for tamping, you can use a distribution or leveling tool. These tools rest on the rim of the portafilter and have small fins that you spin to gently rake the top layer of coffee to a consistent depth. It’s important to set the depth of these tools correctly; they should only groom the surface, not compress the grounds. The goal is to create a flat top without compacting the coffee underneath, preserving the even density you created with WDT.
From perfect prep to a level tamp
You have done everything right so far: your grounds are fluffy, clump-free, and perfectly level. The final step is tamping, and it’s where a lot of good prep can be undone. The single most important aspect of tamping is not how hard you press, but how level you are. Tamping at even a slight angle will create a sloped coffee bed. This means one side of the puck will be thinner and less dense than the other, creating an obvious path of least resistance for the water and causing immediate channeling.
To ensure a level tamp, focus on your form. Stand comfortably, place the portafilter on a flat, sturdy surface, and keep your wrist straight and your elbow bent at a 90-degree angle directly above the tamper. Press straight down. Consistency is more important than force. For beginners, a calibrated tamper can be a great investment. These tampers provide a click or a physical stop when a certain pressure is reached, but their main benefit is that their design helps you press down evenly and achieve a level surface every time. Below is a quick guide to troubleshooting your shots.
| Symptom in Your Cup | Likely Distribution Cause | Recommended Solution |
|---|---|---|
| Shot starts fast on one side, gushes out (channeling) | Uneven tamping or tapping the portafilter | Focus on a level tamp. Stop tapping the portafilter and use a grooming tool instead. |
| Shot is both sour and bitter at the same time | Clumps in the coffee bed causing uneven extraction | Implement the Weiss Distribution Technique (WDT) to break up all clumps. |
| Donut extraction (extracts on the edge but not the center) | Grounds are less dense in the center of the puck | Ensure your WDT technique distributes grounds from the edges toward the center. |
| Watery, weak shots that run too quickly | Widespread channeling due to poor distribution overall | Combine all techniques: Use a dosing funnel, WDT thoroughly, groom the surface, and tamp level. |
The journey to consistent espresso
Mastering espresso at home is a rewarding journey, and puck preparation is its foundation. As we’ve seen, the path to a perfect shot isn’t about expensive gear, but about thoughtful technique. It begins with understanding that your goal is a coffee bed of uniform density, free of clumps and air pockets. By implementing tools like a WDT and a dosing funnel, you eliminate the biggest variable: clumps from the grinder. By replacing counter-productive habits like tapping with gentle grooming, you preserve that evenness. Finally, a straight and level tamp locks in your perfect preparation, creating a puck that is ready to resist the water’s pressure evenly and extract beautifully. Don’t be discouraged by a few bad shots; every cup is a learning opportunity. Focus on these steps, be consistent, and you will be rewarded with delicious, cafe-quality espresso.


 No products in the cart.