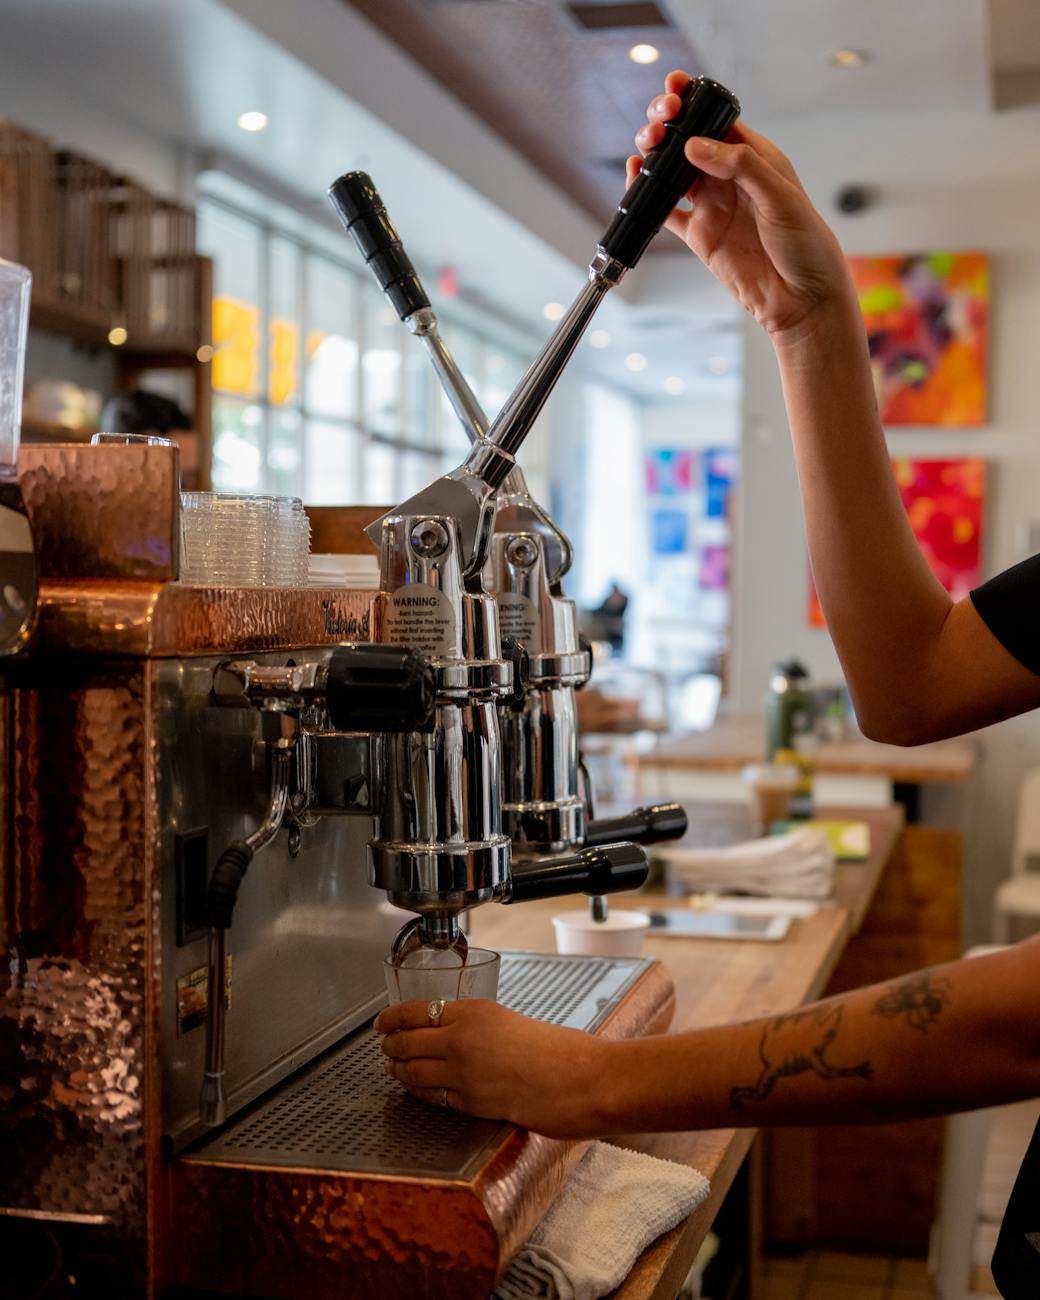
The beauty of a manual lever espresso machine lies in its tactile nature. It’s a direct, mechanical connection between you and your coffee. Central to this experience is the feedback you feel through the lever—the piston resistance. This isn’t just a physical force you have to overcome; it’s a rich source of information about your entire preparation process. It tells you how well you’ve ground your beans, dosed your basket, and prepared your puck. Learning to read and manage this resistance is the single most important skill for moving from inconsistent shots to consistently smooth, rich, and balanced extractions. This guide will walk you through how to understand, control, and perfect the resistance for a better cup of espresso.
What piston resistance tells you
When you pull the lever on your machine, you are manually forcing hot water through a compacted bed of coffee grounds. Piston resistance is the back-pressure created by this coffee puck as it resists the flow of water. Think of it as a conversation. A perfect shot feels like a firm but smooth handshake—the lever moves steadily without demanding excessive force, and the espresso flows like warm honey.
Understanding this feedback is crucial for diagnosing your shot in real-time:
- Too little resistance: If the lever slams down with almost no effort, the water is rushing through the puck too quickly. This is a “gusher,” and it leads to a weak, sour, and under-extracted shot. The beautiful coffee oils and sugars are left behind in the puck.
- Too much resistance: If you have to strain to move the lever, or it stalls completely, the puck is too dense. This “choked” shot results in a slow, drippy extraction that is often bitter, harsh, and over-extracted as the water struggles to find a path.
- Uneven resistance: A pull that starts firm but then suddenly gives way is a classic sign of channeling. This means the water has fractured the puck and created a low-resistance “channel,” causing part of the coffee to be under-extracted while the area around the channel is over-extracted.
The goal is to find that sweet spot of steady, even pressure that allows for a full and balanced extraction in your target time, typically around 25-35 seconds.
The primary factors that control resistance
Piston resistance isn’t random; it’s a direct result of how you prepare your coffee. Mastering it means understanding and manipulating three key variables. These elements work together to determine the density of your coffee puck and, consequently, how much it resists the flow of water.
The most important factor is grind size. This is your main dial for controlling resistance. Finer coffee particles pack together more tightly, leaving less space between them. This creates a more difficult path for the water, increasing resistance and slowing down your shot. Conversely, a coarser grind creates more space, allowing water to flow through more easily, which reduces resistance and speeds up the shot.
Next is your dose, or the amount of coffee grounds you use. Increasing the dose in the same filter basket makes the coffee bed deeper and more compact after tamping. A deeper bed naturally offers more resistance. If your shots are running too fast but the grind seems right, a small increase in dose (perhaps 0.5 grams) can add the resistance you need.
Finally, there’s your puck preparation. This includes distribution and tamping. The goal of tamping isn’t to apply as much force as possible, but to create a level and evenly compressed puck. Uneven distribution or a crooked tamp creates weak spots. Water will always follow the path of least resistance, leading to channeling and an uneven feel in the lever.
How to diagnose and adjust your shot
Now that you understand what resistance is and what causes it, you can start making intentional adjustments. The golden rule is to change only one variable at a time. Otherwise, you’ll never know which change made the difference. Is your shot flowing too fast and feeling weak in the lever? Your first move should be to adjust your grinder one small step finer. Keep the dose and your tamping technique exactly the same, then pull another shot. Does it feel better? Is the flow slower?
Conversely, if the lever is stalling and the shot is choking, your first adjustment should be to make the grind slightly coarser. This will open up space in the puck and allow water to flow more freely. Using a scale to ensure a consistent dose and a puck rake or WDT (Weiss Distribution Technique) tool to break up clumps before tamping are essential for eliminating other variables and isolating the impact of your grind adjustments.
This systematic approach turns frustration into a clear, problem-solving process. The table below offers a simple guide for troubleshooting common issues based on the feedback from your lever.
| Problem Symptom | What You Feel in the Lever | Potential Cause(s) | How to Adjust |
|---|---|---|---|
| Under-extraction (Sour, Fast Shot) | Lever drops too quickly with little resistance. | 1. Grind is too coarse. 2. Dose is too low. 3. Poor puck prep (channeling). |
1. Adjust grinder to a finer setting. 2. Increase dose slightly (e.g., by 0.5g). 3. Focus on even distribution and tamping. |
| Over-extraction (Bitter, Slow Shot) | Lever is very hard to push or stalls completely. | 1. Grind is too fine. 2. Dose is too high. |
1. Adjust grinder to a coarser setting. 2. Decrease dose slightly (e.g., by 0.5g). |
| Channeling (Uneven Extraction) | Resistance feels uneven; may start strong then suddenly drop. | 1. Uneven tamping. 2. Clumps in the grounds. 3. Grind is too fine, forcing water to find weak spots. |
1. Use a WDT tool to break up clumps. 2. Ensure a level tamp. 3. Try a slightly coarser grind. |
Achieving the perfect pull
Once you’ve dialed in your grind and dose to achieve a baseline of good resistance, you can focus on the nuances of the pull itself. This is where the art of the lever machine truly shines. Pre-infusion, the stage where you let hot water saturate the puck under low pressure before applying full force, is critical. A proper pre-infusion helps settle the coffee grounds and ensures the entire puck is evenly saturated, which dramatically reduces the chances of channeling. You might feel the puck swell slightly and offer a bit of initial resistance. After a 5-10 second pre-infusion, you can begin the main pull. Apply firm, steady pressure. Don’t jerk the lever. The goal is a smooth, continuous motion that produces a beautiful, syrupy stream of espresso. This final step is about translating all your careful preparation into a delicious result.
To summarize, managing piston resistance is the key to unlocking the full potential of your manual espresso machine. It’s the most immediate and honest feedback you can get on your shot preparation. The resistance you feel is determined primarily by your grind size, dose weight, and how well you prepare the puck. By learning to interpret this tactile feedback—whether the lever is dropping too fast, stalling completely, or feeling uneven—you can make precise, targeted adjustments. The process transforms espresso making from a game of chance into a craft. Mastering this feel allows you to go beyond simply following a recipe and start intuitively guiding each extraction toward a smooth, balanced, and truly exceptional cup of coffee.

 No products in the cart.