
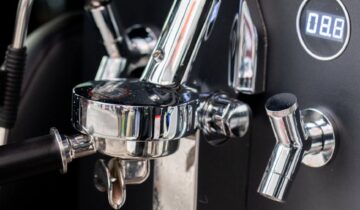
The pursuit of the perfect espresso is a journey of precision. For many home baristas, the biggest frustration is inconsistency; a sublime, syrupy shot one day, followed by a sour, watery one the next. While variables like grind size, dose, and temperature are often discussed, one of the most powerful yet underutilized tools for consistency is the pressure gauge. It’s more than just a dial on your machine; it’s a window into the heart of your extraction. By learning to read and interpret this gauge, you can move from guesswork to a data-driven approach. This article will guide you through understanding brew pressure, reading your gauge throughout the shot, and using that information to diagnose problems and achieve repeatable, delicious results.
What is brew pressure and why does it matter?
At its core, brew pressure is the force exerted by the water as it is pushed through the compacted puck of coffee grounds. This force is essential for extracting the oils, sugars, and acids that create the complex flavor profile of espresso. The industry standard is often cited as 9 bars of pressure, which is roughly nine times the atmospheric pressure at sea level. This benchmark became popular because it provides a powerful yet balanced extraction, capable of pulling a rich shot in the typical 25-30 second window without being overly aggressive.
However, pressure is not an isolated variable. It works in a delicate balance with your dose (how much coffee you use), grind size, and tamp. Think of them as an interconnected system.
- Too little pressure (e.g., 5-6 bars) will struggle to penetrate a finely ground puck, leading to under-extraction and a sour, weak taste.
- Too much pressure (e.g., 11-12 bars) can blast through the puck too quickly, causing channeling (where water finds weak spots) and creating a bitter, harsh, and over-extracted shot.
Understanding this relationship is the first step. The pressure gauge doesn’t just tell you the force; it tells you how your other variables are resisting that force, providing crucial feedback on your entire preparation process.
How to read your pressure gauge throughout the shot
A static reading of “9 bars” doesn’t tell the whole story. The real value of a pressure gauge comes from watching its behavior from the moment you start the pump to the moment you stop it. A shot typically has three distinct phases visible on the gauge.
1. Pre-infusion: This is the initial stage where water gently soaks the coffee puck before full pressure is applied. On your gauge, you’ll see a slow ramp-up, often lingering between 2-4 bars for a few seconds. A smooth and steady climb here indicates that your puck is evenly saturated. If the pressure jumps up too quickly, it might mean your puck is too dense or your grind is too fine, not allowing water to saturate it gently.
2. Peak pressure: After pre-infusion, the pressure will climb to its target, ideally around 9 bars. This is the main extraction phase. A well-prepared puck will allow the machine to reach and hold this pressure steadily for the majority of the shot’s duration. This stability is a key indicator of a good extraction in progress.
3. The decline: Towards the end of the shot (after about 15-20 seconds), it’s normal to see the pressure begin to fall slightly, perhaps to 8 or 8.5 bars. This happens because the coffee puck erodes as coffee is extracted, offering less resistance to the water. A gradual, gentle decline is a great sign. However, a sudden, sharp drop in pressure is a red flag, almost always indicating that channeling has occurred.
Using pressure readings to troubleshoot your espresso
Now that you know what to look for, you can use the pressure gauge as a powerful diagnostic tool. Instead of just tasting a bad shot and wondering what went wrong, you can correlate the taste with the pressure reading to pinpoint the exact problem. This turns frustration into a clear, actionable plan.
Here’s a table to help you diagnose common issues:
| Gauge Reading / Behavior | Potential Problem | How to Fix It |
|---|---|---|
| Pressure climbs too slowly and struggles to reach 9 bars. The shot runs very fast (a “gusher”). | The water is flowing through the puck with little resistance. This is classic under-extraction. | Grind your coffee finer. This is the most common solution. You can also slightly increase your dose or ensure you are tamping firmly and levelly. |
| Pressure spikes very quickly to 10+ bars. The shot barely drips out (the machine is “choked”). | The puck is too dense for the water to penetrate. This leads to over-extraction and bitterness. | Grind your coffee coarser. If the grind seems right, try reducing your dose by a small amount (e.g., 0.5 grams). |
| Pressure hits 9 bars, holds for a few seconds, then suddenly drops to 6-7 bars. | This is the classic sign of channeling. Water has broken through a weak spot in the puck. | Focus on puck preparation. Use a Weiss Distribution Technique (WDT) tool to break up clumps and distribute the grounds evenly. Ensure your tamp is perfectly level. |
| The pressure needle is unstable and jitters throughout the shot. | This could indicate an uneven puck with pockets of varying density, or potentially an issue with the machine’s pump. | Rule out puck prep first. Perfect your distribution and tamping. If it persists, you may need to investigate your machine’s health. |
Advanced techniques: An introduction to pressure profiling
Once you’ve mastered shot consistency at a stable 9 bars, the pressure gauge opens the door to more advanced techniques like pressure profiling. Many modern espresso machines allow the user to manually control the pressure throughout the extraction. This is where you can truly start to tailor the shot to a specific coffee bean and taste preference.
By manipulating the pressure, you can influence which flavor compounds are extracted and when. For example:
- Low-pressure “blooming” pre-infusion: Holding the pressure at 3-4 bars for 10 seconds can help reduce acidity in bright, light-roast coffees, leading to a more balanced and sweet cup.
- Lever-style declining profile: Starting the shot at a high pressure (e.g., 10 bars) and allowing it to naturally decline to 6-7 bars by the end can mimic the profile of a classic lever machine. This often results in a shot with a heavy body but without the bitterness that can come from sustained high pressure.
- Low-pressure shots: Some baristas pull entire shots at a lower peak pressure, such as 7 bars. This can produce a softer, sweeter, and less intense espresso, which works beautifully for certain coffee beans.
Without a pressure gauge, executing and repeating these profiles would be impossible. It becomes your speedometer and your guide, allowing you to craft a specific extraction recipe and follow it every time.
In conclusion, the pressure gauge is far more than an aesthetic component of your espresso machine. It is an indispensable diagnostic tool that provides real-time feedback on your shot. By moving beyond a simple glance, you can learn to interpret its journey through pre-infusion, peak extraction, and the final decline. This understanding empowers you to troubleshoot issues like channeling or an incorrect grind with precision, replacing guesswork with a methodical approach. For those looking to push their skills further, the gauge is the key to unlocking the creative world of pressure profiling. Ultimately, learning to use your pressure gauge is one of the most significant steps you can take to transform your espresso making from a game of chance into a craft of consistency.

 No products in the cart.