How to identify and fix burrs that are out of alignment
For any coffee enthusiast, the grinder is the most important piece of equipment. It is the heart of the brewing process, responsible for transforming whole beans into the uniform particles necessary for a balanced extraction. However, even the most expensive grinder can produce a subpar cup if its burrs are out of alignment. This often overlooked issue is the silent culprit behind inconsistent shots, channeling, and a muddled flavor profile. Misaligned burrs create an uneven grind, with a mix of large boulders and fine dust, preventing you from ever achieving a truly even extraction. This guide will walk you through why burr alignment is so critical, how to diagnose it using simple tools, and the step-by-step process for fixing it.
Why burr alignment is crucial for your coffee
At its core, burr alignment refers to the parallel relationship between the two grinding surfaces, one stationary and one rotating. In a perfectly aligned grinder, the distance between the burrs is uniform across their entire surface area. This ensures that every coffee bean passing through is ground to a consistent and predictable size. When this alignment is off, even by a few microns, high spots develop where the burrs are closer together and low spots where they are further apart. This deviation has a direct and detrimental impact on your grind quality.
The result is what’s known as a bimodal or polymodal grind distribution, a chaotic mix of very fine particles (fines) and very coarse particles (boulders). During brewing, water over-extracts the fines, pulling out bitter and astringent flavors. Simultaneously, it under-extracts the boulders, leaving behind sour, undeveloped notes. The final cup is a confusing blend of both, lacking clarity, sweetness, and balance. For espresso lovers, this is a primary cause of channeling, where water jets through the path of least resistance, leading to a weak and messy shot.
Signs and symptoms of misaligned burrs
Before you start disassembling your grinder, it is important to recognize the tell-tale signs of misalignment. These symptoms can often be mistaken for other issues, like poor puck prep or stale beans, but if they persist, your burrs are the likely cause. Paying attention to these clues can save you a lot of frustration and wasted coffee.
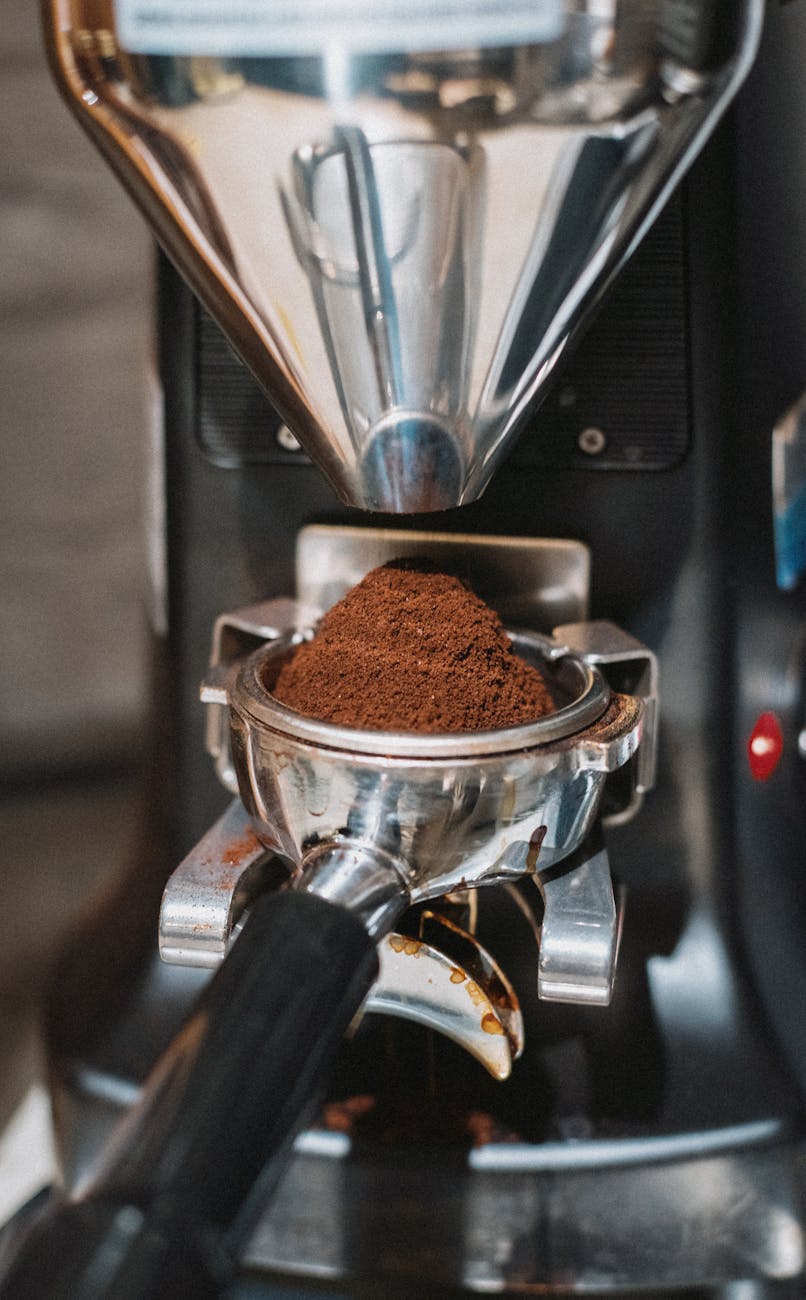
- Visual inconsistency in the grounds: This is the most obvious sign. Look closely at your pile of ground coffee. Does it look uniform, like fine sand, or can you clearly see a mixture of dust-like particles and noticeably larger chunks? If it is not uniform, your burrs are likely not aligned.
- Auditory cues from the grinder: Listen to your grinder as you adjust the setting finer, without any beans inside. As the burrs get very close, you might hear a distinct “chirp” or “tick” at one point in the rotation. This is the sound of the high spots on the burrs making contact before the rest of the surface does. In a well-aligned grinder, the burrs will make a more consistent ‘whirring’ sound as they touch evenly.
- Brewing problems: For espresso, persistent channeling, even with meticulous puck preparation, is a major red flag. You might find your shots running too fast, forcing you to grind much finer than expected, which can choke the machine or introduce more bitterness. For pour-over, you might notice that your brew bed stalls or drains too quickly, resulting in an unbalanced flavor profile.
The marker test: A definitive diagnostic tool
While the symptoms above are strong indicators, the only way to be certain of misalignment is to perform a diagnostic test. The most reliable and widely used method is the “marker test.” It is a simple, non-invasive procedure that gives you a clear visual map of your burr alignment. You will only need a non-toxic dry-erase marker.
- Safety first: Unplug your grinder from the power source completely.
- Access the burrs: Disassemble your grinder according to the manufacturer’s instructions to expose the stationary (upper) burr. Clean any coffee grounds or oils from the burr surface.
- Color the burr: Using your dry-erase marker, carefully color the outer flat edge of the burr teeth. Try to apply an even coat all the way around.
- Carefully reassemble: Put the grinder back together, making sure not to smudge the marker ink.
- Find the zero point: With the grinder empty, plug it in and turn it on. Slowly and carefully adjust the grind setting finer until you hear the very first faint “chirp” or touch of the burrs. This is the zero point where the highest spots are just making contact. Immediately turn the grinder off and back the setting off to a coarser position.
- Inspect the results: Unplug the grinder again and disassemble it to look at the burr you colored. If the marker ink is wiped away evenly all the way around the circle, congratulations, your burrs are well-aligned. If the ink is only wiped off in one or two sections, those are your high spots, and the areas where the ink remains are the low spots. This confirms you have a misalignment.
Step-by-step guide to fixing the alignment with shims
Once you have confirmed misalignment with the marker test, the most common and effective way to fix it is by shimming. This involves placing tiny, thin pieces of foil under the low spots of the stationary burr to raise them, creating a more parallel surface. It’s a process of trial and error that requires patience, but the results are well worth the effort.
The goal is to place shims under the low spots (where the marker was not erased) to lift them up to the same level as the high spots. Typically, you will only want to shim the stationary burr, as it is safer and easier to work with.
The process:
- Identify the low spots: Based on your marker test, pinpoint the areas where the marker ink was left untouched. These are often directly opposite the high spots.
- Create your shims: Cut small pieces of regular aluminum foil. It is best to start with one layer, as even a single sheet can make a significant difference. You can fold it for a thicker shim if needed later.
- Place the shims: Unscrew and remove the stationary burr. Place your foil shims on the burr carrier mount, directly underneath where the low spots of the burr were sitting.
- Reinstall and re-test: Carefully place the burr back on top of the shims and screw it down firmly and evenly. Reassemble the grinder and perform the marker test again from the beginning.
- Analyze and repeat: Check your results. Hopefully, more of the marker has been wiped away. If a high spot persists, you may need to add or adjust the shims. This iterative process can take a few attempts to get perfect, but you are looking for a result where at least 80-90% of the marker is wiped away evenly.
| Symptom | Potential Cause | Recommended Action |
|---|---|---|
| Inconsistent grounds (fines and boulders) | Burr misalignment | Perform the marker test to confirm and identify high/low spots. |
| Persistent espresso channeling | Uneven extraction from poor grind quality | Check alignment; an even grind is key to a good puck. |
| Grinder chirps at a specific point | A high spot on one of the burrs | Use the marker test to find the high spot and plan your shimming strategy. |
| Marker erases on one half only | Significant tilt or misalignment | Place a foil shim on the opposite (low) side and re-test. |
Conclusion
Achieving a perfect cup of coffee is a game of controlling variables, and burr alignment is one of the most fundamental yet frequently ignored. A misaligned grinder will always hold you back, creating an inconsistent grind that makes balanced extraction impossible. By learning to recognize the symptoms, such as uneven grounds and brewing issues, you can take the first step toward a solution. The marker test provides a definitive diagnosis, giving you a clear visual guide to any imperfections in your grinder’s alignment. While the process of shimming with foil may seem tedious, it is a highly rewarding task. Taking the time to properly align your burrs will dramatically improve your grind consistency, unlocking the true flavor potential of your coffee beans and elevating your entire brewing experience.

 No products in the cart.