
Unlocking latte art: A guide to upgrading your Gaggia Classic steam wand
The Gaggia Classic is a legendary entry-point into the world of home espresso, celebrated for its robust build and ability to produce genuinely excellent shots. However, for milk-drink enthusiasts, it has one significant drawback: the stock panarello steam wand. This standard wand is designed for convenience, creating stiff, bubbly foam with little effort, but it falls short for those aspiring to craft velvety microfoam for lattes and cappuccinos. This article will guide you through why the stock wand limits your potential and how a simple, affordable upgrade can completely transform your machine. We will explore the best replacement options, provide a step-by-step installation guide, and offer essential tips for mastering the technique of steaming professional-quality microfoam at home.
Understanding the problem: The stock Gaggia panarello wand
To appreciate the upgrade, it’s crucial to understand the limitations of the standard equipment. The panarello wand that comes with most Gaggia Classic models (pre-Pro versions) is essentially a metal tube covered by a plastic or metal sheath. This sheath has a large air-intake hole near the top. When you open the steam valve, this design forcefully injects a large volume of air into the milk. The result is a rapid creation of big, airy bubbles, often referred to as macrofoam. While this is fine for a traditional, dry cappuccino, this foam is stiff, separates quickly from the liquid milk, and is impossible to use for latte art.
In contrast, a professional-style steam wand, like the one found on high-end commercial machines, features a solid metal arm with a specially designed tip containing one or more small holes. This design gives the user complete control over the two critical phases of milk steaming:
- Stretching: The initial phase where air is gently introduced by keeping the tip just at the surface of the milk.
- Texturing: The second phase where the wand is submerged to create a swirling vortex, breaking down large bubbles and integrating the air into the milk to form a silky, uniform texture.
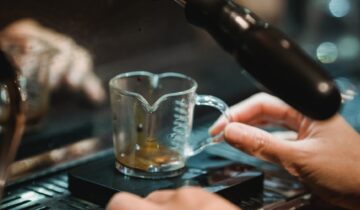
This precise control is what creates true microfoam—a glossy, liquid texture that resembles wet paint, tastes sweeter, and seamlessly integrates with espresso for beautiful latte art.
Choosing your upgrade: The Rancilio Silvia wand and other options
Fortunately, upgrading the Gaggia Classic’s steam wand is a common and well-documented modification. The goal is to replace the panarello with a single-piece, professional-style wand. This change will shift the responsibility for creating foam from the wand’s design to your technique, which is exactly what you want for full control.
The most popular and time-tested upgrade is the Rancilio Silvia V1/V2 steam wand. For years, this has been the go-to choice for Gaggia owners because it’s affordable, widely available, and its single-hole tip is perfectly suited to the Gaggia’s smaller boiler, providing ample steam power without being overwhelming. Other excellent aftermarket options have also emerged, such as dedicated kits from retailers like Shades of Coffee, which are often pre-bent for a perfect fit.
Here is a comparison of the most common options:
| Wand Upgrade | Pros | Cons | Approximate Cost |
|---|---|---|---|
| Rancilio Silvia Wand (V1/V2) | Proven performance, very affordable, widely available. | Requires a straightforward DIY installation; may not be a direct bolt-on. | $20 – $30 |
| Gaggia Classic Pro Wand | An official Gaggia part, offers great performance and articulation. | Can be more expensive and sometimes harder to source as a standalone part. | $35 – $50 |
| Aftermarket Kits (e.g., Shades of Coffee) | Designed specifically for the Gaggia Classic, often pre-bent for an easy fit. | Availability can be region-dependent; may cost slightly more. | $30 – $40 |
Before purchasing, ensure the wand is compatible with your specific Gaggia Classic model, as the fittings can differ between pre-2015, 2015-2018 (EU), and the newer Gaggia Classic Pro models.
The installation process: A step-by-step guide
Installing your new steam wand is a manageable task that typically takes less than 30 minutes. Important: Before you begin, unplug your machine from the power source and ensure it is completely cool to avoid any risk of burns or electric shock.
You will need a few basic tools, typically an adjustable wrench or a 17mm spanner and a Phillips head screwdriver.
- Access the Steam Valve: Remove the water tank and drip tray. Then, unscrew the screws holding the top cover of the machine and lift it off carefully. This will expose the boiler and the steam valve assembly where the current wand is attached.
- Remove the Old Wand: Using your wrench, carefully loosen and unscrew the retaining nut that holds the panarello wand to the steam valve. Once loose, the old wand assembly should pull away easily. Be careful not to lose the small gasket if it comes off.
- Prepare the New Wand: If you are installing a Rancilio Silvia wand, you may need to remove a small C-clip from its fitting so it can mount correctly on the Gaggia’s valve. It should slide off with a bit of pressure. Ensure the gasket is properly seated on the new wand’s ball joint.
- Attach the New Wand: Carefully guide the new wand’s fitting onto the steam valve. Hand-tighten the retaining nut first, then use your wrench to give it a final quarter-turn to ensure a snug, steam-tight seal. Do not overtighten, as this can damage the threads.
- Test for Leaks: Re-place the top cover without screwing it in. Fill the water tank, plug in the machine, and turn it on. Let it heat up to steam temperature. Open the steam valve for a few seconds to purge, then close it. Carefully inspect the new connection point for any signs of water or steam leaks. If you see any, unplug and cool the machine before slightly tightening the nut.
- Final Assembly: Once you’ve confirmed there are no leaks, unplug the machine again, screw the top cover back into place, and you’re ready to start steaming.
Mastering the technique with your new wand
With your professional-style wand installed, the real fun begins. Unlike the panarello, this wand requires technique, and there will be a learning curve. Don’t be discouraged if your first few attempts aren’t perfect. Focus on the process and listen to the sounds.
Start with cold milk in a cold metal pitcher, filling it to just below the base of the spout.
Phase 1: Stretching (Aerating)
First, purge the wand by opening the steam valve for a second to clear out any condensed water. Submerge the tip of the wand just below the surface of the milk, positioning it slightly off-center. Open the steam valve fully. You want to hear a gentle, consistent “tsss-tsss” or hissing sound, like paper tearing. This is the sound of air being incorporated. Keep the tip at this position until the milk has expanded in volume by about 20-30% and the pitcher feels lukewarm to the touch.
Phase 2: Texturing (Creating the Vortex)
Once you’ve incorporated enough air, submerge the wand deeper into the milk. The key now is to find the right angle and depth to create a powerful swirling vortex. This vortex folds the incorporated air into the milk, breaking down larger bubbles and creating a homogenous, silky texture. The hissing sound should stop completely. Continue heating the milk in this vortex until the outside of the pitcher is almost too hot to comfortably hold (around 140-150°F or 60-65°C). Turn off the steam valve before removing the wand from the milk.
Finally, wipe the wand clean and purge it again. Tap the pitcher firmly on the counter to pop any remaining large bubbles and give it a swirl to polish the milk into a glossy, uniform liquid ready for pouring.
Conclusion
Upgrading the steam wand on a Gaggia Classic is arguably the single most impactful modification an owner can make. By replacing the simplistic panarello wand with a professional-style alternative like the Rancilio Silvia wand, you remove the machine’s primary limitation for crafting high-quality milk beverages. This simple and cost-effective change puts you in direct control of milk texturing, empowering you to create the velvety, delicious microfoam that is essential for cafe-quality lattes, flat whites, and cappuccinos. While the new technique demands patience and practice, the reward is immense. You unlock the full potential of your Gaggia Classic, opening up the satisfying and creative world of latte art right in your own kitchen.
 No products in the cart.