Understanding the Gaggia Classic Pro warm-up time for peak performance
The Gaggia Classic Pro is a legendary machine in the world of home espresso, celebrated for its robust build and potential to produce café-quality shots. However, unlocking that full potential requires understanding one of its most critical, yet often overlooked, aspects: the warm-up time. Many new users, guided by the machine’s “ready” light, pull a shot after just a few minutes, only to be disappointed by a sour or inconsistent result. This article delves into why the real warm-up time is much longer than the manual suggests. We will explore the science of thermal stability, the components that need heating, and provide a practical routine to ensure your Gaggia Classic Pro is truly ready for peak performance every single time.
Beyond the ‘ready’ light: What’s really heating up?
When you first switch on your Gaggia Classic Pro, the orange “ready” light on the front panel will turn off in about five to six minutes. It’s a common misconception that this signals the machine is fully prepared to brew a perfect espresso. In reality, this light only indicates that the water inside the small aluminum boiler has reached brewing temperature. While this is an important first step, it’s only one piece of a much larger thermal puzzle. The true goal is not just hot water, but temperature stability throughout the entire brew path.
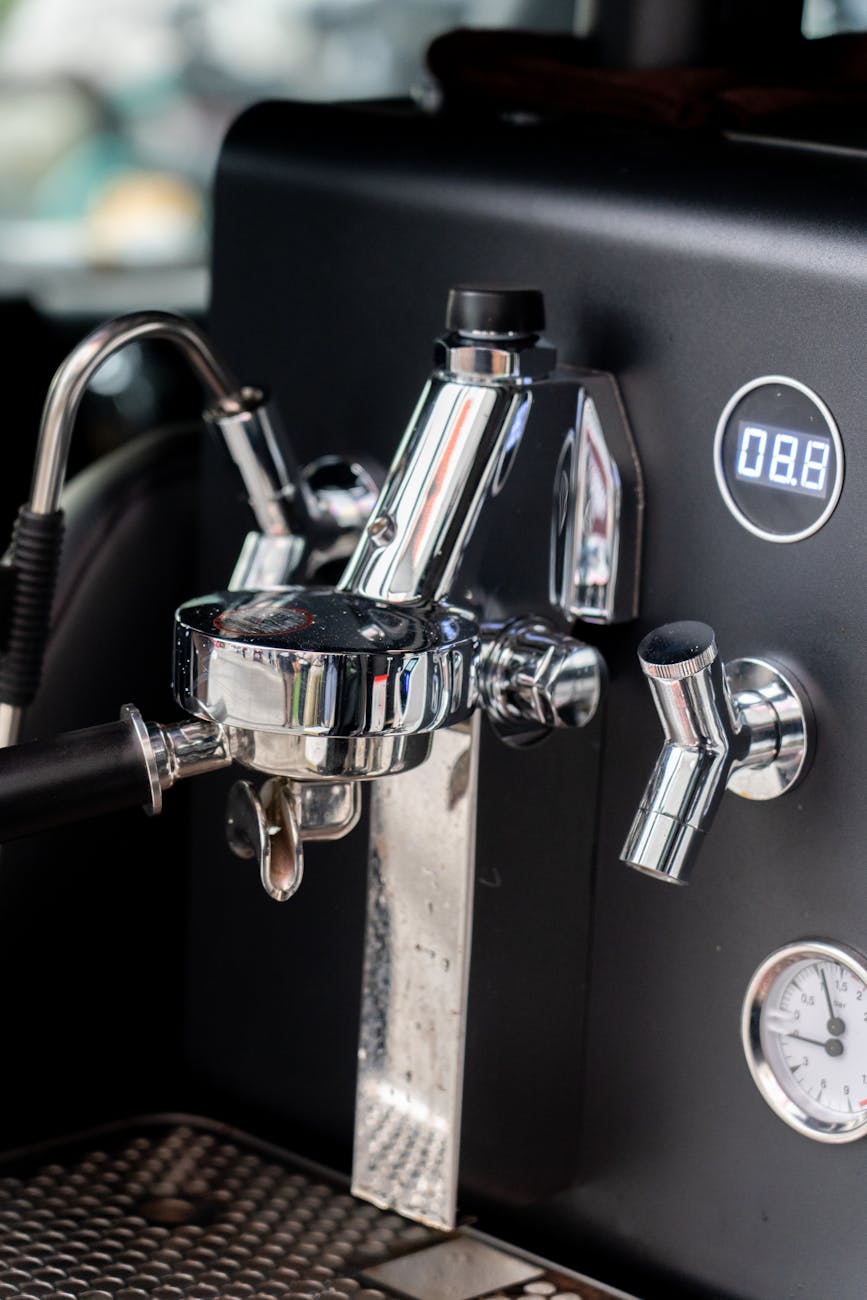
Your machine’s group head and portafilter are made of heavy, chrome-plated brass for a reason: brass is excellent at absorbing and retaining heat. This quality is essential for maintaining a consistent temperature as water travels from the boiler to your coffee puck. If these components are cold, they will act like a heat sink, drastically dropping the water’s temperature on contact. This temperature shock leads to under-extraction, resulting in a weak, sour, and unsatisfying shot of espresso. Therefore, a proper warm-up involves heating not just the water, but thoroughly saturating the brass components with heat until they reach a stable, uniform temperature.
The importance of thermal mass and stability
The concept of thermal stability is the cornerstone of great espresso. Extraction is a delicate chemical process where hot water dissolves soluble compounds from ground coffee. Even a few degrees of temperature difference can dramatically alter which compounds are extracted, and at what rate. An unstable temperature will result in an unbalanced shot that is both sour (from under-extracted acids) and bitter (from over-extracted compounds) at the same time. The Gaggia Classic Pro, with its heavy brass components, is designed to provide this stability, but it needs time.
Think of the group head and portafilter as a thermal battery. It takes time to charge them with heat, but once they are fully heated, they help ensure the brew water temperature remains rock-solid from the beginning of the shot to the end. This is why simply waiting for the boiler to heat up is insufficient. The entire system must come to a thermal equilibrium. Allowing the machine to warm up for a longer period ensures that every part the water touches is at the correct temperature, giving you the control and consistency needed to pull a delicious, well-balanced shot.
Your optimal warm-up routine for brewing
So, how long should you actually wait? For truly consistent and optimal results, a minimum of 15 to 20 minutes is the widely accepted standard among Gaggia enthusiasts. This allows enough time for the heat from the boiler to radiate and conduct through the group head and into the portafilter.
Here is a simple, effective routine to follow:
- Step 1: Fill the water tank and turn on the machine with the portafilter locked into the group head. This is the most important step, as it allows direct heat transfer.
- Step 2: Wait for at least 15 minutes. You can use a smart plug to have the machine turn on automatically before you wake up.
- Step 3: Just before you grind your coffee and pull your shot, run a short “warming flush” by dispensing a few ounces of water through the group head (with the portafilter still attached). This purges any stagnant or potentially overheated water from the boiler and adds a final boost of heat to the system.
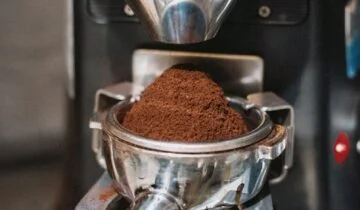
- Step 4: Dry your portafilter basket, dose and tamp your coffee, and pull your shot. You will now be working with a thermally stable machine.
This patient approach moves you from guessing to knowing, providing a stable foundation that makes dialing in your grind and technique much easier.
Warm-up times for brewing and steaming
The warm-up routine is primarily focused on brewing espresso, but what about when you want to steam milk for a latte or cappuccino? The good news is that once the machine is fully preheated for brewing, getting it ready for steaming is a much quicker process. After you’ve pulled your espresso shot, press the steam switch. The boiler will begin heating the water to a higher temperature to create steam, which typically takes between 30 and 90 seconds. You’ll know it’s ready when the “ready” light turns off again.
It’s important to always brew first, then steam. The boiler temperature required for steaming is too high for proper espresso extraction. Trying to brew immediately after steaming will result in a burnt, bitter shot. If you need to pull another shot after steaming, you must cool the boiler back down to brewing temperature, a process known as temperature surfing which involves flushing water through the group head until the heating element kicks back on.
| Goal | Recommended time | Key actions |
|---|---|---|
| Quickest acceptable shot | 10 minutes | Keep portafilter locked in. Flush water through the group head for 10 seconds before brewing to boost heat. |
| Optimal espresso performance | 15-20 minutes | Keep portafilter locked in. Perform a short 2-3 second warming flush before brewing. |
| Brewing then steaming milk | 15-20 minutes (for brew) + 60-90 seconds (for steam) | Follow the optimal routine, pull your shot, then activate the steam switch and wait for it to get to temperature. |
Conclusion: Patience is a key ingredient
While the Gaggia Classic Pro’s “ready” light may offer a tempting shortcut, true espresso excellence lies in patience. Understanding that the machine requires a thorough 15-to-20-minute warm-up is the most significant step you can take toward improving your coffee. This period is not just about heating the water; it’s about achieving complete thermal stability across the boiler, group head, and portafilter. By saturating these heavy brass components with heat, you create a stable environment that eliminates temperature as a variable, allowing you to focus on your grind and technique. Adopting this simple routine will transform your Gaggia Classic Pro from a good machine into a great one, consistently delivering rich, balanced, and delicious espresso day after day.


 No products in the cart.