
The Gaggia Classic is a legendary name in home espresso, celebrated for its robust build, simple mechanics, and ability to produce genuine café-quality shots. For decades, it has served as the entry point for countless aspiring baristas. At the core of its design lies a small, powerful single boiler. This single boiler is both the machine’s greatest strength and its most significant challenge. While it allows for a compact size and quick heat-up times, it also introduces the issue of temperature instability. Understanding how this boiler operates, the nature of its temperature cycles, and how to manage them is the single most important skill for any Gaggia Classic owner. This article will delve into the machine’s inner workings to help you master temperature control and unlock its true potential.
The heart of the classic: a look at the single boiler design
At its core, the Gaggia Classic is a Single Boiler, Dual Use (SBDU) machine. This means a single, small boiler is responsible for heating water to two different temperatures: a lower temperature for brewing espresso and a much higher temperature for creating steam to froth milk. The classic Gaggia boiler is traditionally a thick-walled aluminum unit, holding approximately 100ml of water, with two external heating elements bolted to its sides. This external placement is clever, as it prevents the heating elements from coming into direct contact with water, drastically reducing scale buildup on the elements themselves and extending their lifespan.
This design has several key implications:
- Fast heat-up: The small boiler volume means the machine is ready to brew in minutes, not the 30-45 minutes required by larger, E61-style machines.
- Simplicity and cost: A single boiler is mechanically simple, making the machine affordable to produce and relatively easy to service.
- The temperature trade-off: Because one boiler does two jobs, there’s a waiting period when switching between brewing and steaming. You must wait for the boiler to heat up to steam temperature and then wait for it to cool back down (or be “flushed” with cooler water) to brew temperature.
The boiler’s material and small size are crucial. While aluminum heats up quickly, it doesn’t retain heat as well as brass or stainless steel. This, combined with its small thermal mass, makes it highly susceptible to temperature fluctuations during and between shots, which leads us to the machine’s control system.
The thermostat’s dance: understanding temperature cycles
The Gaggia Classic does not have a sophisticated digital brain. Instead, its temperature is regulated by simple, mechanical bimetallic thermostats—one for brewing and one for steaming. These thermostats function like a basic light switch. They are not precise instruments; they work within a wide temperature range, often called a “deadband” or hysteresis.
Here’s how the cycle works for brewing:
- The heating elements turn on, and the boiler water heats up.
- The temperature rises past the target brew temperature until it hits the thermostat’s upper limit, causing the “ready” light to turn off and the heaters to disengage.
- The temperature continues to coast up slightly due to residual heat before it begins to fall.
- Water temperature then drops significantly, well below the ideal brew range, before it hits the thermostat’s lower limit, which turns the heaters (and the ready light) back on.
This creates a constant sine wave of heating and cooling. Pulling a shot at the peak of the cycle versus the trough can result in a temperature difference of 10°C (18°F) or more. This is the primary cause of inconsistency for new Gaggia owners, leading to shots that are sour (too cold) or bitter and burnt (too hot).
| Mode | Heater On (Low Point) | Heater Off (High Point) | Resulting Swing |
|---|---|---|---|
| Brew | 95°C / 203°F | 105°C / 221°F | ~10°C / 18°F |
| Steam | 127°C / 261°F | 145°C / 293°F | ~18°C / 32°F |
Taming the beast: introduction to temperature surfing
So, how do you manage this wild temperature swing without modifying the machine? The answer is a technique called temperature surfing. The goal of surfing isn’t to achieve a perfect, stable temperature, but rather to start your brew at the same point in the temperature cycle every single time, thereby achieving consistency.
A popular and effective method is to “surf” from the top of the cycle downwards. It provides a relatively stable and predictable falling temperature curve.
- Let your machine fully warm up for at least 15-20 minutes with the portafilter locked in.
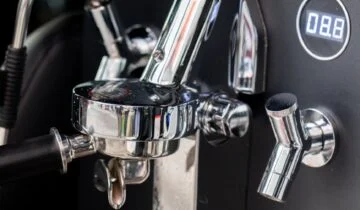
- Place a cup under the group head and run the pump. Watch the brew-ready light on the front panel.
- Let the water run until the light turns on. This indicates the thermostat has detected the temperature is too low and has engaged the heaters. Stop the pump immediately.
- Now, you wait. The heaters are on, and the temperature is rising. Wait for the brew-ready light to turn off, indicating the thermostat’s high limit has been reached.
- Immediately start a timer, lock in your prepared portafilter, and begin pulling your shot after a set amount of time (e.g., 10 seconds).
By waiting the same number of seconds after the light turns off, you are always starting your extraction at a very similar temperature, bringing shot-to-shot consistency to an otherwise chaotic process.
The ultimate upgrade: achieving stability with a PID
While temperature surfing is a free and effective technique, it requires diligence and attention. For those seeking ultimate control and convenience, the single best upgrade for a Gaggia Classic is installing a PID (Proportional-Integral-Derivative) controller. A PID replaces the inaccurate bimetallic thermostat with a digital brain and a precise temperature sensor (a thermocouple or RTD).
Unlike the thermostat’s simple on/off logic, a PID works intelligently. It learns how the boiler behaves and begins to pulse the heating elements with tiny bursts of power as it approaches the target temperature. This eliminates the overshoot and wide deadband of the mechanical thermostat. The result is an incredibly stable water temperature, often held within a single degree of your set point.
The benefits are transformative:
- Eliminates temperature surfing: The machine is always at the right temperature, ready to go.
- Unlocks flavor profiles: You can set the exact temperature (e.g., 92°C for a medium roast, 95°C for a light roast) to get the best extraction for different beans.
- Improves steam power: A PID can also be used to manage the steam thermostat, providing more consistent and powerful steam pressure for better milk frothing.
Adding a PID turns the Gaggia Classic from a capable entry-level machine into a precision instrument that can compete with machines costing three or four times as much.
In summary, the Gaggia Classic’s performance is fundamentally tied to its single aluminum boiler and the simple thermostat that controls it. This design creates significant temperature swings that can frustrate new users and lead to inconsistent espresso. However, this challenge is not insurmountable. By understanding the heating and cooling cycles, a barista can use manual techniques like temperature surfing to achieve remarkable shot-to-shot consistency. For those who desire the ultimate in precision and ease of use, installing a PID controller completely transforms the machine. It tames the temperature instability, providing rock-solid control. Mastering the temperature, whether through manual skill or a digital upgrade, is the key to unlocking the full, legendary potential of the Gaggia Classic.
 No products in the cart.