So, you’ve upgraded your Gaggia Classic with a digital temperature controller, or PID. Congratulations! You’ve just transformed your reliable machine into a precision instrument. While many see this as a way to achieve temperature stability, it’s actually the gateway to a more advanced technique: shot profiling. This article will demystify the basics of temperature profiling for your newly modified Gaggia. We’ll explore what it means to control your brew temperature actively, how it directly impacts the taste in your cup, and how you can start experimenting with different profiles. This isn’t about complex pressure gauges or flow control mods; it’s about harnessing the power of the one variable you now command with incredible accuracy: temperature.
What is shot profiling and why does it matter?
At its core, shot profiling is the art of manipulating key variables during the 25-30 second extraction of an espresso shot to influence its final taste. For multi-thousand-dollar machines, this can involve altering water pressure and flow rate on the fly. For a Gaggia Classic user with a PID, our primary tool for profiling is temperature. But why does this single variable hold so much power over your coffee’s flavor?
Coffee is complex, containing hundreds of chemical compounds. These compounds dissolve into water at different rates and at different temperatures. Here’s a simple breakdown:
- Acids: These are responsible for bright, fruity, and sometimes sour notes. They extract relatively easily and quickly, even at lower temperatures.
- Sugars: These provide sweetness and balance. They take a bit more energy (higher temperature and time) to extract properly.
- Oils and Lipids: These contribute to the body and mouthfeel of the espresso.
- Bitter Compounds: These extract last and are more soluble at very high temperatures. A little can add complexity, but too much results in an unpleasant, ashy taste.
By precisely controlling the temperature with your PID, you gain the ability to target or avoid certain compounds, effectively steering the final taste of your espresso. You’re no longer just brewing coffee; you’re conducting an extraction to achieve a specific, desired result.
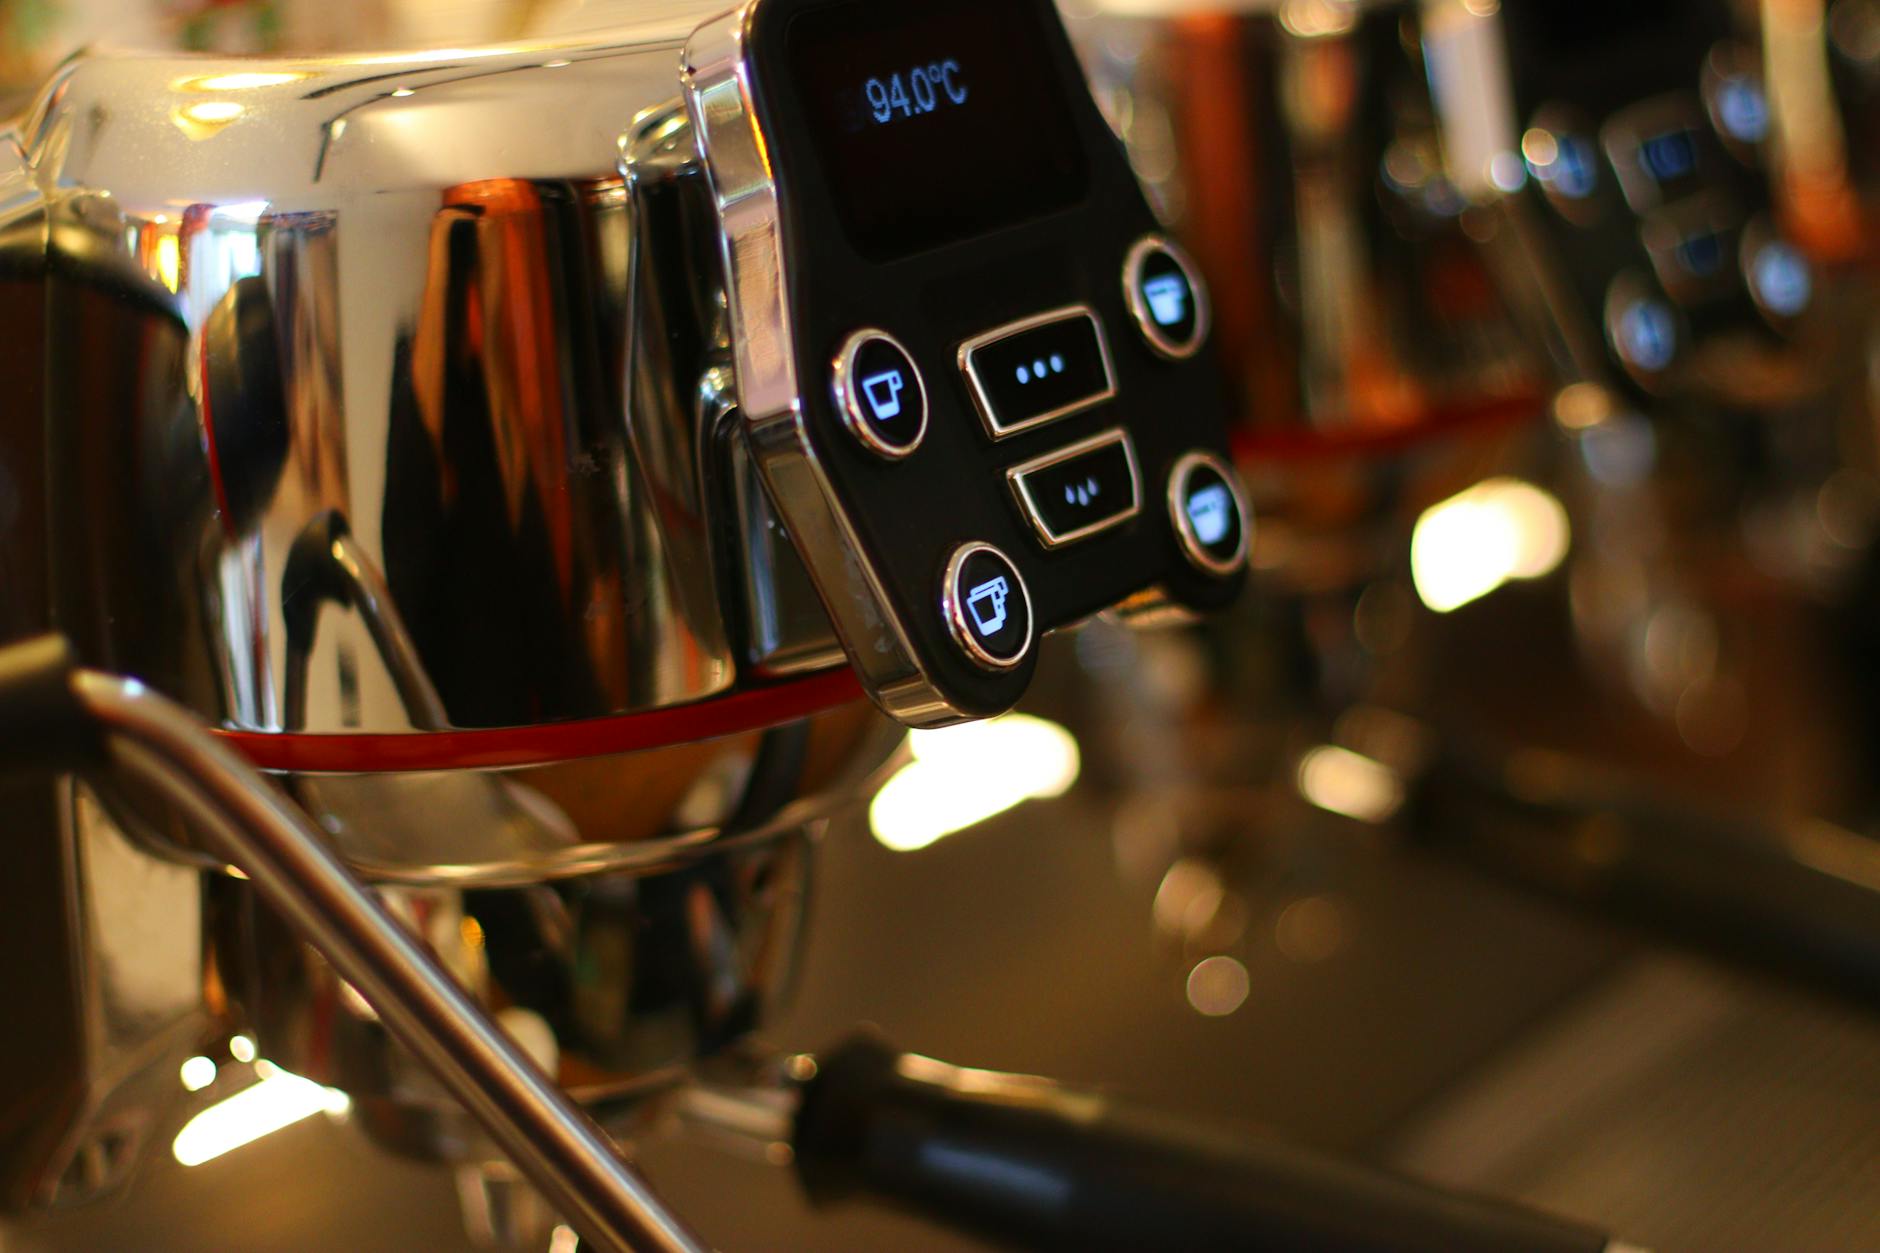
The role of digital temperature control (PID)
Before diving into profiles, it’s crucial to understand why the PID is the key that unlocks this potential. The stock Gaggia Classic uses a simple bimetallic thermostat. It works like the thermostat in an old oven: it lets the boiler heat up to a certain point, clicks off, and then lets it cool down significantly before clicking back on. This creates a wide temperature swing, often 10-15°C (18-27°F), meaning the temperature of your water is largely a matter of luck depending on when you pull your shot. Any attempt at profiling on a stock machine is futile because you lack a stable starting point.
A PID (Proportional-Integral-Derivative) controller changes everything. It’s a smart controller that constantly monitors the boiler’s temperature and uses sophisticated algorithms to make tiny, precise adjustments to the heating element. The result? Rock-solid temperature stability, often within 1°C of your set target. This stability is the foundation of profiling. It gives you a reliable, repeatable baseline from which to experiment. It ensures that when you decide to pull a shot at 92°C, you are actually getting water at 92°C, every single time.
Basic temperature profiles for your Gaggia Classic
With a stable temperature, you can now start experimenting with different profiles. For a PID-equipped Gaggia Classic, profiling is primarily about choosing a specific, stable target temperature based on your coffee beans and your taste preference. Here are three fundamental approaches to consider.
1. The flat profile: This is the most common and straightforward approach. You set your PID to a single temperature and let it stabilize before pulling your shot. The goal is to maintain this temperature throughout the entire extraction. This method is excellent for achieving consistency and is the perfect starting point for dialing in a new bag of beans. You simply adjust this one temperature up or down to fine-tune the taste.
2. The declining profile: This is a slightly more advanced technique that mimics the natural temperature drop found in some classic lever machines. You can achieve this by “temperature surfing” with your PID. For example, you set your PID to 95°C. The moment the machine hits this peak temperature, you start your shot. As the shot pulls, the influx of cooler water from the tank will cause the temperature to gradually drop a few degrees. This can add complexity to the shot, starting with a higher temperature to extract bright notes and finishing cooler to bring out sweetness while avoiding bitterness.
3. The roast-dependent profile: This isn’t a separate profile in itself, but a philosophy. You adapt your flat profile temperature based on the roast level of your beans. Darker roasts are more soluble and extract easily, so they benefit from lower temperatures to avoid bitterness. Lighter roasts are denser and less soluble, requiring higher temperatures to properly extract their delicate, acidic flavors. This is where your PID truly shines, allowing you to switch from a 90°C dark roast profile to a 96°C light roast profile with precision.
Here is a table to help you get started:
| Roast level | Suggested temp range (°C) | Expected taste profile | What to do if… |
|---|---|---|---|
| Light roast | 94°C – 97°C | Bright, acidic, fruity, floral | Sour: Increase temperature. |
| Medium roast | 92°C – 94°C | Balanced, sweet, caramel, chocolate | Sour: Increase temp. Bitter: Decrease temp. |
| Dark roast | 88°C – 92°C | Rich, low acidity, dark chocolate, roasty | Bitter: Decrease temperature. |
Putting it into practice
Theory is great, but how do you apply this to your daily routine? Follow these steps to start your temperature profiling journey:
- Start with a clean slate: Use a coffee bean you are familiar with. This helps you isolate the impact of temperature changes.
- Choose a flat profile: Refer to the table above and select a starting temperature based on your bean’s roast level. For a typical medium roast, 93°C (200°F) is an excellent starting point. Set this on your PID and wait for the machine to fully stabilize.
- Dial in your grind: Remember that temperature is just one part of the equation. Your dose, grind size, and yield are still fundamental. Aim for a standard recipe, like a 1:2 ratio (e.g., 18g of coffee in, 36g of espresso out) in about 25-30 seconds. Adjust your grinder to hit this target before you start playing with temperature.
- Taste, don’t just measure: Pull the shot and taste it carefully. Is it unpleasantly sour? This suggests under-extraction. Is it harsh and bitter? That points to over-extraction. Is it sweet and balanced? You’re on the right track.
- Adjust one variable: Based on your tasting notes, adjust the temperature by 1°C. If the shot was sour, increase the temperature. If it was bitter, decrease it. Pull another shot, keeping all other variables (dose, grind, yield) exactly the same. Taste again. This systematic process is the key to understanding your coffee and mastering your machine.
By installing a PID, you’ve already taken the most significant step toward elevating your home espresso. Now, the journey into shot profiling begins. Remember that this is about using temperature as a precise tool to influence extraction. Start with a simple, flat profile, using your coffee’s roast level as a guide. The most important part of this process is to taste your results and make small, deliberate adjustments. Don’t be afraid to experiment. A one-degree change can make a surprising difference, turning a good shot into a great one. This newfound control empowers you to unlock the full potential of every bean and truly tailor each cup to your personal preference.

 No products in the cart.