Stepping up to a professional espresso grinder is a monumental moment for any home coffee enthusiast. The promise of cafe-quality espresso, with its rich crema and complex flavors, is finally within reach. However, unboxing that heavy, gleaming piece of machinery is often followed by a humbling realization: this is not a simple appliance. It is a precision instrument with a significant learning curve. Unlike basic grinders, a professional model offers infinitesimal control over your grind, which is both a blessing and a challenge. This article will guide you through mastering that curve, transforming frustration into fluency and unlocking the true potential of your grinder and your coffee beans.
From the box to the basics: Understanding your grinder
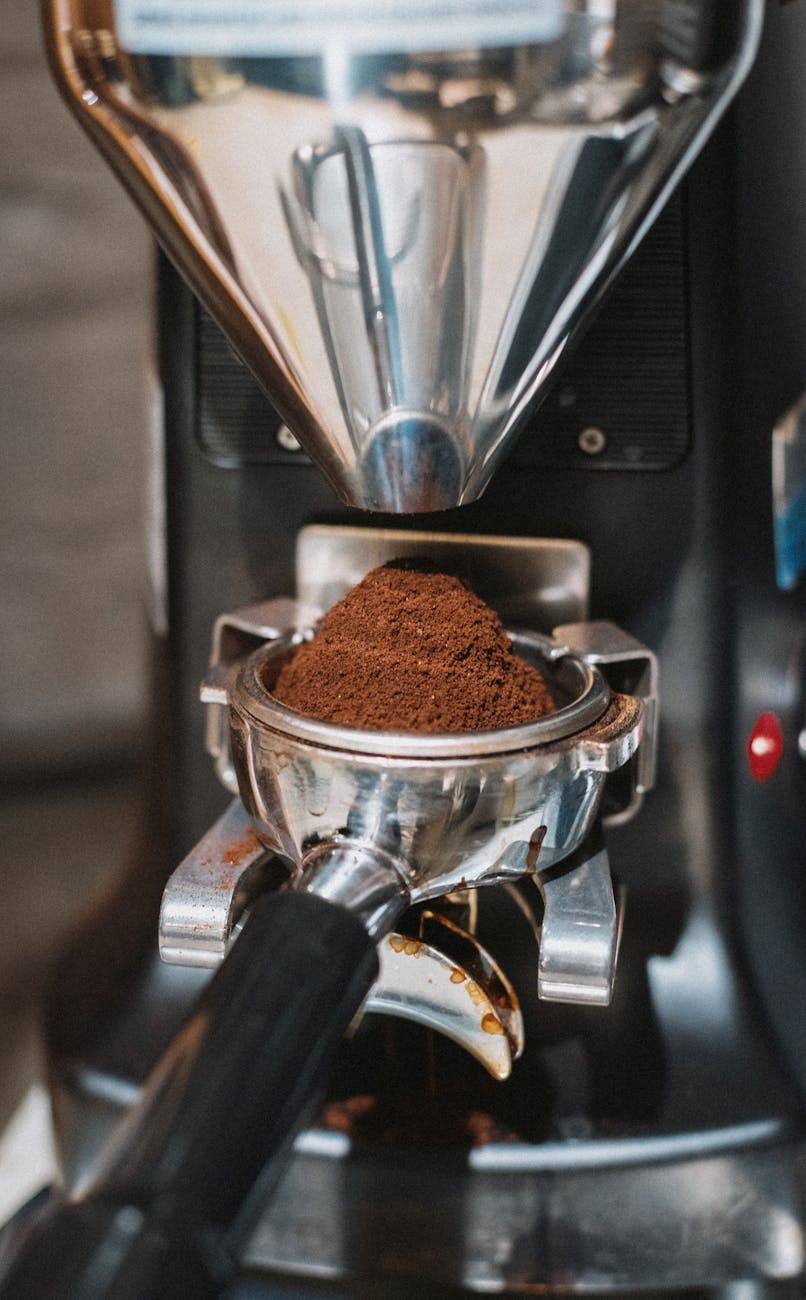
Before you can pull a great shot, you must first understand the tool in your hands. Professional espresso grinders are built around one critical component: the burrs. These are typically either flat or conical. Flat burrs tend to produce a more uniform grind size, often resulting in clarity and sweetness, while conical burrs produce a bimodal distribution (a mix of fine and slightly larger particles) that can enhance body and texture. Neither is definitively better; they simply offer different characteristics in the cup.
Next, consider the adjustment mechanism. Is it stepped or stepless? A stepped grinder clicks into predefined settings, which is user-friendly but can sometimes leave you wishing for a setting “in between” two clicks. A stepless grinder, common in professional models, uses a worm drive or similar mechanism to allow for infinite micro-adjustments. This is key for truly dialing in espresso, but it also requires a more delicate touch. Finally, understand your grinder’s dosing method. Is it a timer-based grinder? Does it grind directly into a portafilter? Or is it a single-doser, designed for weighing beans for every shot? Knowing these fundamentals is the first step toward predictable and repeatable results.
The fundamentals of espresso extraction
Mastering your grinder isn’t just about the hardware; it’s about understanding how the grind itself impacts the coffee. Espresso brewing is a delicate dance between three core variables: dose, yield, and time. Your grinder directly controls the most influential of these variables, which in turn affects the others.
- Dose: This is the weight of dry coffee grounds you put into your portafilter basket. A common starting point is 18-20 grams for a standard double basket. Consistency here is non-negotiable, so a scale accurate to 0.1 grams is essential.
- Yield: This is the weight of the liquid espresso in your cup. It’s often expressed as a ratio relative to the dose. A common starting ratio for modern espresso is 1:2 (e.g., an 18-gram dose producing a 36-gram yield).
- Time: This is the duration of the extraction, from the moment you press the button to the moment you stop the shot. A general target is 25-32 seconds.
Your grind size is the lever you pull to influence these outcomes. A finer grind creates more resistance, slowing down the flow of water and increasing extraction time. A coarser grind creates less resistance, allowing water to flow through faster, decreasing the time. The goal is to adjust the grind size to hit your target yield in your target time, achieving a balanced extraction.
The dialing-in process: A step-by-step guide
Dialing in is the methodical process of finding the right grind setting for a specific coffee bean. It requires patience and a systematic approach. Wasting a few shots to get it right is a normal and necessary part of the process.
- Establish your constants: Start by fixing your dose. Let’s use 18 grams as an example. Keep this dose the same for every shot during the initial dialing-in process. Also, decide on your target yield, such as 36 grams.
- Make an educated guess: Set your grinder to a setting you believe is in the espresso range. If you’re unsure, it’s often better to start slightly too coarse than too fine to avoid choking your machine.
- Grind and prepare your puck: Dose your 18 grams into the portafilter. Distribute the grounds evenly (a Weiss Distribution Technique or WDT tool is highly recommended) and tamp levelly with firm, consistent pressure.
- Pull and observe: Place your cup on a scale under the portafilter and start your shot and a timer simultaneously. Stop the shot once you hit your target yield of 36 grams. Note the time it took.
- Taste and adjust: This is the most important step. Did the shot run too fast (e.g., 18 seconds)? It will likely taste sour and under-extracted. Did it run too slow (e.g., 40 seconds)? It will probably taste bitter and over-extracted. Based on your time and taste, make one small adjustment to the grind setting. If it was too fast, go finer. If it was too slow, go coarser. Remember to purge a small amount of coffee after adjusting to clear out the old grounds.
- Repeat: Repeat steps 3-5 until you achieve your target yield in your target time and, most importantly, the espresso tastes balanced and delicious.
Troubleshooting and achieving consistency
Once you’ve dialed in, the next challenge is maintaining consistency. Coffee is an agricultural product; it changes as it ages, and different beans will require completely different grind settings. Don’t be surprised if you need to make small adjustments every day.
Common issues often stem from more than just the grind setting. Channeling, where water finds a path of least resistance and blasts through one part of the puck, leads to a shot that is both sour and bitter. This is a puck preparation issue, not a grind issue. Ensure your grounds are fluffy and evenly distributed before tamping. Another factor is retention—the amount of old coffee grounds left in the grinder. High-retention grinders can make dialing in tricky, as the first shot after an adjustment may contain a mix of old and new grind sizes. Always purging a few grams of coffee can help mitigate this.
Here is a simple table to help diagnose common espresso problems:
| Problem | Likely Cause | Primary Solution |
|---|---|---|
| Shot is too fast and tastes sour | Under-extraction | Grind finer to increase resistance and slow the shot. |
| Shot is too slow and tastes bitter | Over-extraction | Grind coarser to reduce resistance and speed up the shot. |
| Water sprays from the portafilter (channeling) | Uneven coffee puck | Improve distribution (use a WDT tool) and ensure a level tamp. |
| Shots are inconsistent despite no changes | Bean aging, inconsistent puck prep, or grinder retention | Make micro-adjustments to the grind as beans age. Focus on a repeatable prep workflow. |
Mastering a professional espresso grinder is not an overnight accomplishment; it’s an ongoing journey of learning and refinement. The process begins with understanding the fundamental mechanics of your machine, from its burr type to its adjustment mechanism. From there, it’s about grasping the core relationship between dose, yield, and time, and using your grinder as the primary tool to bring those variables into harmony. By following a methodical dialing-in process and learning to troubleshoot common issues like channeling, you transform a daunting piece of equipment into a reliable partner. The reward for your patience and practice is not just good coffee, but the deep satisfaction of having mastered a craft and the ability to produce truly exceptional espresso at home.
 No products in the cart.