Mastering La Pavoni temperature management for consistent espresso
The La Pavoni lever machine is an icon of Italian design and a testament to the art of manual espresso making. Owning one is not just about brewing coffee; it’s about engaging in a hands-on, rewarding ritual. However, this beautiful simplicity comes with a challenge that every new owner quickly discovers: temperature instability. The direct connection between the boiler and the grouphead means the machine can easily run too hot or too cold, leading to inconsistent and frustrating results. This guide will demystify La Pavoni temperature management, providing you with the knowledge and practical techniques needed to tame your machine and pull consistently delicious, syrupy shots of espresso every single time.
Why temperature is the key to your espresso
Before diving into techniques, it’s crucial to understand why water temperature is so fundamental to a great shot of espresso. Coffee extraction is a chemical process where hot water dissolves soluble compounds from the ground coffee beans. The temperature of that water acts as a primary controller, dictating which compounds are dissolved and at what rate. The ideal brewing range for most coffees sits between 90°C and 96°C (195°F – 205°F).
Veer outside this window, and the results change dramatically:
- Too hot: Water that is boiling or close to it will over-extract the coffee. It aggressively strips out unwanted compounds, resulting in a cup that is bitter, harsh, and ashy. You might notice a very fast, watery extraction with minimal crema.
- Too cold: Water that isn’t hot enough will fail to properly dissolve the desirable sugars and oils. This leads to under-extraction, producing a shot that is weak, sour, and lacks the rich body and sweetness you’re looking for.
–
On a La Pavoni, the temperature of the water hitting the puck is determined by the temperature of the grouphead itself. Because the grouphead is bolted directly to the boiler, its temperature is in constant flux, making your management of it the single most important variable for shot consistency.
Reading the signs and understanding the cycle
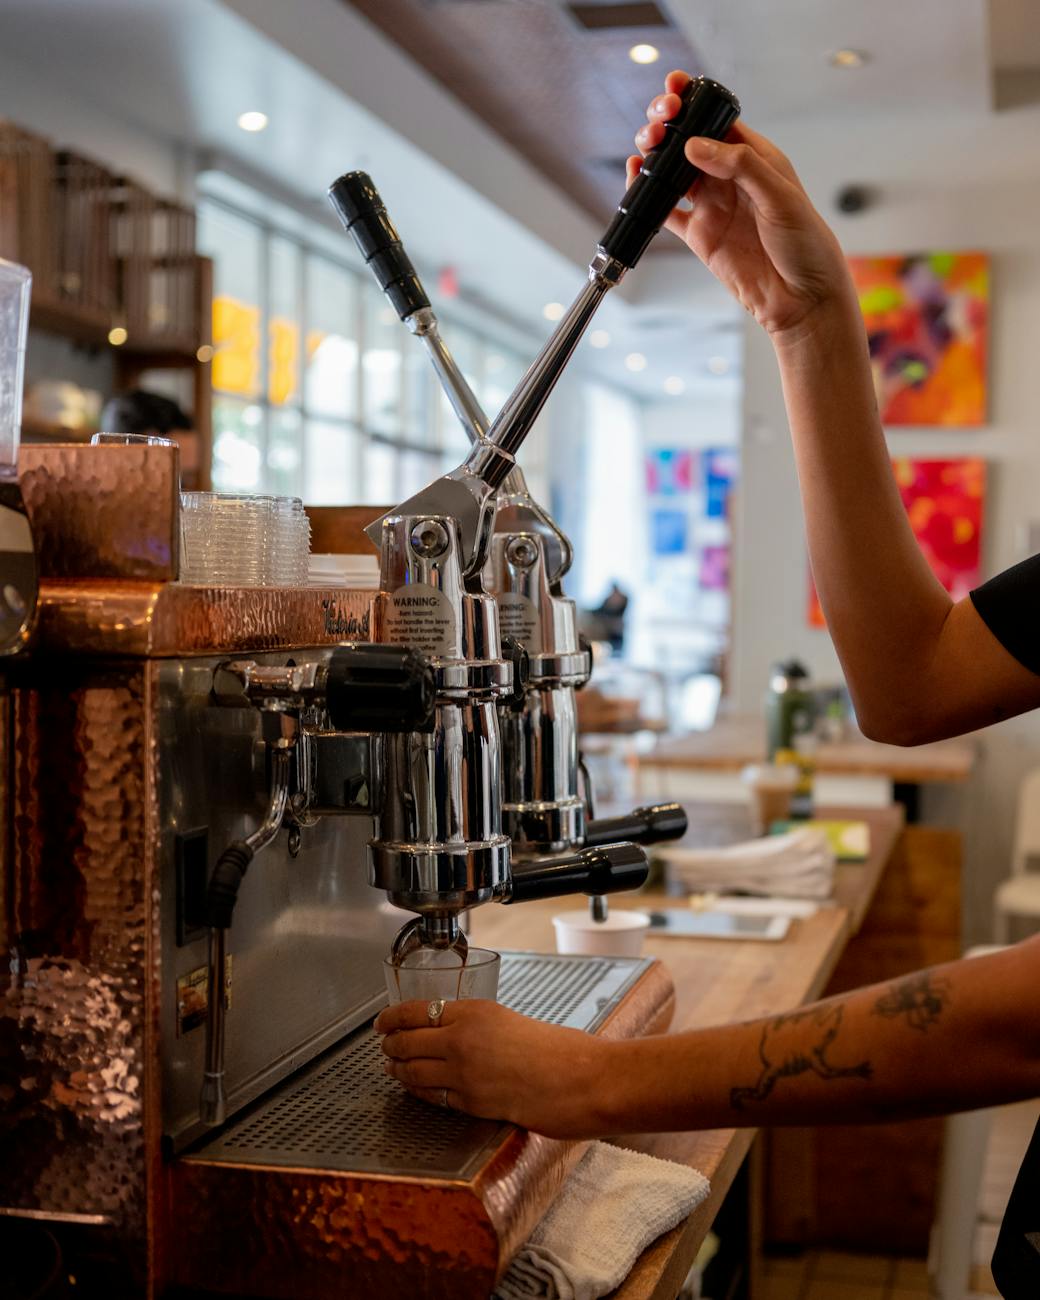
Your La Pavoni communicates its temperature status through clear, observable signs. Learning to “read” your machine is the first step towards mastering it. Unlike semi-automatic machines where you set a thermostat, with a La Pavoni, you manage the heat of the large brass grouphead.
The machine’s basic heating cycle means that after turning it on and letting it come to pressure, the grouphead will continue to absorb heat from the boiler. After 10-15 minutes, it’s often ready for the first shot. After that first shot, however, the grouphead temperature will continue to climb, quickly becoming too hot for subsequent shots.
Here are the key indicators:
- The group is too hot: The most famous sign is the “sizzle.” If you lift the lever slightly to let water into the group and hear a distinct hissing or sizzling sound, the water is flashing to steam upon contact with the hot metal. A shot pulled at this temperature will be bitter and gush out of the portafilter.
- The group is too cold: This is common for the very first shot of the day. The group will feel merely warm to the touch, not hot. A shot pulled now will taste sour and underdeveloped, as the cold brass has sucked too much heat out of the brew water.
Your goal is to find the happy medium—a grouphead that is hot enough to maintain thermal stability during the shot but not so hot that it scorches the coffee.
Practical techniques for temperature control
Once you can identify if the group is too hot or too cold, you can use simple but effective techniques to steer it into the ideal brewing range. This is the hands-on part of the ritual that La Pavoni users come to love.
Heating a cold group (for the first shot)
Before your first shot, the grouphead is a cold mass of metal that needs to be brought to temperature.
- Let the machine fully warm up until the pressurestat clicks off (or it reaches pressure).
- Without the portafilter locked in, raise the lever about halfway to three-quarters of the way up. You will feel and hear hot water entering the group.
- Hold it there for a few seconds to let the metal absorb the heat.
- Slowly lower the lever, discarding the small amount of water. Repeat this “half-pull” or “warming flush” two or three times until the sides of the grouphead are hot to the touch. Now you are ready for your first shot.
Cooling an overheated group (for subsequent shots)
After the first shot, your main challenge will be managing excess heat.
- The wet towel method: This is the most common and effective technique. Simply drape a cold, damp cloth or rag over the top and sides of the grouphead for 10-20 seconds. The evaporation rapidly and evenly cools the metal. You can use this method to bring the group back into the ideal range before every shot.
- Cooling flushes: By locking in an empty portafilter and running a small amount of water through it, you can also help cool the group. However, this method uses more boiler water and can be less precise than the towel method.
- Heatsinks: For those who want a more passive solution, aftermarket fins or heatsinks can be attached to the grouphead. These increase the surface area and help dissipate heat more effectively, reducing the time you need to wait between shots.
Tools for precision and diagnosis
While you can achieve great results by feel and touch, a few tools can take the guesswork out of the equation and elevate your consistency to the next level.
Grouphead thermometer strips: These are adhesive, color-changing strips that stick directly onto your grouphead. They provide a simple, at-a-glance visual indicator of the surface temperature, allowing you to see exactly when you’ve hit your target. They are an inexpensive and highly recommended upgrade.
| Indicated color | Approx. temperature | Resulting shot profile |
|---|---|---|
| Green / Dark Blue | Below 88°C (190°F) | Too cold: Likely sour, weak, under-extracted. |
| Black / Brown | 90°C – 96°C (195°F – 205°F) | Ideal range: Balanced, sweet, and rich extraction. |
| Red / Orange | Above 98°C (208°F) | Too hot: Likely bitter, ashy, over-extracted. |
Bottomless portafilter: This is an essential diagnostic tool. It allows you to see the extraction as it happens. If your temperature is too high, you will often see sputtering and channeling as the superheated water vaporizes. A perfect, even, syrupy extraction is a clear sign your temperature and puck preparation are on point.
Digital thermometers: For the ultimate in precision, dedicated digital thermometer kits can be installed. These provide a real-time numerical readout of your group temperature, allowing for unparalleled accuracy and repeatability shot after shot.
Learning to manage the temperature of a La Pavoni is a journey that transforms you from a coffee drinker into a true home barista. It requires patience and attention, but the rewards are immense. By understanding why temperature is so critical, you can begin to read the signs your machine is giving you. Whether you are performing warming flushes to prepare for your first shot or using a cold, wet towel to cool the group for your second, you are actively participating in the creation of your espresso. These techniques, supplemented with tools like a thermometer strip or a bottomless portafilter, remove the guesswork. They empower you to achieve the consistency you crave, turning a notoriously finicky machine into a reliable partner for exceptional coffee.


 No products in the cart.