
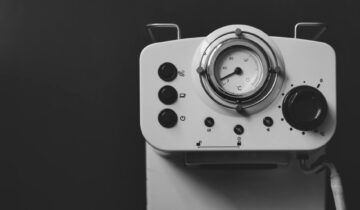
Unlock better espresso: A step-by-step guide to cleaning your shower screen
The quest for the perfect shot of espresso is a journey of precision, involving everything from the bean and the grind to the tamp and the temperature. Yet, there’s a small, often-overlooked component in your espresso machine that holds immense power over the final taste in your cup: the shower screen. This metal disc is the last stop for water before it meets your coffee grounds, designed to distribute it evenly for a balanced extraction. When it becomes clogged with old coffee oils and fine grounds, it can lead to channeling and bitter, unpleasant flavors. This guide will walk you through the essential maintenance task of removing and deep cleaning your shower screen, a simple process that will dramatically improve your espresso quality and machine longevity.
Why a clean shower screen is your secret weapon
Before we grab the screwdriver, it’s important to understand why this task is so critical. Think of the shower screen as the rain cloud for your coffee puck. Its job is to create a gentle, even shower of hot water over the entire surface of the ground coffee. Over time, coffee oils, minerals from the water, and tiny coffee particles build up, clogging the tiny holes in the screen. When this happens, the water is forced out unevenly, creating high-pressure jets in some areas and dry spots in others. This is a primary cause of channeling, where water punches holes through the puck instead of saturating it uniformly. The result? A shot that is simultaneously sour (under-extracted) and bitter (over-extracted). Those built-up oils also turn rancid, imparting stale, burnt flavors into every subsequent shot you pull.
Gathering your tools and preparing your machine
Proper preparation makes this a quick and painless five-minute job. Rushing into it without the right tools or with a hot machine is a recipe for frustration or injury. Before you begin, ensure your espresso machine is turned off, unplugged, and has had at least an hour to cool down completely. The group head retains a lot of heat, and safety should always be your first priority. You won’t need a massive toolbox, just a few simple items.
- A suitable screwdriver: Most machines use a standard flathead or Phillips head screw. Check your machine and use a screwdriver that fits snugly to avoid stripping the screw head.
- Espresso machine cleaning powder: A product like Cafiza or a similar espresso-specific cleaner is designed to dissolve coffee oils effectively.
- A small bowl: This will be used for soaking the screen and screw.
- A group head brush: This specialized brush helps clean the nooks and crannies of the group head itself.
- A soft, non-abrasive cloth: For wiping down components without scratching them.
The step-by-step removal and cleaning process
With your machine cool and your tools ready, you can now begin the cleaning process. This is the part where you get to see exactly what’s been hiding between your water and your coffee. The difference between a dirty and a clean screen can be shocking.
- Remove the screw and screen: Insert your portafilter into the group head to help you see better. Locate the central screw on the shower screen. Carefully unscrew it, making sure to apply firm, even pressure. Once the screw is out, the screen may fall out on its own. If it’s stuck, gently use the tip of your screwdriver or a spoon to pry it down from the edges.
- Prepare the soaking solution: In your small bowl, dissolve about half a teaspoon of espresso machine cleaning powder in hot water. Stir until the powder is fully dissolved.
- Soak the components: Place the shower screen and the screw into the cleaning solution. Let them soak for about 20-30 minutes. You will likely see the water turn a dark, murky brown as the coffee oils dissolve. This is a good sign!
- Clean the group head: While the screen is soaking, take your group head brush and scrub the exposed cavity of the group head. Use a damp cloth to wipe away all the loose coffee grounds and gunk. Pay special attention to the rubber gasket around the edge.
- Scrub and rinse: After soaking, use your brush or a non-abrasive sponge to scrub any remaining residue off the shower screen. Hold it up to a light to ensure all the tiny holes are clear. Rinse both the screen and the screw thoroughly under fresh water to remove all traces of the cleaning solution.
Reassembly, flushing, and your recommended schedule
Putting everything back together is just as important as taking it apart. A properly seated screen ensures that all your hard work pays off in the cup. Once your screen and screw are perfectly clean and dry, carefully place the screen back into its housing in the group head. Re-insert the screw and tighten it until it is snug. Be careful not to overtighten, as this can damage the screw threads or the group head itself. Once it’s secure, plug in your machine and turn it on. Run the pump for about 20 seconds to flush the system and ensure water is flowing evenly through the clean screen. Now you are ready to pull a shot, which should taste noticeably cleaner and more balanced. To maintain this quality, incorporate this deep clean into a regular maintenance routine.
| Task | Recommended Frequency | Why it matters |
|---|---|---|
| Daily water flush | After each session | Rinses fresh grounds before they dry and harden. |
| Chemical backflush | Every 1-2 weeks | Removes built-up oils inside the group head and three-way solenoid valve. |
| Shower screen removal & soak | Every 2-4 weeks | Deep cleans what a simple backflush can’t reach, ensuring perfect water distribution. |
| Gasket check/replacement | Every 6-12 months | Ensures a proper portafilter seal and prevents frustrating leaks. |
In conclusion, mastering the removal and cleaning of your espresso machine’s shower screen is a fundamental skill for any home barista serious about coffee quality. This simple procedure, which takes only minutes to perform every few weeks, directly combats the primary causes of a bad shot: channeling and off-flavors from rancid oils. By gathering a few basic tools and following the steps of removing, soaking, scrubbing, and reassembling, you take control over a crucial variable in the espresso-making process. This isn’t just about cleaning a machine; it’s about respecting the coffee and unlocking its true flavor potential. Making this part of your regular maintenance routine will reward you with consistently delicious espresso and a longer, healthier life for your beloved machine.


 No products in the cart.