
The pursuit of the perfect espresso shot is a journey many coffee lovers embark on. At the heart of that “god shot” is a rich, velvety, and persistent layer of crema. This reddish-brown foam isn’t just for looks; it contributes to the aroma, flavor, and mouthfeel of the espresso. While modern semi-automatic machines can make achieving crema seem easy, mastering it on a manual espresso maker is a true art form. It requires a deeper understanding of the variables at play. This guide will delve into the essential techniques and knowledge you need to consistently pull shots with a thick, beautiful crema from your manual lever machine, transforming your home coffee experience from good to exceptional.
The foundation: Choosing the right coffee beans
Before you even touch your grinder or lever machine, the quest for crema begins with the coffee beans. Crema is an emulsion of coffee oils and microscopic bubbles of carbon dioxide (CO2) gas, created under the intense pressure of extraction. Therefore, the single most important factor for good crema is the freshness of your beans.
CO2 is trapped within the bean during the roasting process and is released over time. To maximize crema, you should use beans that are between 4 and 21 days past their roast date. Coffee that is too fresh (1-3 days) can produce an excessive, bubbly crema due to too much gas, while stale coffee (over a month old) will have lost most of its CO2, resulting in a thin, pale, and quickly dissipating crema.
Other bean characteristics also play a significant role:
- Roast level: Medium to dark roasts tend to produce more crema. The longer roasting process makes the beans more porous and brings more oils to the surface, both of which are conducive to crema formation.
- Bean type: While 100% Arabica beans are prized for their nuanced flavors, Robusta beans are the undisputed kings of crema. They contain more coffee oils and produce a thicker, more stable crema. Many classic Italian espresso blends include 10-15% Robusta specifically for this purpose.
- Processing method: Naturally processed (or dry-processed) coffees, where the bean dries inside the coffee cherry, often retain more oils and sugars. This can contribute to a richer, sweeter, and more viscous crema compared to washed coffees.
The perfect grind and dose
Once you have the right beans, the next critical step is how you prepare them. For espresso, you need a fine, consistent grind, similar in texture to table salt or powdered sugar. An inconsistent grind, with both large and small particles, will lead to an uneven extraction. The water will rush through the larger gaps (a phenomenon called channeling) while failing to properly extract from the finer, compacted areas. This results in a shot that is simultaneously sour and bitter, with a weak and disappointing crema.
This is why a high-quality burr grinder is non-negotiable for making espresso. Blade grinders chop beans unevenly and are unsuitable for this task. A burr grinder crushes the beans between two revolving abrasive surfaces, allowing for a much more uniform particle size.
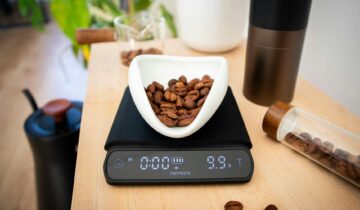
Your dose, or the amount of ground coffee you use, must be precise and matched to the size of your portafilter basket. A common starting point for a double shot is between 16-18 grams. Consistency is key, so using a digital scale that measures to 0.1 grams is highly recommended. After grinding and dosing, distribute the grounds evenly in the basket. You can do this by gently tapping the side of the portafilter or by using a distribution tool to level the coffee bed before tamping. This preparation prevents channeling and ensures the water flows through the entire coffee puck uniformly.
Mastering the puck prep and tamping
With your coffee perfectly ground and dosed, creating a well-prepared “puck” is the final step before extraction. The goal of tamping is to remove air pockets from the coffee grounds and create a compact, level bed for the water to pass through evenly. The common myth of needing exactly “30 pounds of pressure” is less important than two other factors: consistency and being level.
A tamp that is not level will cause the water to flow to the lower side, over-extracting that part of the puck and under-extracting the other. This is a primary cause of channeling and poor crema. To ensure a level tamp, keep your wrist straight and your elbow bent at a 90-degree angle directly over the portafilter. Press down firmly and evenly until you feel the coffee bed has compacted and won’t compress further. Give the tamper a gentle spin without pressure to “polish” the surface, which helps prevent grounds from sticking to the shower screen.
Remember, the goal is to create a dense and uniform puck that provides resistance to the water. This resistance is what allows the pressure to build, which is necessary to emulsify the oils and dissolve the CO2 that ultimately forms the crema. A poorly prepared puck will lead to a fast, watery shot with little body and next to no crema.
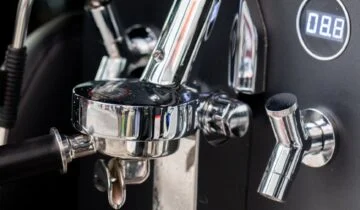
The art of pressure, temperature, and pre-infusion
This is where manual espresso makers truly shine. Unlike automatic machines with a fixed pressure setting, a lever machine gives you complete control over the entire extraction process, a technique known as pressure profiling. This control is your greatest tool for cultivating thick crema.
Start with pre-infusion. This involves gently saturating the coffee puck with low-pressure water (around 2-3 bars) for 5-10 seconds before ramping up to full pressure. Pre-infusion settles the coffee bed, minimizes the risk of channeling, and allows for a more even and full-flavored extraction. On a manual machine, you achieve this by partially lifting the lever to let a small amount of water into the chamber.
After pre-infusion, smoothly increase pressure to a peak of 8-9 bars. This is the sweet spot for espresso extraction where the magic happens and the oils and gasses are forced out of the coffee to create crema. Hold this pressure steady as the espresso begins to flow. As the shot progresses and approaches your desired yield (a 1:2 ratio of coffee grounds to liquid espresso is a great starting point), you can gently decrease the pressure. This “ramping down” can help reduce bitterness at the end of the shot.
Finally, don’t forget water temperature. The ideal range is 90-96°C (195-205°F). Since manual machines don’t have internal heating elements, you must preheat the brew chamber and portafilter with boiling water to ensure your brew water doesn’t cool down too much upon contact.
| Problem | Possible Cause(s) | Solution(s) |
|---|---|---|
| Thin, pale crema that disappears quickly | Stale beans; Grind too coarse; Low water temperature; Insufficient pressure. | Use beans roasted within the last 3 weeks; Grind finer; Thoroughly preheat all components; Ensure you are applying 8-9 bars of pressure. |
| No crema at all | Very old beans; Grind is far too coarse (like for drip coffee); Tamping is too light or uneven. | Check the roast date on your beans; Use a proper espresso grind setting; Tamp firmly and ensure the puck is level. |
| Dark, bubbly, and thin crema | Grind too fine causing channeling; Water temperature too high; Shot pulled for too long (over-extraction). | Grind slightly coarser; Let water cool for 30 seconds off boil; Stop the shot sooner (aim for a 25-30 second total extraction time). |
Achieving a thick, luscious crema on a manual espresso maker is not the result of a single secret but the culmination of careful attention to detail. It is a process where every step builds upon the last, creating a chain of quality that ends in a spectacular cup. It all begins with selecting fresh, high-quality beans, ideally with a medium-dark roast profile. This is followed by the precision of a consistent, fine grind and an accurate dose. Meticulous puck preparation, including even distribution and a level tamp, sets the stage for the final act: a skillful extraction. By mastering pre-infusion and pressure profiling, you take direct control over the creation of crema. While there is a learning curve, the reward is an unparalleled espresso shot, crowned with the rich crema you created yourself.

 No products in the cart.