A persistent drip from your espresso machine’s group head is more than just an annoyance; it’s often a cry for help from a critical component: the 3-way solenoid valve. This small but mighty part is the traffic cop of your machine, directing water flow and releasing pressure. When it gets clogged with coffee oils and mineral scale, it can’t seal properly, leading to those frustrating leaks. Don’t call a technician just yet. Understanding how this valve works and how to clean it can save you time, money, and a lot of wasted coffee. This guide will walk you through the entire process, from identifying the problem to performing a deep clean, ensuring your machine pulls clean, leak-free shots every time.
What the 3-way solenoid valve does for your espresso
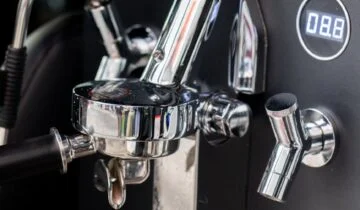
Before diving into cleaning, it helps to understand what you’re working on. The 3-way solenoid valve is an electronically controlled valve that has two primary jobs. First, when you start your shot, it opens to allow pressurized hot water from the boiler to flow to the group head and saturate your coffee puck. Its second, and equally important, job happens the moment you stop the shot. The valve closes the path from the boiler and simultaneously opens a third path, which vents the excess pressure and water from the group head directly into the drip tray. That satisfying “whoosh” sound you hear after pulling a shot? That’s the 3-way solenoid valve doing its job, instantly relieving pressure so you can remove the portafilter without a messy, explosive spray of coffee grounds.
Signs of a dirty or failing solenoid valve
A dirty solenoid valve doesn’t just fail overnight. It usually gives you warning signs. The most common and obvious symptom is a constant drip from the group head long after you’ve finished pulling a shot. When the machine is hot and idle, you shouldn’t see any water coming out. If you do, it’s a strong indicator that coffee residue or scale buildup is preventing the valve’s plunger from creating a perfect seal.
Other signs can be more subtle. You might notice:
- A weak or non-existent “whoosh” sound when you finish a shot. This means pressure isn’t being vented properly.
- Water leaking from the group head during pre-infusion or while the shot is pulling, indicating a seal issue.
- A “wet” or soupy coffee puck after extraction, as the excess water isn’t being siphoned away effectively.
If you’re experiencing any of these issues, it’s time to give your valve some much-needed attention. Ignoring it can lead to bigger leaks and potential damage to other components.
How to clean your solenoid valve: From routine backflushing to a deep clean
Cleaning the valve can be approached in two ways: regular maintenance to prevent buildup and a more intensive deep clean for when problems have already started. Think of it as the difference between brushing your teeth daily and going to the dentist for a cleaning.
Routine maintenance: Chemical backflushing
This should be a regular part of your espresso machine maintenance. Backflushing with a dedicated espresso machine cleaner (like Cafiza or Urnex) dissolves the coffee oils that build up in the group head, shower screen, and the solenoid valve’s pathways. You’ll need a blind basket (one with no holes) for your portafilter. Simply add a small amount of cleaner, lock the portafilter in, and run the pump for 5-10 seconds. The pressure will build and force the cleaning solution back through the system, cleaning the valve. Repeat this cycle a few times, followed by several rinses with plain water to flush out any remaining cleaner.
The deep clean: Disassembly and soaking
If backflushing doesn’t solve your leak, it’s time for a more hands-on approach. This involves removing and disassembling the valve itself.
- Safety first! Unplug your machine and ensure it is completely cool. Water and electricity do not mix.
- Locate and remove the valve. Its location varies by machine, but it’s typically near the group head, connected by copper or braided steel tubing. You may need to remove the machine’s outer casing. Use appropriate wrenches to carefully disconnect the fittings and remove the valve. Take a picture beforehand so you remember how it goes back together.
- Disassemble the valve. The valve consists of an electrical coil (usually held on by a nut) and the brass or steel valve body. Never get the electrical coil wet. Slide it off the valve stem. Now, you can unscrew the valve stem from the body. Inside, you will find a small plunger and a spring. These are the parts that get gunked up.
- Soak and scrub. Prepare a solution of hot water and your espresso machine cleaner. Place the metal valve body, stem, plunger, and spring into the solution and let them soak for about 30 minutes. After soaking, use a small, stiff brush (a toothbrush works well) to scrub away any remaining residue. Pay close attention to the tiny orifices and the rubber seal on the plunger.
- Rinse and reassemble. Rinse all parts thoroughly with clean water to remove all traces of the cleaning solution. Carefully reassemble the valve in the reverse order you took it apart. Reinstall it in the machine, ensuring all fittings are snug but not overtightened.
Preventing future leaks and buildup
Once your solenoid valve is clean and your machine is leak-free, you want to keep it that way. The key is consistent maintenance and paying attention to the water you use. Scale from hard water is a primary enemy of the solenoid valve, as the mineral deposits can form on the plunger and prevent it from sealing. Using properly filtered or softened water is the single best thing you can do for the long-term health of your entire machine.
Combining good water with a regular cleaning schedule will keep leaks at bay and ensure your machine operates at peak performance. Here is a sample maintenance schedule to follow:
| Task | Frequency | Purpose |
|---|---|---|
| Water backflush | Daily | Rinses loose coffee grounds from the group head and valve. |
| Chemical backflush | Every 1-2 weeks (for home use) | Dissolves built-up coffee oils and residue. |
| Descale machine | Every 2-4 months (depending on water hardness) | Removes mineral scale buildup throughout the system. |
| Deep clean solenoid valve | As needed (if leaks persist after backflushing) | Removes stubborn scale and oil deposits that routine cleaning can’t. |
A clean 3-way solenoid valve is fundamental to a well-functioning espresso machine. That nagging drip from your group head isn’t something you have to live with; it’s a clear signal that maintenance is due. By understanding its function, you can see why coffee oils and mineral scale are its biggest foes. Regular chemical backflushing is your best preventative measure, acting as a powerful deterrent against buildup. For more stubborn problems, a manual deep clean is a very manageable DIY task that can restore your valve to perfect working order. By adopting a consistent cleaning routine and using filtered water, you’ll not only fix your current leak but also protect your investment and guarantee delicious, perfectly extracted espresso for years to come.


 No products in the cart.