How to backflush a Gaggia Classic: A step-by-step maintenance guide
The Gaggia Classic is a legendary entry-point into the world of authentic espresso, beloved for its simplicity and capability. To keep it pulling delicious, flavorful shots for years to come, regular maintenance is not just recommended—it’s essential. One of the most critical yet often overlooked tasks is backflushing. This process is designed to clean the internal pathways of your machine’s group head, specifically the three-way solenoid valve, removing built-up coffee oils and fine grounds. Neglecting this can lead to bitter, rancid-tasting espresso and potentially damage your machine. This guide will walk you through everything you need to know, providing a simple, step-by-step process for backflushing your Gaggia Classic to ensure every cup is as good as the last.
Why backflushing is essential for your Gaggia Classic
Many new espresso machine owners confuse backflushing with simply rinsing the group head. While a quick rinse after pulling a shot is good practice, it only cleans the surface. Backflushing is a much deeper, more important cleaning procedure. The Gaggia Classic, like many prosumer machines, is equipped with a three-way solenoid valve. This component is a game-changer; when you finish brewing a shot and turn off the pump, the valve opens a third pathway, instantly releasing pressure from the group head and drying the coffee puck. This “whoosh” sound you hear is the valve doing its job.
Over time, this valve and the entire group head assembly become coated with rancid coffee oils and clogged with microscopic coffee particles. These residues directly impact the taste of your coffee, introducing bitter and sour notes. More critically, a clogged solenoid valve can fail, leading to a watery, messy puck, improper pressure, or a complete blockage. Backflushing forces water and a cleaning solution backwards through the group head and out through the solenoid valve’s exhaust tube into the drip tray, effectively purging these performance-killing deposits. It’s the single best thing you can do to maintain shot quality and prolong your machine’s life.
Gathering your tools and supplies
Before you begin the process, you’ll need to gather a few specific items. Having everything ready will make the procedure quick and seamless. You won’t be able to perform a backflush without these key components, so consider them a necessary investment in your coffee hobby.
- Blind basket: This is the most important tool. It looks like a regular portafilter basket but has no holes. When you engage the pump, it creates a seal, forcing the water to build pressure and then exit through the three-way solenoid valve. Ensure you get a 58mm blind basket to fit the Gaggia Classic’s portafilter.
- Espresso machine cleaner: You must use a detergent specifically formulated for backflushing, such as Cafiza or Puly Caff. Do not use vinegar or a general descaling solution, as these are designed for mineral buildup and will not dissolve coffee oils effectively.
- Group head brush: A simple brush with stiff nylon bristles helps you scrub the group head gasket and shower screen to remove stubborn grounds.
- Screwdriver: A flat-head or Phillips screwdriver (depending on your model’s screw) is needed for the occasional deep clean of the shower screen and dispersion plate.
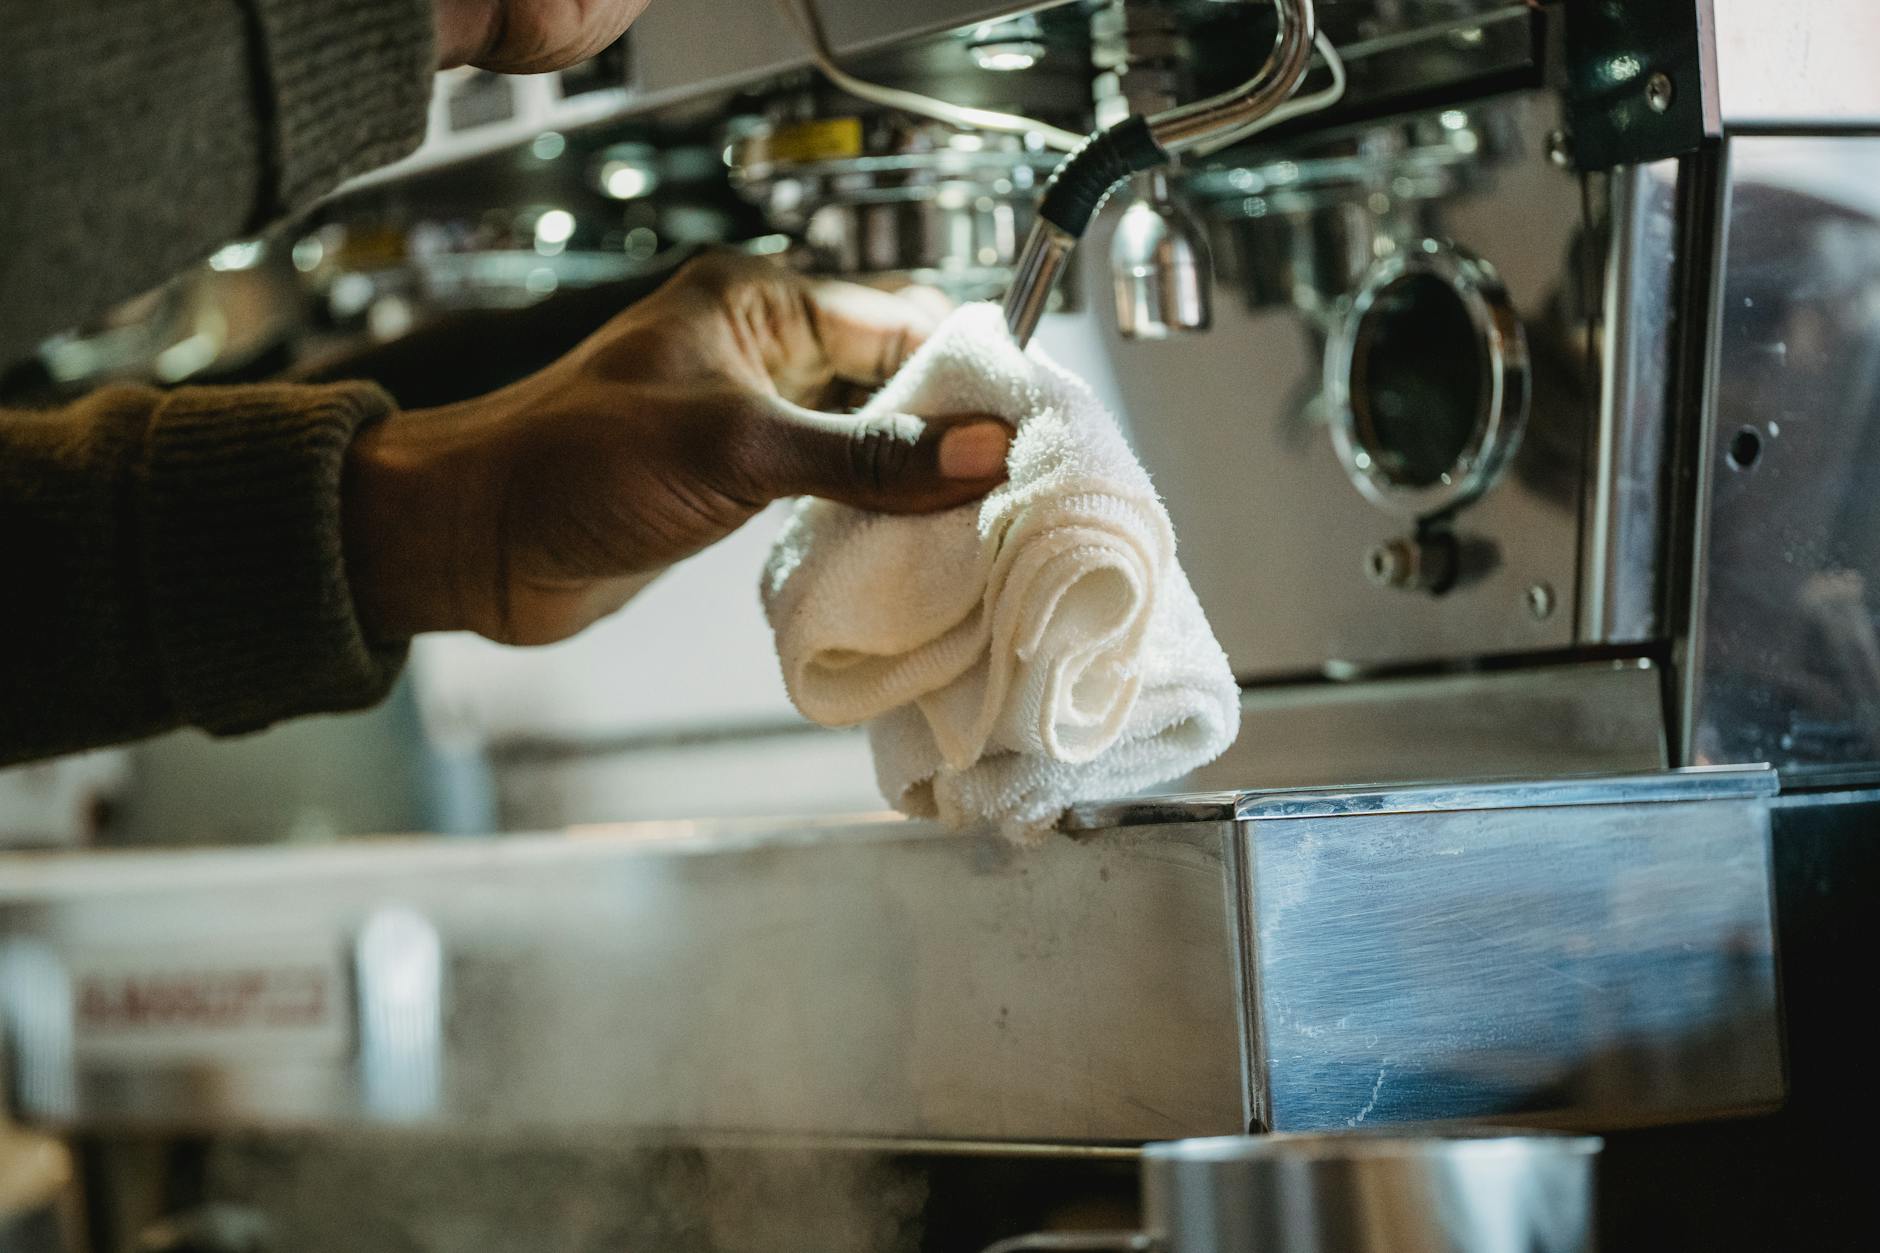
- Clean cloths: You’ll need a few soft towels for wiping down the portafilter, group head, and drip tray.
The step-by-step backflushing process
With your tools ready, you can now perform the backflush. This entire process should take less than ten minutes. We recommend doing this near a sink to make rinsing parts easier. Follow these steps carefully for a perfect clean.
- Prepare the group head: Start with the machine fully heated. Remove the portafilter. Use your group head brush to scrub around the rubber gasket and the shower screen to dislodge any loose coffee grounds.
- Initial rinse cycle: Place the blind basket into your portafilter and lock it into the group head, just as you would when making espresso. Turn on the brew switch for 5-10 seconds. You will hear the pump strain slightly as pressure builds. Turn the switch off. You should hear a “whoosh” as the pressure is released into the drip tray. Repeat this on-and-off cycle 4-5 times with just water.
- Detergent cleaning cycle: Remove the portafilter and add a small amount of espresso machine cleaner to the blind basket—about 1/4 teaspoon is plenty. Lock the portafilter back into the machine. Repeat the same 5-10 second on/off cycle another 4-5 times. Don’t be alarmed if you see foamy, brown water being discharged into the drip tray. This is the cleaner doing its job and dissolving old coffee oils.
- Thoroughly rinse the system: This step is crucial to remove all traces of detergent. Remove the portafilter and rinse it and the blind basket completely with water from your tap. Lock the clean, empty portafilter back into the group head and repeat the on/off cycle with plain water at least 10 times. You want to be absolutely sure no chemical residue is left.
- Final check and re-seasoning: Remove the portafilter and run the pump for a few seconds to give the shower screen a final rinse. Wipe everything down with a clean cloth. To be safe, pull one shot of espresso and discard it. This “seasons” the group head and ensures your next coffee is clean and delicious.
Creating a consistent maintenance schedule
Backflushing isn’t a one-time fix; it’s part of a larger maintenance routine. Sticking to a schedule will keep your Gaggia Classic in peak condition and prevent problems before they start. While backflushing with a detergent is important, you can also perform a simpler water-only backflush more frequently to keep things tidy between deep cleans. For an even deeper clean, you should periodically remove the shower screen and dispersion plate and soak them in a hot water and detergent solution. This allows you to scrub the inside of the group head itself.
Here is a simple schedule you can follow:
| Task | Frequency | Reason |
|---|---|---|
| Daily group head rinse | After each session | Removes fresh grounds from the screen and gasket. |
| Backflush with water | Every 2-3 days | A quick way to keep the solenoid valve clear of fresh debris. |
| Backflush with detergent | Every 1-2 weeks (or ~100 shots) | Removes built-up, rancid coffee oils for optimal flavor. |
| Deep clean group head | Once a month | Involves removing the screen/plate for a thorough soak and scrub. |
| Descale the machine | Every 2-3 months | Removes mineral scale from the boiler, depending on water hardness. |
By integrating these tasks into your routine, you move from reactive problem-solving to proactive care, ensuring your machine is always ready to perform at its best.
Conclusion
Mastering the backflushing process is a rite of passage for any serious Gaggia Classic owner. It may seem technical at first, but it quickly becomes a simple, routine task that pays enormous dividends. As we’ve covered, this essential maintenance cleans the internal pathways of the group head and the crucial three-way solenoid valve, flushing out the old coffee oils and grounds that cause bitter flavors and can harm your machine. By following the step-by-step guide with a blind basket and proper detergent, you directly contribute to better-tasting espresso and the long-term health of your investment. Making backflushing a regular part of your coffee ritual is a small commitment that guarantees your Gaggia Classic will continue to produce exceptional coffee for many years.

 No products in the cart.