Welcome to the vibrant, and often challenging, world of light roast espresso. If you’ve mastered the rich, chocolaty notes of darker roasts but find your light roast shots turning out sour and underwhelming, you’re not alone. These beans, celebrated for their bright acidity and delicate floral or fruity notes, demand a different approach. Their dense, less-porous structure makes them notoriously difficult to extract properly. But don’t be discouraged. Unlocking their potential is a rewarding journey that can elevate your coffee experience. This guide will walk you through the essential adjustments to your espresso workflow, from your grinder settings to your machine’s temperature, empowering you to pull a balanced, sweet, and complex shot of light roast espresso every time.
Understanding the challenge of light roasts
Before you change a single setting, it’s crucial to understand why light roast beans behave so differently. Unlike their darker counterparts, light roast beans spend less time in the roaster. This minimal exposure to heat means their internal cellular structure remains very dense and less brittle. Darker roasts, on the other hand, are roasted longer, making them more porous, brittle, and easier for water to penetrate.
This density is the root of the problem. When you try to pull a shot, the water struggles to saturate the coffee grounds evenly and extract the soluble flavor compounds. This leads to two common issues:
- Under-extraction: The water passes through the puck too quickly or without enough energy, failing to pull out the sugars and deeper flavors needed to balance the coffee’s natural acidity. The result is a shot that tastes overwhelmingly sour, thin, and grassy.
- Channeling: Because the puck is so resistant, water will exploit any weakness or tiny crack, creating “channels” to flow through. This means some parts of the coffee are over-extracted (leading to bitterness) while most of the puck is left under-extracted, resulting in a chaotic and unpleasant taste.
Therefore, every adjustment we make from this point forward is designed to overcome this fundamental challenge of density, helping water do its job more effectively.
Grinding finer and perfecting your puck prep
Your first and most significant adjustment starts at the grinder. To compensate for the density of light roast beans, you must grind finer than you would for a medium or dark roast. A finer grind increases the total surface area of the coffee particles, giving the water more to interact with. This slows down the flow of water through the puck, increasing the contact time and allowing for a more thorough extraction of sugars and nuanced flavors.
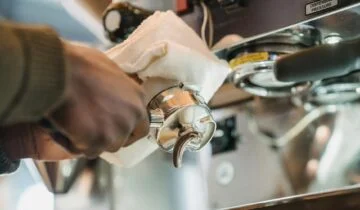
Be aware that light roasts are physically harder on your equipment. A high-quality burr grinder is essential, as entry-level grinders may struggle to produce a consistent fine grind or may even stall. However, grinding finer introduces a higher risk of channeling. This makes your puck preparation technique more critical than ever. Meticulous prep is not optional; it’s a requirement for success.
Follow these steps for a perfectly prepared puck:
- WDT (Weiss Distribution Technique): After grinding into your portafilter, use a WDT tool (a small tool with fine needles) to stir the grounds. This breaks up any clumps and distributes the coffee particles evenly, eliminating pockets of air or density that lead to channeling.
- Distribute and Level: Use a coffee distribution tool or a gentle tap-and-swirl method to create a perfectly flat and level bed of coffee. This ensures the water saturates the puck uniformly from the top down.
- Tamp Consistently: Apply firm, even pressure with your tamper to compact the grounds into a solid puck. The key isn’t extreme force, but a perfectly level tamp every single time. An uneven tamp will encourage water to flow faster down one side.
Adjusting brew parameters for optimal extraction
With a finely ground and perfectly prepared puck, the next step is to adjust your espresso machine’s settings. Light roasts require more energy to extract properly, and we can provide that energy through heat and controlled water flow.
First, increase your brew temperature. While a dark roast might taste best around 90°C (195°F), light roasts need a higher temperature to help break down their dense structure and extract sweetness. Aim for a range between 93-96°C (200-205°F). This extra heat increases the solubility of the flavor compounds you want in your cup.
Next, focus on your brew ratio and pre-infusion. Instead of the classic 1:2 ratio (e.g., 18g of coffee in, 36g of espresso out), light roasts often shine with a longer ratio, such as 1:2.5 or even 1:3 (e.g., 18g in, 45-54g out). This longer shot gives the water more time to pull out the sweetness needed to balance the bright acidity, preventing a purely sour taste.
Finally, leverage longer pre-infusion if your machine allows it. Pre-infusion is a low-pressure stage at the beginning of the shot that gently wets the puck. For a dense light roast puck, a longer pre-infusion of 8-12 seconds is ideal. This helps to fully saturate the grounds before applying the full 9 bars of pressure, dramatically reducing the chance of channeling and promoting a more even extraction from the very start.
Tasting and dialing in your shot
You’ve adjusted your grind, prep, and machine parameters. Now comes the most important part: tasting the result and making small, methodical adjustments. This process, known as “dialing in,” is a feedback loop where taste tells you what to change next. It’s crucial to distinguish between sourness (a sign of under-extraction) and pleasant acidity or brightness (a desired characteristic of light roasts).
A well-extracted light roast should have a vibrant, juicy acidity—like a crisp apple or a ripe berry—that is balanced by a clear sweetness and a smooth, pleasant finish. A sour shot will be puckering, hollow, and lack any real sweetness, often with a vegetal or grassy aftertaste.
Use the following table as a guide to troubleshoot your shots. Remember to only change one variable at a time to understand its effect.
| If your shot tastes… | And the shot time is… | Try this adjustment… |
|---|---|---|
| Sour, thin, and watery | Too fast (e.g., under 25 seconds) | Grind finer to slow the shot down. |
| Sour, but balanced body | In the target range (e.g., 28-35 seconds) | Increase the brew temperature or increase the yield (e.g., go from 1:2.5 to 1:2.8 ratio). |
| Bitter, dry, and astringent | Too slow (e.g., over 40 seconds) | Grind coarser to speed the shot up. |
| Both sour and bitter, chaotic | Inconsistent or spurts during extraction | Focus on improving puck prep (WDT, leveling) to fix channeling. |
Patience is key. It may take several attempts to find the sweet spot for a new bag of beans, but this systematic approach will get you there efficiently.
Taming light roast espresso is undoubtedly a craft that requires more attention to detail than working with forgiving dark roasts. However, the rewards are immense. By understanding the inherent density of the bean, you can make targeted adjustments that truly make a difference. The journey involves grinding finer, executing flawless puck prep to prevent channeling, and leveraging higher brew temperatures and longer brew ratios to ensure a full extraction. Each step builds upon the last, creating a workflow designed to pull out the delicate sweetness and complex acidity locked inside the bean. It’s a process of patience, tasting, and tweaking. Once you pull that first balanced, vibrant, and sweet shot, you’ll realize that the effort was well worth it, opening up a whole new spectrum of coffee flavors.
 No products in the cart.