




How to check for wear and tear on Gaggia Anima brew group parts
The Gaggia Anima, like any super-automatic espresso machine, relies on its brew group to perform the critical tasks of tamping and extraction. For the experienced home barista, understanding this component is key to maintaining shot quality and machine longevity. Over time, heat, pressure, and mechanical movement inevitably lead to wear on its internal parts. Proactively inspecting the brew group is not about waiting for a catastrophic failure; it is about recognizing subtle signs of degradation that can impact flavor, consistency, and machine performance. This guide provides a technical framework for identifying and assessing wear on the most common service components, ensuring your Anima continues to operate at its peak.
Understanding the signs of a worn brew group
Before disassembling any components, the first step is to observe the machine’s output. A perfectly functioning brew group produces consistent, well-formed pucks and a clean extraction. Deviations from this baseline are often the earliest indicators of wear. For instance, you might notice an increase in soupy or watery pucks, which often suggests a loss of pressure or a sealing issue within the group. Similarly, if you find an unusual amount of coffee grounds bypassing the puck and ending up in the drip tray or internal chassis, it could point to a compromised seal or a misaligned component. A noticeable decline in crema quality or a sudden need to grind finer for the same extraction time are also symptoms worth investigating.
Inspecting the main O-rings and gaskets
The most common wear items in any brew group are the elastomeric seals, specifically the O-rings. The Gaggia Anima brew group has several critical seals, but the most important one is the large piston O-ring. After carefully removing the brew group, examine this main seal for any signs of drying, cracking, or flattening. A healthy O-ring should be pliable and perfectly round. A flattened or squared-off profile indicates that it has been compressed over thousands of cycles and is no longer providing an optimal seal against the chamber wall. This loss of seal integrity is a primary cause of pressure loss, leading to under-extracted shots and wet pucks. Run a finger over its surface; any nicks or rough patches are grounds for replacement.
Examining the shower screen and coffee outlet
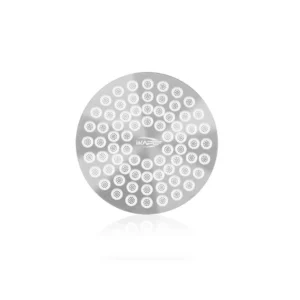
The shower screen plays a crucial role in water distribution over the coffee bed. Over time, coffee oils and fine particulates can accumulate, leading to blockages. While regular cleaning is essential, physical wear can also occur. Remove the brew group and hold it up to a light source to inspect the shower screen. Look for any signs of deformation or damage to the fine mesh. Even a small dent can create channels where water will preferentially flow, leading to uneven extraction. Check the coffee outlet tube as well. While less prone to wear, ensure it is free from cracks and securely seated. Any damage in this area can disrupt the flow of espresso into the cup and contribute to internal leaks within the machine.
Assessing the mechanical assembly
The brew group is a complex mechanical assembly with several moving parts that guide its movement during the tamping and ejection cycles. With the brew group removed, manually move its components through their range of motion. The action should be smooth and consistent, without any grinding, clicking, or excessive resistance. Pay close attention to the guide rails and locking mechanisms. Look for stress marks in the plastic, which often appear as white or discolored lines, particularly around pivot points or load-bearing areas. While the plastic used in the Anima’s brew group is durable, repeated mechanical stress over many years can eventually lead to fatigue. Any signs of cracking, no matter how small, warrant immediate attention to prevent a more significant failure.
In conclusion, a systematic approach to inspecting the Gaggia Anima’s brew group is fundamental to long-term performance. By moving from observational diagnostics like puck quality to detailed checks of specific parts such as O-rings, shower screens, and mechanical linkages, users can preemptively address issues before they escalate. This process empowers the owner to understand the machine on a deeper technical level, ensuring that every shot of espresso remains consistent and flavorful. Regular, mindful inspection is the most reliable method for maintaining the heart of the machine. For those who undertake these maintenance tasks, quality components and tools are always a valuable asset, and reliable sources for these parts can be found at papelespresso.com.

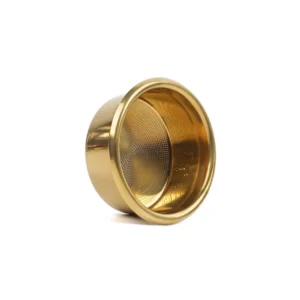
Key indicators of wear on brew group parts
A thorough visual and tactile inspection can reveal the health of your brew group. When removed from the machine and rinsed, several areas warrant close attention.
- O-rings and seals: These are the most common failure points. Healthy seals should be pliable and intact. Look for any signs of cracking, brittleness, or flattening. A worn seal will often look compressed and may have lost its rounded profile, compromising its ability to hold pressure. Discoloration is normal, but physical degradation is not.
- Shower screen: The metal screen should be free of blockages from hardened coffee oils or scale buildup. Check for any physical damage, such as dents or warping, which could affect the evenness of water distribution during extraction.
- Piston and cylinder walls: Inspect the surfaces for deep gouges or scratches. While minor scuffing can be normal, significant scoring may indicate a mechanical issue or abrasive buildup, leading to premature wear on the main seals.
- Lubrication points: The Anima brew group has specific channels and rails that require food-safe lubricant for smooth operation. A lack of lubricant causes components to grind against each other, accelerating wear and producing audible strain during the brew cycle.
A systematic inspection routine
Performing a regular check is straightforward. A monthly inspection is a good baseline for most users.
- Power the machine off and unplug it from the wall. Safety should always be the first step.
- Open the service door and remove the brew group according to the manufacturer’s instructions.
- Rinse the unit thoroughly with lukewarm water. Avoid using soaps or detergents, as they can strip the necessary lubricant and degrade seals.
- Carefully examine all O-rings for the signs of wear mentioned previously, such as cracks or flattening.
- Hold the shower screen up to a light source to check for clogged holes.
- Check the lubrication on the guide rails. If it appears thin or is gone, clean the old lubricant off and reapply a thin layer of food-safe grease as specified by Gaggia.
- Once the inspection is complete, re-insert the brew group, ensuring it clicks securely into place.
Proactive maintenance is central to getting the best performance from a quality espresso machine. By regularly inspecting the Gaggia Anima’s brew group for signs of wear on its seals, shower screen, and moving parts, you can address minor issues before they impact extraction quality or lead to more complex problems. This disciplined approach ensures the machine operates as intended, delivering the consistency and control that manual espresso users expect. Catching a worn O-ring or a clogged screen early is a simple fix that pays dividends in every cup. For those committed to machine longevity, sourcing the correct maintenance supplies from a reputable vendor like papelespresso.com can help ensure every component functions properly.