
A step-by-step guide: how to clean the E61 mushroom assembly and remove scale buildup
The legendary E61 group head is the heart of many high-end espresso machines, prized for its thermal stability and crucial role in crafting the perfect shot. However, deep within this marvel of engineering lies the mushroom assembly, a component highly susceptible to scale buildup. Over time, mineral deposits from your water can clog its delicate passages, leading to a host of problems. A restricted flow rate, inconsistent extraction, and a stiff brew lever are all symptoms of a neglected mushroom assembly. This guide will walk you through the essential process of disassembling, cleaning, and descaling this critical component. By performing this vital maintenance, you can restore your machine’s performance, extend its lifespan, and significantly improve the quality of your espresso.
Understanding the E61 mushroom and why scale is a problem
Before you reach for your wrench, it’s important to understand what the mushroom assembly is and why it’s so prone to scale. The “mushroom” is the valve assembly that sits directly inside the top of the E61 group head. It’s not just one piece; it contains the gicleur (or jet), the top and bottom valves, springs, and the cam follower. This entire assembly works in concert with the brew lever to control the flow of water for both pre-infusion and the full-pressure extraction. Because it’s a nexus point where hot water constantly flows and sits between shots, it’s the perfect environment for calcium and magnesium carbonates—the minerals that cause limescale—to precipitate out of the water and cling to the metal surfaces. This buildup can be devastating to performance.
The most common and immediate issue is a clogged gicleur. This tiny jet has a precisely drilled hole, often less than a millimeter in diameter, that meters the water flow. Even a small amount of scale can partially block it, drastically reducing the flow rate and leading to under-extracted, weak shots. Scale can also build up on the cam and valves, causing the brew lever to feel stiff, grindy, or difficult to operate. In severe cases, scale can prevent the valves from sealing properly, resulting in a constant drip from the group head or leaks from the exhaust port.
Tools and preparation for the cleaning process
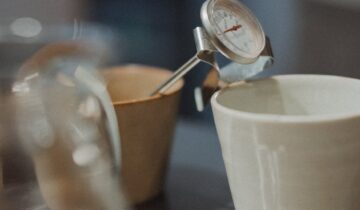
Proper preparation is key to a smooth and successful cleaning process. Rushing into disassembly without the right tools can lead to frustration or even damage to your machine. Before you begin, ensure your espresso machine is turned off, unplugged, and has had several hours to cool down completely. Working on a hot group head is a serious safety hazard. It’s also wise to relieve any residual pressure by lifting and lowering the brew lever a few times until no more water comes out.
Gather the following tools and supplies:
- Adjustable wrench or a large fixed wrench (the size can vary, but 22mm is common)
- Flathead screwdriver for prying gaskets if necessary
- A small bowl or container for soaking parts
- Food-safe descaling solution (citric acid powder mixed with water or a dedicated commercial descaler)
- A paperclip, a strand from a wire brush, or a specialized gicleur pick
- Food-safe silicone lubricant (such as Molykote 111 or DOW 111)
- Clean, lint-free cloths or paper towels
*A small nylon brush or an old toothbrush
Once you have your tools, lay a towel on your work surface to protect it and catch any water drips or small parts that might try to escape.
Step-by-step guide to disassembly and cleaning
With your machine cool and your tools ready, you can begin the disassembly. The process is straightforward if you work slowly and methodically. We recommend taking a photo of the valve assembly as you take it apart to serve as a reference for reassembly.
- Remove the mushroom: Place your large wrench on the hexagonal nut at the very top of the E61 group head. Turn it counter-clockwise to loosen. It may be quite tight, so apply firm, steady pressure. Once it breaks free, you should be able to unscrew it the rest of the way by hand.
- Extract the assembly: Lift the nut straight up. The entire mushroom assembly, including the valves and springs, will come out with it. You’ll likely see white, chalky scale deposits on the brass components.
- Disassemble the components: Carefully pull the components apart over your towel. You will typically find a top valve, a spring, and a bottom valve with gaskets. Note their order. The gicleur is the small jet screwed into the very bottom of the mushroom chamber. You can usually unscrew it with a flathead screwdriver.
- Descale the parts: Prepare your descaling solution in the bowl according to the product’s instructions. Place all the metal components (the mushroom housing, nut, gicleur, valves, and spring) into the solution. You may see it start to fizz—this is the acid reacting with the scale. Let the parts soak for about 20-30 minutes.
- Scrub and clear: After soaking, use your small brush to scrub away any remaining scale. For the gicleur, this is the most critical step. Gently pass the paperclip or pick through the tiny hole to ensure it is completely clear of any obstructions. Be very gentle, as you do not want to enlarge the hole, which would permanently alter your machine’s flow characteristics.
- Rinse thoroughly: Once everything is clean, rinse all the parts under fresh running water to remove every trace of the descaling solution. Dry them completely with a clean cloth.
Reassembly, lubrication, and final checks
Proper reassembly is just as important as the cleaning itself. This is where your food-safe lubricant comes into play, ensuring smooth operation and a perfect seal for months to come. It prevents the grinding feeling in the lever and protects the gaskets.
Using your reference photo if needed, reassemble the components in the reverse order of how you took them apart. Apply a thin layer of food-safe lubricant to the O-rings/gaskets and the surfaces of the cam follower that make contact with the cam inside the group head. This lubrication is vital for a smooth lever action. Screw the gicleur back into the bottom of the mushroom chamber, ensuring it’s snug but not overly tight.
Now, carefully insert the fully reassembled mushroom back into the group head. Begin screwing the top nut in by hand to ensure it isn’t cross-threaded. Once it’s hand-tight, use your wrench to give it a final quarter-turn to snug it up. Do not overtighten, as this can compress the gasket too much and cause damage. With everything back in place, it’s time to test your work. Plug the machine in, turn it on, and let it come up to temperature. Lift the brew lever and run a significant amount of water through the group. Check for any leaks around the top nut you just tightened. Operate the lever a few times to feel the now-smooth action. Finally, pull a shot of espresso. You should notice an immediate improvement in the consistency and strength of the water flow from the shower screen.
| Symptom | Probable Cause | Solution |
|---|---|---|
| Reduced water flow / slow shots | Partially clogged gicleur jet | Descale and clear the gicleur hole |
| Stiff or grinding brew lever | Scale buildup on the cam or valve stems | Clean all components and re-lubricate |
| Group head drips when idle | Scale preventing the brew valve from sealing | Thoroughly clean the valve and its seat |
Performing a deep clean of your E61 mushroom assembly is one of the most impactful maintenance tasks you can undertake for your espresso machine. This process directly tackles the negative effects of limescale, the primary enemy of espresso machine performance and longevity. By following the steps of careful disassembly, thorough descaling with a food-safe solution, and methodical reassembly with proper lubrication, you restore the precise mechanics of your group head. The rewards are immediate: a smoother lever action, a consistent and full-powered flow of water, and ultimately, a more balanced and delicious extraction in your cup. We recommend performing this cleaning every 6 to 12 months, depending on your water hardness and usage, to keep your machine operating at its peak.


 No products in the cart.