The Gaggiuino project is a remarkable open-source modification that elevates the humble Gaggia Classic into an espresso machine with precision and control rivaling commercial-grade equipment. At the heart of this transformation are sensors that provide real-time data on pressure, temperature, and weight. However, the accuracy of this entire system hinges on one critical process: calibration. When sensors are not calibrated correctly, the advanced features of Gaggiuino can become a source of frustration, leading to inconsistent and disappointing shots. This article serves as a comprehensive guide to understanding and resolving the most common sensor calibration errors, ensuring your modified machine performs at its peak. We will delve into troubleshooting the pressure transducer, the load cell, and temperature sensors, providing practical steps to get you back to pulling perfect espresso.
The foundation of precision: why calibration matters
Before diving into troubleshooting, it’s crucial to understand why each sensor’s accuracy is so vital. The Gaggiuino system is an interconnected ecosystem where one faulty data point can negatively impact the entire brewing process. Think of it as a team where every player needs to perform their role perfectly for a win.
The three core sensors you will work with are:
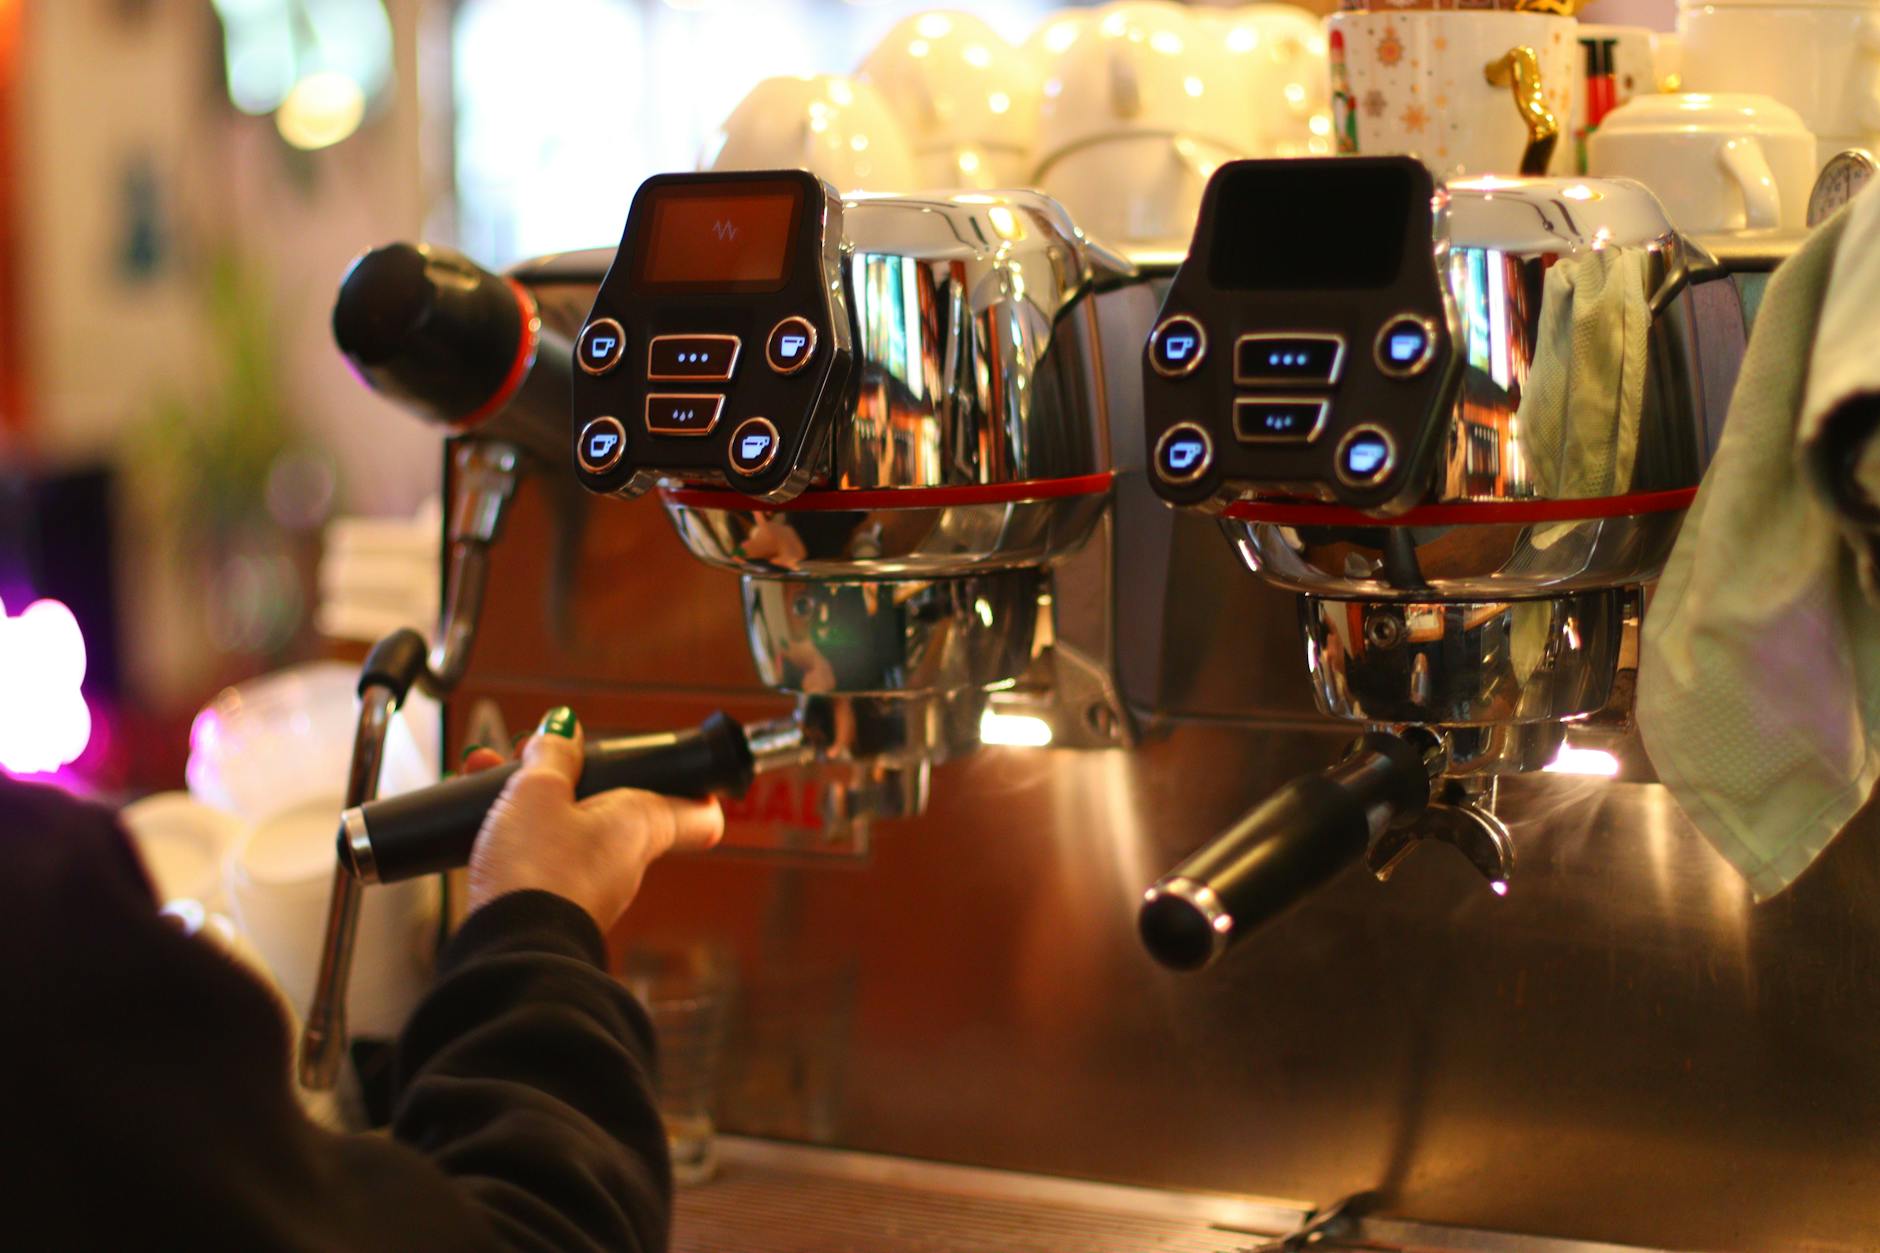
- The pressure transducer: This sensor measures the real-time pressure at the group head. Gaggiuino uses this data to execute complex pressure profiles, pre-infusion, and flow control. If the calibration is off, the 9 bars you think you’re brewing at might actually be 7 or 11, leading to under or over-extraction. The system is flying blind, and your shot consistency will suffer.
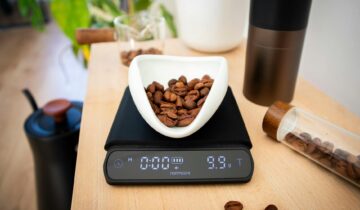
- The load cell (scale): This is the key to gravimetric brewing, allowing you to stop shots based on the precise weight of the espresso in the cup. An improperly calibrated scale means your brew ratios will be incorrect. A shot programmed to stop at 36 grams might stop at 32 or 40, completely changing the taste and texture of your espresso.
- NTC thermistors (temperature sensors): While less prone to calibration *errors* in the traditional sense, their accuracy is paramount for the PID controller. The PID relies on these sensors to maintain rock-solid temperature stability. A faulty sensor providing incorrect data can cause the PID to overshoot or undershoot the target temperature, resulting in sour or bitter shots.
Each of these components feeds information back to the microcontroller. The system trusts this data implicitly to make decisions. Therefore, ensuring the data is clean and accurate through proper calibration is the first and most important step in mastering your Gaggiuino.
Diagnosing pressure transducer issues
The pressure transducer is often a primary source of calibration headaches. Symptoms can range from erratic pressure readings on the display to a complete lack of response. When your machine’s pressure profile isn’t behaving as expected, this is the first place to look.
The calibration process for the transducer typically involves two main points: the zero point (tare) and the maximum pressure point (span). An error in either will skew all subsequent readings.
Common problems and solutions:
- Symptom: The pressure reading is stuck at 0 or a maximum value.
This is almost always a wiring issue. Carefully check the connections for the transducer. It requires three wires: VCC (power, usually 5V), GND (ground), and Signal (data output). Ensure they are connected to the correct pins on your Arduino or STM32 board. A loose ground or a swapped VCC and Signal wire are common culprits. - Symptom: Pressure readings are noisy and jump around wildly.
Electrical interference is the likely cause. The signal wire from the transducer is sensitive and can pick up noise from high-voltage AC wires, like those powering the pump or boiler. Try to route the sensor’s wires away from AC lines. Twisting the three transducer wires together can also help reduce interference. In persistent cases, adding a small capacitor (e.g., 0.1uF) between the signal and ground pins on the microcontroller can help smooth out the reading. - Symptom: The pressure doesn’t rise when the pump is engaged.
After confirming your wiring is correct, check for physical issues. Is the tube leading to the transducer clogged with scale or coffee grounds? Is the transducer itself faulty? You can test this by applying a known pressure (if you have the means) or by ensuring the physical connection to the boiler or OPV is secure and unobstructed. Finally, re-run the calibration process in the Gaggiuino software, ensuring you set the zero point correctly with no pressure and the span point using a blind basket to reach maximum pressure.
Taming the scale: load cell calibration problems
A perfectly functioning gravimetric scale is a game-changer for consistency. When it misbehaves, it can be infuriating. Most load cell issues stem from either the physical setup or the calibration process itself.
Key areas to check:
- Physical setup is critical. The load cell and its amplifier (the HX711 board) are extremely sensitive. First, ensure there is no physical interference. The platform your cup sits on must not touch the drip tray or any other part of the machine. Even a single wire pressing against the platform can throw off readings. Check that the wires coming from the load cell are not taut or pulling on it.
- Vibration and temperature. The machine’s pump creates vibrations that can affect the scale. Some users add a thin layer of foam or silicone beneath the load cell to dampen this. Temperature fluctuations can also cause the reading to drift. It’s best practice to let the machine fully warm up for 15-20 minutes before calibrating or pulling shots.
- The software calibration. The process requires a known weight. Don’t use a random object; invest in a small, accurate calibration weight (100g or 200g is ideal). During calibration, first, you tare the scale with nothing on it. Then, you place the known weight on the center of the platform and enter its exact value. If readings are still off, double-check your wiring between the load cell and the HX711 amplifier. The color coding (Red, Black, White, Green) must correspond to the correct E+, E-, A+, A- pins. This is one of the most common setup mistakes.
If your weight drifts or is inconsistent, work through these steps methodically. Start with the physical setup, as it’s the source of a majority of scale-related problems.
A quick reference for troubleshooting
To help you diagnose issues faster, here is a summary of common errors, their likely causes, and the recommended solutions. Keep this handy as you work on your machine.
| Sensor | Symptom / Error message | Potential cause | Recommended solution |
|---|---|---|---|
| Pressure transducer | Reading stuck at 0 bar or max value | Incorrect wiring (VCC, GND, Signal) or faulty transducer | Verify all three wires are connected to the correct pins. Reseat connections. Test transducer with a multimeter if possible. |
| Pressure transducer | Readings are very noisy or erratic | Electrical interference from AC lines | Re-route sensor wires away from pump/boiler wiring. Twist sensor wires together. Add a smoothing capacitor if needed. |
| Load cell / scale | Weight value drifts constantly | Temperature fluctuations or physical interference | Allow the machine to fully warm up before use. Ensure no wires or parts of the drip tray are touching the scale platform. |
| Load cell / scale | Readings are inaccurate or non-responsive | Incorrect wiring to HX711; poor calibration | Check that the Red/Blk/Wht/Grn wires match E+/E-/A+/A-. Re-run the calibration process using an accurate, known weight. |
| Temperature sensor (Thermistor) | Temperature reads an impossible value (e.g., -999) | Broken wire, loose connection, or faulty thermistor | Inspect the thermistor’s wiring for breaks. Ensure it’s securely connected at both the sensor and board ends. Replace the thermistor if damaged. |
Sensor calibration is not a one-time “set it and forget it” task. It’s a fundamental part of maintaining a high-performance Gaggiuino machine. As we’ve explored, accurate data from the pressure transducer, load cell, and temperature sensors is the bedrock upon which all the system’s advanced features are built. By methodically troubleshooting issues—starting with physical wiring and setup before moving to software calibration—you can solve the vast majority of common errors. Remember to be patient and systematic in your approach. The reward for your efforts is an incredibly capable espresso machine that offers unparalleled consistency and control, turning the art of a perfect shot into a repeatable science. This hands-on process is a core part of the rewarding DIY journey that is Gaggiuino.
 No products in the cart.