Fit for a pro: How to use larger scales with your Gaggia Classic Pro
The Gaggia Classic Pro is a legendary machine, serving as the gateway to true, cafe-quality espresso for countless home baristas. Its robust build and straightforward design make it a joy to use and modify. However, this compact powerhouse has one well-known limitation: the tight clearance between the portafilter spouts and the drip tray. This small space presents a significant challenge for anyone serious about consistency, as it makes fitting a standard, professional-sized coffee scale nearly impossible. Without a scale, you’re flying blind, relying on guesswork rather than precision. This article is your guide to overcoming that hurdle. We will explore why weighing your shot is critical and provide practical, step-by-step solutions to fit a proper scale with your Gaggia Classic Pro.
Why weighing your espresso is non-negotiable
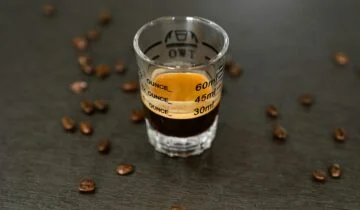
Before we dive into modifying your setup, it’s crucial to understand why this effort is so important. In the world of espresso, consistency is king, and the single most important tool for achieving it is a scale. Relying on volumetric measurements, like the markings on a shot glass, is notoriously inaccurate. The volume of an espresso shot is heavily influenced by the amount of crema, which varies depending on the bean’s freshness, roast level, and even the time of day. Two shots that look identical in volume can have a significant difference in actual liquid mass, leading to wildly different tastes.
Using a scale allows you to work with a brew ratio. This is the relationship between the weight of your dry coffee grounds (the dose) and the weight of the liquid espresso in your cup (the yield). A common starting point is a 1:2 ratio. For example:
- Dose: 18 grams of ground coffee
- Yield: 36 grams of liquid espresso
By weighing your dose in and your yield out, you remove the guesswork. You can pull a shot, taste it, and decide if you want to adjust. Perhaps a 1:2.5 ratio (18g in, 45g out) would be less intense and bring out more sweetness. Without a scale, making these precise, repeatable adjustments is impossible. It is the key to diagnosing issues, refining your recipe, and finally pulling that perfect, god-tier shot, every single time.
The clearance conundrum: Gaggia’s compact design
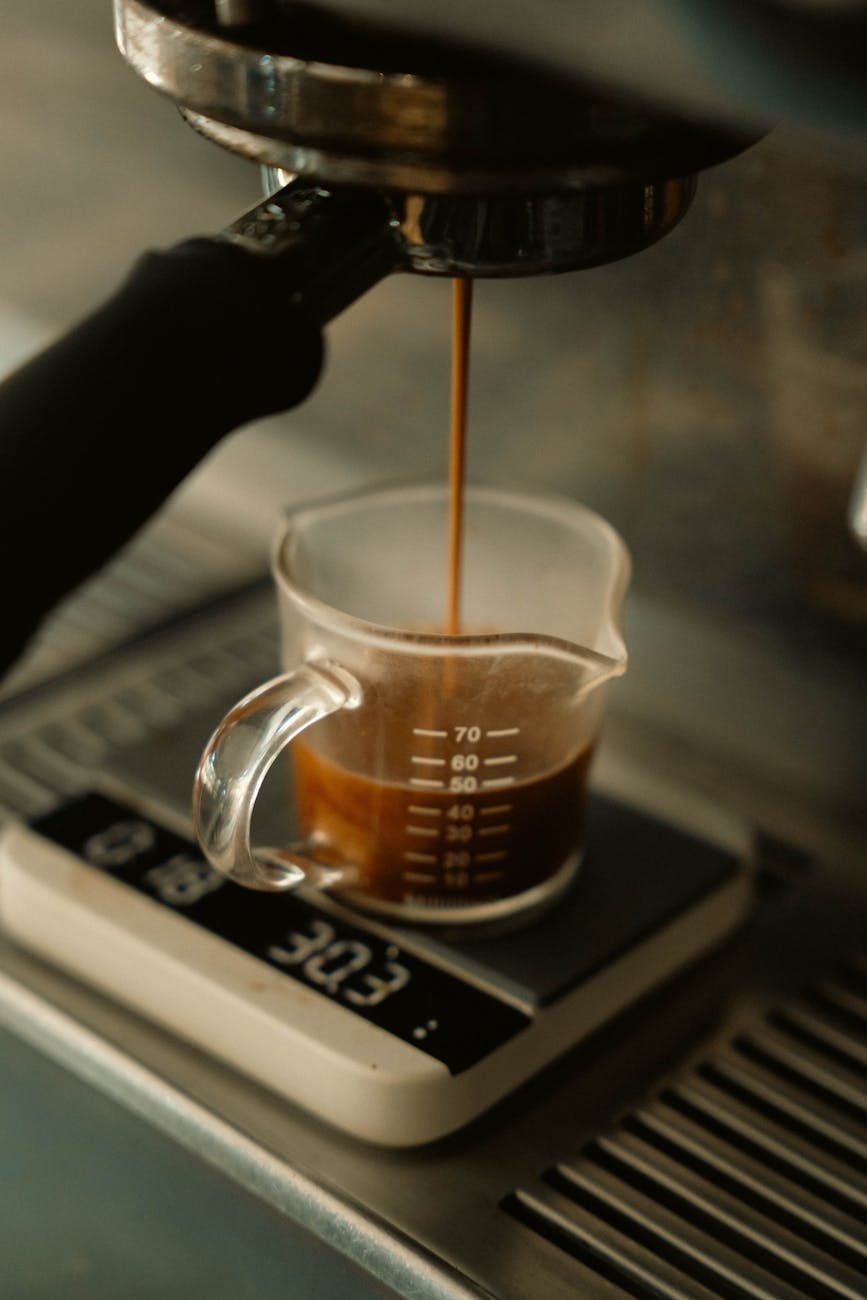
The core of the problem is a simple matter of geometry. The standard Gaggia Classic Pro setup leaves very little vertical space between the bottom of the portafilter spouts and the top of the drip tray grate. Many of the most popular and responsive coffee scales, such as the Acaia Lunar or Felicita Arc, are feature-rich but are simply too tall to fit in this space along with a reasonably sized espresso cup. You might be able to squeeze a tiny, cheap jewelry scale in there, but these are often slow to respond, not water-resistant, and have frustratingly quick auto-off timers.
This forces many new GCP owners into a frustrating compromise. They either forego weighing their shot directly, opting to weigh the cup after the shot is finished (which doesn’t allow for stopping the shot at the precise target weight), or they resort to using a spouted shot glass on the scale and then transferring the espresso, which is messy and causes the shot to lose temperature. To truly integrate a professional workflow with your Gaggia, you need a solution that allows for a good quality scale to live under the portafilter, giving you real-time feedback as you brew.
Creating space: Mods and gear for precision weighing
Thankfully, the passionate Gaggia community has developed several excellent solutions to this clearance issue. These range from simple purchases to minor modifications, each with its own set of benefits. The goal is the same: to gain those precious millimeters needed for a proper scale and cup.
The low-profile drip tray
This is arguably the most popular and elegant solution. Several third-party manufacturers produce “slim” or “low-profile” drip trays specifically for the Gaggia Classic Pro. These trays are much shallower than the bulky stock tray provided by Gaggia. By replacing the original, you can instantly gain a significant amount of extra vertical space. While they are typically made from 3D-printed plastic rather than metal, they are designed to be durable and fit the machine’s aesthetic perfectly. The main trade-off is capacity; because they are shallower, they hold less waste water from the solenoid valve and will need to be emptied more frequently. For most home users, this is a very small price to pay for the immense gain in functionality.
The “no tray” minimalist approach
For those who prefer a zero-cost, DIY solution, you can simply remove the drip tray and grate entirely. This gives you the maximum possible clearance, allowing you to place your scale directly on the machine’s metal base. You can fit almost any scale and cup combination with this method. However, you still have to manage the water released from the three-way solenoid valve after each shot. The simplest way to do this is to place a small, separate ramekin or espresso cup directly under the drain tube to catch the discharge. It’s less integrated than a slim drip tray, but it is completely free and effective.
Choosing a dedicated espresso scale
If you don’t want to modify your machine, another path is to purchase a scale designed specifically for the tight confines of an espresso machine. In recent years, several excellent “nano” or “micro” scales have come to market. Models like the Timemore Black Mirror Nano or the SearchPean Tiny Scale are built with a very small footprint and low height. They are fast, accurate, water-resistant, and often include an auto-timer that starts when the first drop of espresso hits the cup. While they can be a bit pricier than a generic scale, they solve the problem without requiring any changes to your Gaggia.
Scale solutions at a glance
| Solution | Pros | Cons | Best for |
|---|---|---|---|
| Low-Profile Drip Tray | Clean, integrated look; significant space gain; easy to install. | Requires purchase; reduced water capacity; often plastic construction. | The user who wants a seamless, “factory-look” upgrade. |
| “No Tray” Method | Maximum possible clearance; completely free; works with any scale. | Less elegant; requires a separate cup for drainage; can be messy. | The budget-conscious DIYer or someone needing to fit a very large scale. |
| Dedicated Low-Profile Scale | No machine modification needed; designed for espresso workflow; water-resistant. | Can be expensive; smaller weighing platform than full-size scales. | The user who wants a plug-and-play solution and is ready to invest in new gear. |
Conclusion
The Gaggia Classic Pro is a phenomenal espresso machine, but its limited clearance is a real barrier to achieving the precision that separates good espresso from great espresso. As we’ve seen, weighing your dose and yield is not an optional step for those chasing consistency. Relying on brew ratios is the only way to truly understand, repeat, and refine your recipe. Thankfully, you don’t have to let the machine’s compact design hold you back. By implementing one of these solutions—whether it’s installing a sleek low-profile drip tray, adopting the minimalist no-tray method, or investing in a purpose-built nano scale—you can easily create the space you need. By doing so, you’ll equip your Gaggia for a professional workflow and unlock its full potential to produce outstanding, repeatable espresso day after day.
 No products in the cart.