The Gaggia Classic is a legendary machine, beloved by home espresso enthusiasts for its robust build and fantastic performance. However, to keep it pulling delicious, balanced shots, regular maintenance is non-negotiable. Over time, coffee oils, fine grounds, and mineral scale build up within the machine’s core components. This guide will take you beyond a simple backflush and into the essential process of deep cleaning your Gaggia Classic’s group head and its three-way solenoid valve. Neglecting this process can lead to bitter, rancid-tasting espresso and can even harm your machine’s performance. By following these steps, you will restore your machine’s flow, improve your coffee’s flavor, and ensure your Gaggia Classic serves you well for years to come.
Why a deep clean is crucial for your Gaggia Classic
You might be backflushing your machine regularly, which is an excellent habit. But a deep clean addresses the stubborn buildup that a simple water or chemical backflush can’t reach. Coffee is an oily substance, and these oils go rancid over time. They coat the shower screen, the dispersion plate, and the inside of the group head, imparting a bitter and unpleasant taste to every new shot you pull. Furthermore, tiny coffee particles, or fines, can bypass the basket and get lodged in the small passageways of your machine, most notably within the three-way solenoid valve. This can restrict water flow, cause inconsistent pressure, and prevent the valve from properly releasing pressure, leaving you with a soupy, wet puck of coffee after every shot. This isn’t just about taste; it’s about the mechanical health and longevity of your beloved espresso machine.
Gathering your tools and preparing the machine
Before you begin disassembly, it’s vital to have everything you need on hand. A little preparation makes the entire process smoother and safer. The most important first step is to unplug your machine from the wall and ensure it has completely cooled down. Working on a hot or powered machine is extremely dangerous. Once you’re set up, performing a standard chemical backflush is a good first step to loosen up some of the initial grime before you get into the deeper parts.
| Tool / Material | Purpose |
|---|---|
| Espresso machine cleaning powder (e.g., Cafiza) | Breaks down coffee oils and residue. |
| Blind basket (no holes) | Used for backflushing. |
| Flat-head and Phillips-head screwdrivers | For removing the shower screen and machine casing. |
| Adjustable wrenches or a 17mm wrench | To carefully remove the solenoid valve. |
| Group head brush | For scrubbing inside the group head. |
| Small bowl | For soaking parts in cleaning solution. |
| A pick or a paperclip | To clean small orifices in the solenoid. |
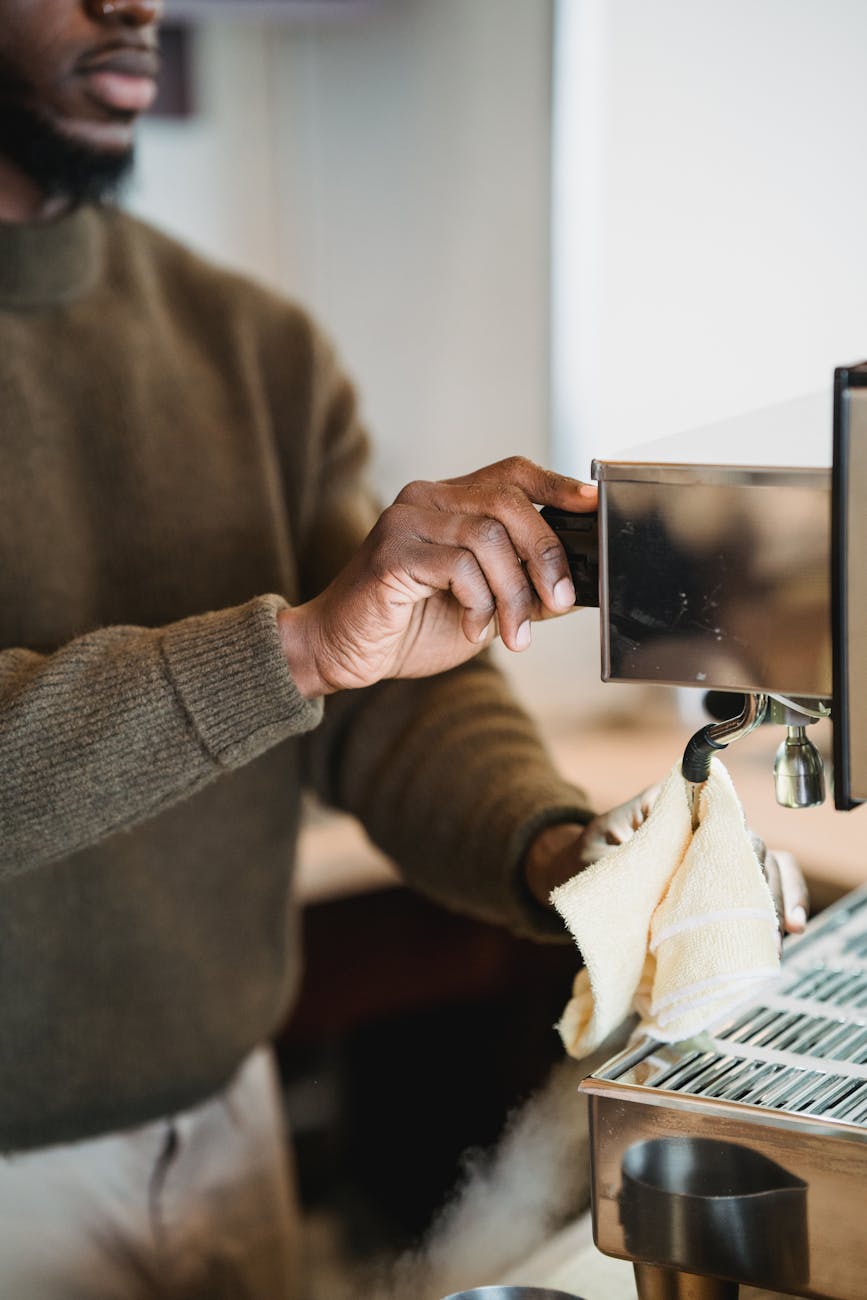
Tackling the group head components
The group head is where the magic happens, but it’s also where the most grime accumulates. This is a straightforward process that should be done every 1-3 months, depending on your usage.
- Disassembly: Start by using a Phillips-head screwdriver to remove the central screw holding the shower screen in place. The screen and the heavier brass or aluminum dispersion plate behind it will come off. They may be stuck on with coffee gunk, so a gentle pry with a flat-head screwdriver might be needed. This is also the perfect time to inspect your rubber group gasket. If it feels hard and brittle instead of pliable, now is the time to replace it.
- Soaking: Mix a teaspoon of espresso machine cleaning powder with hot water in your small bowl. Place the shower screen, dispersion plate, and screw into the solution. Let them soak for at least 30 minutes. You’ll see the water turn a dark, murky brown as the oils dissolve.
- Cleaning and Reassembly: While the parts are soaking, take your group head brush and scrub the inside of the group head on the machine. Pay special attention to the threads and the area where the gasket sits. Once the soaking is complete, use a brush to scrub any remaining residue off the screen and plate. Rinse all parts thoroughly with fresh water to remove any chemical residue. Finally, reassemble everything in reverse order: dispersion plate first, then the shower screen, and secure with the screw. Don’t overtighten.
Demystifying and servicing the solenoid valve
This sounds intimidating, but it’s a manageable task that makes a huge difference, especially if you experience wet pucks or slow-flowing shots. The three-way solenoid valve is an electronically controlled valve that directs water to the group head during an extraction and then releases the pressure to a drip tray when you stop the shot. This pressure release is what dries the puck.
First, ensure the machine is unplugged and cool. You’ll need to remove the top cover of your Gaggia Classic to access its internals. The solenoid valve is a brass component connected to the front of the boiler with wires attached. Carefully disconnect the wires. Using a wrench (often 17mm), slowly and carefully unscrew the valve from the boiler. Be prepared for a small amount of water to spill out.
Once removed, you can disassemble the valve itself. The shaft that the coil was on can be unscrewed from the valve body. Inside, you will find a very small spring and a plunger with a rubber seal. These are the parts that get clogged. Inspect them for coffee grounds or scale. Use a pick or a paperclip to gently clear the tiny holes in the valve body. Soak the metal parts in your cleaning solution (do not soak the main electronic coil), scrub them clean, and rinse thoroughly. Reassemble the valve carefully, making sure the spring and plunger are seated correctly, and then screw it back into the boiler. Reconnect the wires and replace the machine’s cover.
Performing a deep clean on your Gaggia Classic’s group head and solenoid valve is one of the most impactful things you can do to guarantee exceptional espresso. While daily maintenance is important, this more intensive process, performed every few months, tackles the root causes of bad flavor and poor performance. By thoroughly removing the rancid oils and coffee particle blockages from the group head, shower screen, and the critical solenoid valve, you are essentially resetting your machine’s brewing environment. This not only results in sweeter, cleaner, and more consistent shots but also extends the operational life of your machine. The satisfaction of maintaining your own equipment is a reward in itself, rivaled only by the delicious coffee you’ll brew afterward.
 No products in the cart.