The Gaggia Classic is a legendary entry-point into the world of home espresso, but its true potential is unlocked with a PID (Proportional-Integral-Derivative) controller. This popular modification offers precise temperature stability, but one of its most transformative features is the ability to control pre-infusion. This gentle, low-pressure wetting of the coffee puck before the full extraction begins is a technique used in high-end commercial machines to drastically improve shot quality. For Gaggia Classic owners, mastering the pre-infusion settings on their PID is the key to moving beyond good espresso to achieve truly exceptional, consistent, and café-quality extractions. This article will guide you through understanding, testing, and optimizing these settings for a noticeably better cup.
Understanding pre-infusion and why it matters
At its core, pre-infusion is the process of gently introducing low-pressure water to the dry coffee puck for a few seconds before applying the full nine bars of extraction pressure. On a stock Gaggia Classic, the moment you flip the switch, the pump engages at full power, hitting the delicate, dry puck with immense force. This can easily create tiny cracks or fissures, leading to a phenomenon known as channeling. Channeling is when water finds a path of least resistance through the puck, over-extracting from that channel (creating bitterness) and under-extracting the rest of the puck (creating sourness). The result is an unbalanced and often disappointing shot.
A PID controller with pre-infusion capabilities solves this by programming the pump to operate at a lower power for a set duration. This gentle wetting phase allows the coffee grounds to swell and expand, settling into a more uniform and stable structure. It effectively seals any minor imperfections from your tamping or distribution, creating a much more homogenous puck. When the PID finally signals the pump to ramp up to full pressure, the water is forced to flow evenly through the entire bed of coffee, leading to a far more balanced and complete extraction. This simple step elevates consistency, reduces frustrating “sink shots,” and unlocks more of the nuanced, sweet flavors hidden in your coffee beans.
The key pre-infusion parameters on your PID
While the terminology might vary slightly between different PID kits (like those from Auber Instruments or Shades of Coffee), the core concepts you’ll be controlling are universal. Understanding these parameters is the first step toward manipulating them effectively.
- Pre-infusion time: This is the most fundamental setting. It dictates the length of time, in seconds, that the pump runs at a low power/pressure to saturate the puck. A longer time allows for deeper saturation but also increases the total contact time between water and coffee.
- Dwell time (or soak/pause time): This is an optional but powerful setting. It refers to a period of pause after the initial pre-infusion wetting and before the main extraction begins. During this dwell time, the pump is completely off. The water already in the puck continues to distribute evenly through capillary action, ensuring every ground is saturated without adding more water. This can significantly improve the body and sweetness of a shot.
- Pre-infusion power: Some advanced PIDs allow you to control the pump’s power output during the pre-infusion phase. This is a proxy for pressure. A lower power setting (e.g., 30-50%) results in a gentler saturation, which is generally what you want to achieve. If your PID doesn’t have this setting, it likely uses a pre-programmed low-power mode.
Your total shot time will now be a combination of these phases: Pre-infusion Time + Dwell Time + Main Extraction Time = Total Shot Time. It’s crucial to remember that changing these settings will directly impact how you need to dial in your grind size.
A practical method for dialing in your settings
Optimizing pre-infusion is a methodical process. The key is to change only one variable at a time to understand its specific impact. Before you begin, ensure you have a consistent baseline recipe (dose, grind, yield) that produces a decent shot without any pre-infusion.
Step 1: Isolate pre-infusion time
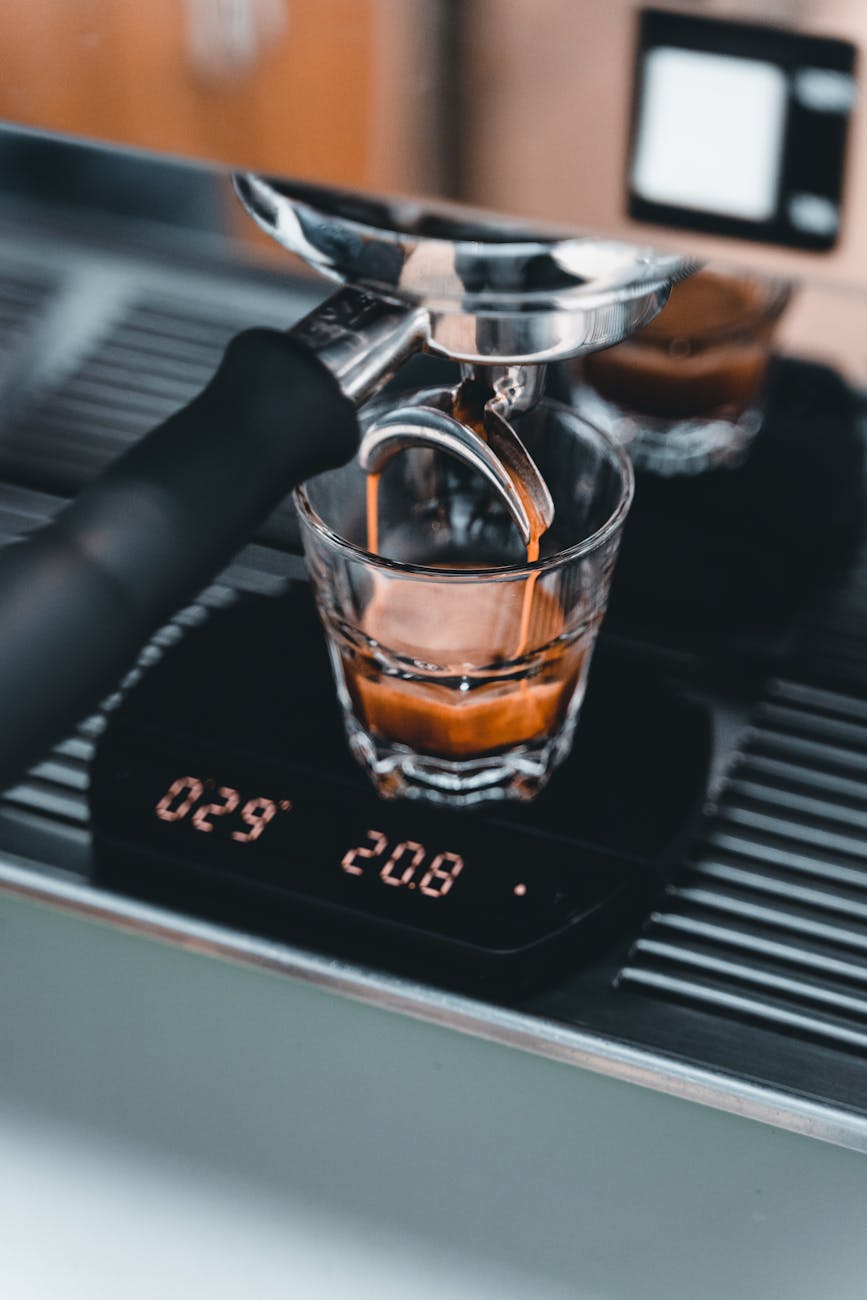
Start by setting your dwell time to zero. Your focus is solely on the initial wetting phase. Keep your coffee dose and target yield constant (e.g., 18g in, 36g out). Begin with a short pre-infusion time, say 3 seconds. Pull a shot and observe. How does it look through a bottomless portafilter? How does it taste? Most importantly, note the total time it takes to reach your target yield.
Step 2: Adjust and observe
Increase the pre-infusion time to 5 seconds and pull another shot. You will almost certainly notice that the main extraction phase runs much faster. This is normal; a fully saturated puck offers less resistance. To compensate and get back to your ideal total shot time (e.g., 25-30 seconds), you will need to grind finer. This relationship is the most important concept to grasp: longer pre-infusion generally requires a finer grind setting. Continue experimenting with pre-infusion times between 3-8 seconds, adjusting your grind each time to keep the total shot time consistent. Taste each shot and note which pre-infusion time produces the most balanced and flavorful result.
Step 3: Introduce dwell time
Once you’ve found a pre-infusion time you’re happy with (let’s say 6 seconds), you can start experimenting with dwell time. Keep the 6-second pre-infusion and add a 3-second dwell. Again, you will likely need to adjust your grind (probably even finer) to account for the increased saturation time. Compare this shot to your best one from Step 2. Does the dwell time add body or sweetness? Or does it mute the flavors? Try different dwell times (e.g., 2-5 seconds) to find what works best for your specific coffee.
Interpreting results and tailoring to your coffee
Your palate is the ultimate judge, but visual cues and a systematic approach can guide you. A bottomless portafilter is invaluable here, as it will instantly reveal if your settings are reducing channeling. You’re looking for an extraction that starts with a few drips before coalescing into a single, steady, centered stream.
Here’s a table to help you troubleshoot and establish a starting point:
| Coffee type | Suggested starting pre-infusion | Suggested starting dwell | Rationale |
|---|---|---|---|
| Dark roast | 2-4 seconds | 0-2 seconds | These beans are more brittle and extract easily. A shorter pre-infusion prevents over-extraction and excessive bitterness. |
| Medium roast | 4-7 seconds | 2-4 seconds | A good all-around approach to promote even saturation and balance, bringing out chocolate and caramel notes. |
| Light roast | 6-10 seconds | 3-5 seconds | These beans are denser and harder to extract. A longer saturation and soak time helps unlock their delicate, acidic, and floral notes. |
Remember, these are just starting points. The perfect settings are a dynamic target that changes with each new bag of beans. A longer pre-infusion can tame the acidity in a bright light roast, while a short, sharp pre-infusion might be all a dark roast needs to produce a rich, syrupy shot. Don’t be afraid to push the boundaries. Your goal is not to hit a magic number but to use these parameters as tools to craft the best possible expression of the coffee you are brewing.
In conclusion, mastering the pre-infusion settings on your PID-modded Gaggia Classic is a game-changer for espresso quality. It transforms the machine from a capable performer into a precision instrument. By systematically understanding and adjusting the core parameters—pre-infusion time and dwell time—you can significantly reduce channeling, increase shot-to-shot consistency, and improve the overall flavor balance of your espresso. The key is to follow a methodical process: establish a baseline, change only one variable at a time, and always be prepared to adjust your grind size to compensate. While data and visual cues are helpful guides, let your taste be the final arbiter. Embracing this process of experimentation is a deeply rewarding part of the home barista journey, leading to consistently delicious espresso.

 No products in the cart.