Why your coffee is sour: how to prevent thermal loss during manual brewing
Have you ever followed a recipe perfectly, using the same coffee beans and grind size, yet ended up with a wildly different cup than the day before? One day it’s sweet and balanced, the next it’s disappointingly sour and thin. The hidden variable sabotaging your brew is often thermal loss. Maintaining a stable water temperature throughout the entire extraction process is one of the most critical, yet frequently overlooked, elements of manual coffee brewing. A significant drop in temperature can lead to under-extraction, leaving the delicious sugars and complex flavors trapped in the grounds. This article will guide you through the science and strategy of thermal management, providing actionable steps to prevent heat loss and brew a consistently delicious cup every single time.
Understanding the enemy: why thermal loss matters
To understand why keeping your brew hot is so important, think of water as a solvent. Its job is to dissolve the soluble flavor compounds within the coffee grounds. The temperature of that water directly dictates how efficiently it can do its job. Different compounds extract at different rates and temperatures. Acids and fruity notes extract relatively quickly and at lower temperatures. Sugars, which create sweetness and body, come next. Finally, the heavier, more bitter compounds are extracted. An ideal extraction is balanced, capturing enough sweetness to round out the acidity without pulling out too much bitterness.
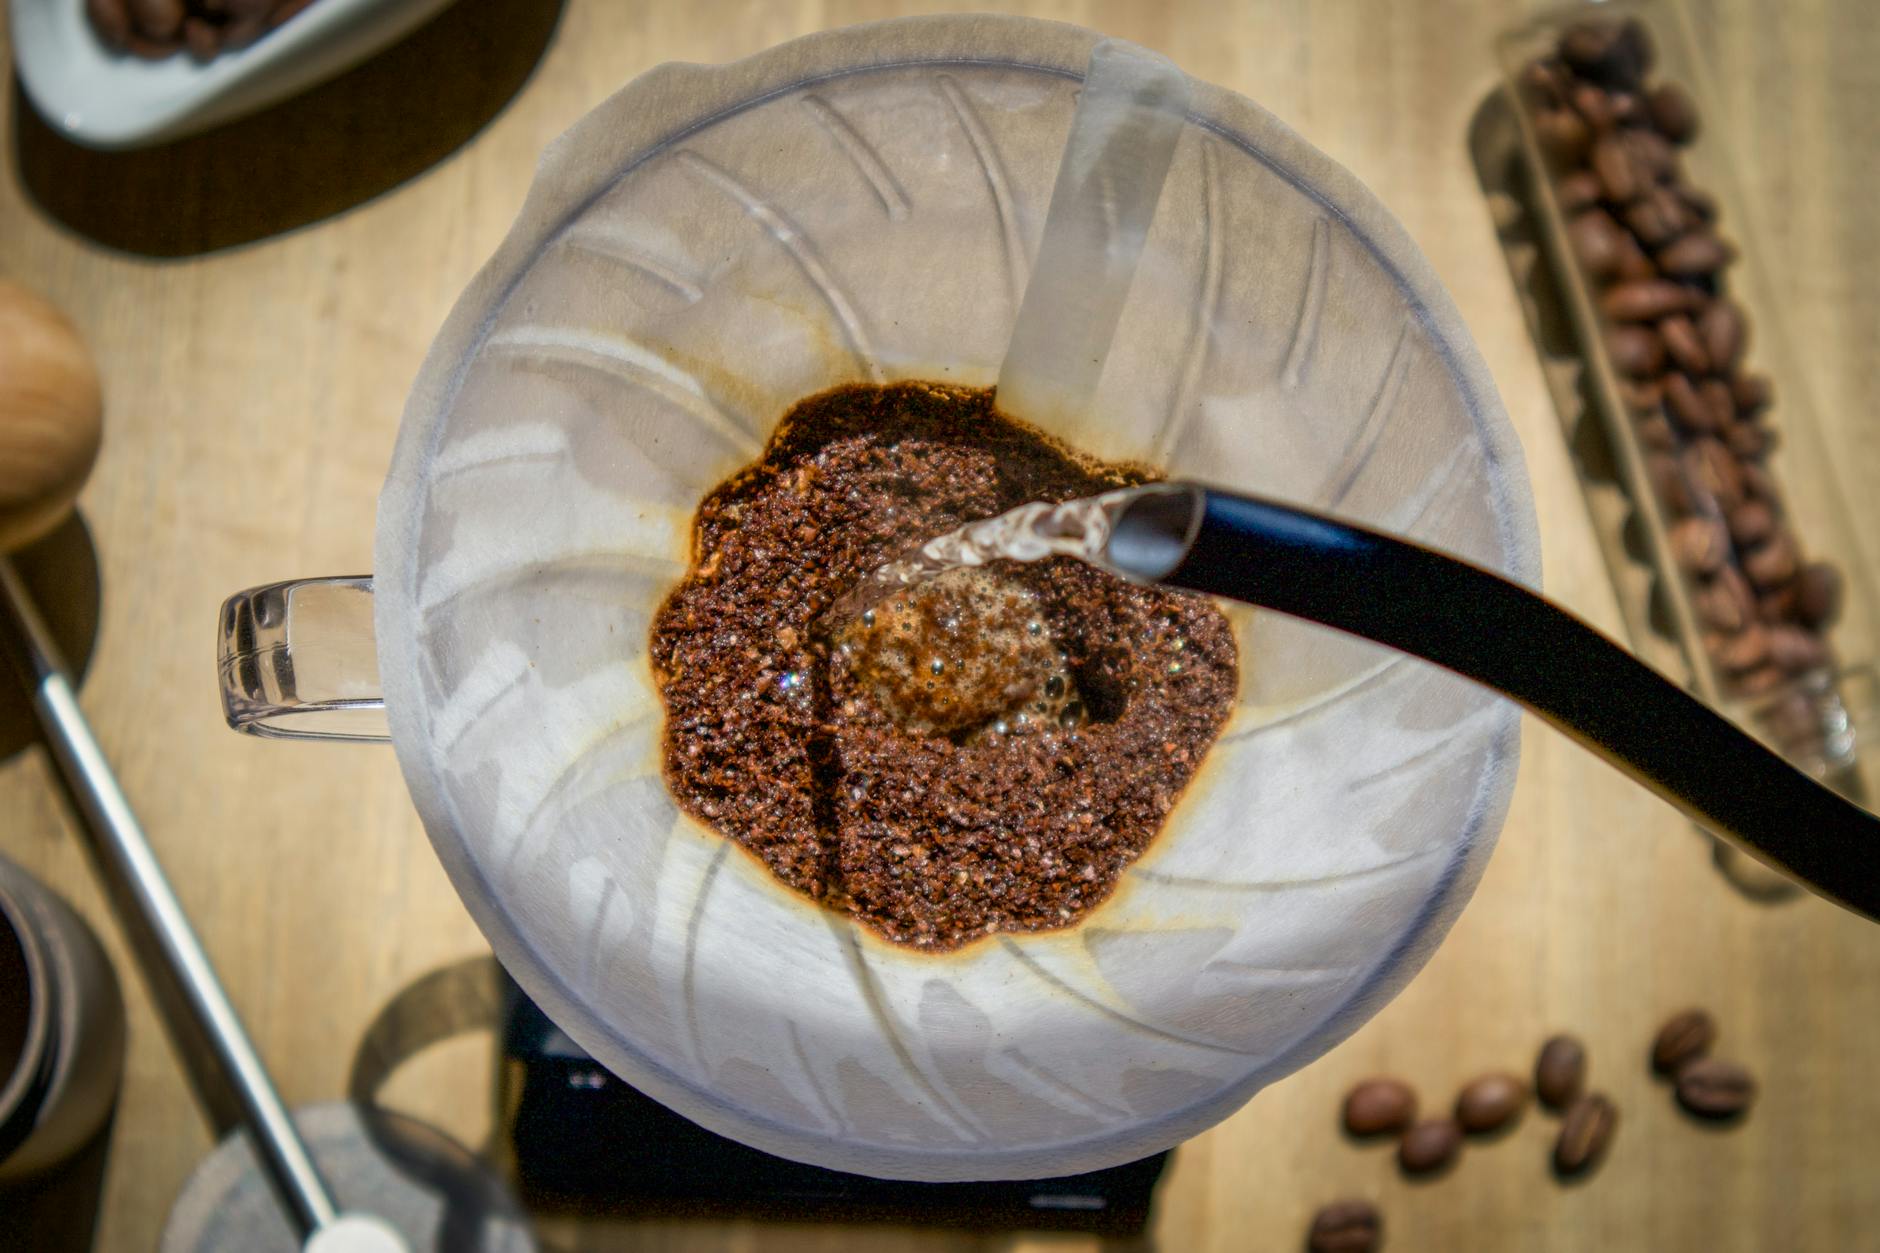
When your water temperature drops significantly during the brew, this process is disrupted. The brew starts hot, extracting normally, but as it cools, the water loses its solvent power. It becomes less and less effective at dissolving those crucial sugars. The result? The extraction stalls, leaving you with a cup that is high in acidity but lacks the balancing sweetness. This is the classic taste of under-extraction. Preventing thermal loss isn’t about just starting with hot water; it’s about maintaining a stable temperature in the coffee and water mixture, or slurry, to ensure a full and even extraction from start to finish.
The pre-brew ritual: setting the stage for stability
The most significant heat loss often occurs within the first 30 seconds of brewing, as your hot water makes contact with cold brewing equipment. Your best defense is a thorough pre-heating routine. This step is not optional if you’re chasing consistency. Every surface the hot water will touch must be pre-heated to minimize the initial temperature shock.
Follow this simple but effective ritual:
- Heat extra water: When you fill your kettle, add about 30-40% more water than you need for the actual brew. This extra water is for pre-heating.
- Rinse the filter and heat the brewer: Place your paper filter in your dripper (like a V60 or Kalita Wave) and place it on top of your server or mug. Pour hot water from the kettle over the filter, fully saturating it. This not only washes away any paper taste but, more importantly, it aggressively heats both the brewer and the vessel below.
- Let it sit: Don’t discard the hot water immediately. Let it sit in the server for a minute while you grind your beans. This allows the heat to fully transfer and saturate the material. For immersion brewers like a French press or AeroPress, simply fill them with hot water and let them stand.
- Discard and brew: Just before you’re ready to add your coffee grounds, discard the pre-heating water. You will now be brewing into a stable, hot environment that won’t steal precious energy from your extraction.
Material matters: choosing your brewing equipment wisely
Not all coffee brewers are created equal when it comes to heat retention. The material your brewer is made from plays a massive role in how much heat it will absorb from the slurry and radiate into the air. Understanding the thermal properties of your gear allows you to adapt your technique and anticipate potential heat loss.
For example, a thick, ceramic dripper has high thermal mass, meaning it can absorb a lot of heat. If it’s not thoroughly pre-heated, it will act as a major heat sink and dramatically cool your brew. Plastic, surprisingly, is a much better insulator. It has a low thermal mass and doesn’t steal nearly as much heat, making it a very stable and consistent choice for brewing. Glass falls somewhere in the middle but is very susceptible to the ambient temperature of the room. Double-walled stainless steel brewers and servers are the champions of heat retention, providing an insulated environment that minimizes thermal loss.
| Material | Heat Retention Capability | Pre-heating Importance | Notes |
|---|---|---|---|
| Plastic (e.g., Hario V60 Plastic) | Good | Important | Low thermal mass means it doesn’t steal much heat, offering great temperature stability. |
| Ceramic | Moderate | Crucial | High thermal mass; will severely drop slurry temperature if not aggressively pre-heated. |
| Glass (e.g., Chemex) | Poor to Moderate | Crucial | Loses heat quickly to the environment. Pre-heating is non-negotiable for a good extraction. |
| Stainless Steel (Double-Walled) | Excellent | Recommended | The best material for insulation. Pre-heating is still good practice but less critical. |
Advanced techniques for temperature management
Once you’ve mastered pre-heating and understand your equipment, you can employ more advanced techniques to lock in your brew temperature. The goal is to create as stable a system as possible. One simple trick is to use a lid. For a French press, this is built-in, but for a pour-over, you can rest a small saucer or a dedicated lid over the top of the dripper during the initial “bloom” phase. This traps steam and prevents significant heat from escaping from the surface of the slurry.
You can also consider temperature offsetting with your kettle. Knowing that your slurry will inevitably lose a few degrees upon contact, you can start with water that is slightly hotter than your target brew temperature. For instance, if you want your slurry to maintain an average of 93°C (200°F), you might set your kettle to 95-96°C (203-205°F) to compensate for the initial drop. Finally, your pouring technique matters. A slow, continuous pour helps maintain a larger thermal mass in the brewer, while multiple small “pulse” pours can cause the slurry to lose more heat to the air between each pour. Experiment with your technique to see what keeps your brew steamy and stable.
Conclusion
Controlling thermal loss is the bridge between inconsistent brewing and repeatable excellence. As we’ve seen, it’s a game of managing energy. By understanding that a drop in temperature leads to under-extraction and sour coffee, you can begin to fight back. The battle is won through a disciplined pre-brew ritual, where pre-heating your brewer, server, and filter becomes second nature. It’s influenced by choosing equipment made from materials like plastic or insulated steel that aid your quest for stability. Finally, it’s refined with advanced techniques like temperature offsetting and strategic pouring. By consciously managing every stage where heat can escape, you take control away from chance and place it firmly in your hands, unlocking the true potential of your coffee beans with every single brew.
 No products in the cart.