The Gaggia group head is a time-tested component, central to delivering the classic espresso profiles these machines are known for. For the experienced home barista, maintaining this component is not just about hygiene; it is a critical practice for ensuring shot-to-shot consistency and preserving the integrity of each extraction. Over time, the accumulation of coffee solids and oxidized oils within the group head can introduce off-flavors, disrupt water dispersion, and contribute to channeling. This guide provides a detailed, step-by-step process for cleaning the Gaggia group head, tailored for users who understand the fundamentals of espresso mechanics and seek to maintain their equipment at a professional standard. It is a direct approach to a necessary maintenance task.
Understanding the group head assembly
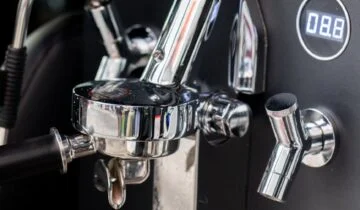
Before disassembling the group, it is helpful to understand its core components. The Gaggia group head assembly consists of three primary parts that require regular attention: the shower screen, the shower holding plate, and the group gasket. The shower screen provides the final dispersion of water over the coffee bed. Directly behind it, the heavier brass or aluminum shower holding plate secures the screen and contains larger water channels. The rubber or silicone group gasket, seated in a groove within the group head, creates the seal with the portafilter. Coffee fines and oils build up on all of these surfaces, impeding water flow and creating a source of rancid flavors if left uncleaned.
Routine cleaning: daily and weekly tasks
Consistent, low-effort maintenance is foundational. A daily routine should include a simple water backflush using a blind basket. This process dislodges fresh coffee particles from the shower screen and the three-way solenoid valve, preventing immediate buildup. After the final shot of the day, run a few backflush cycles with only water, then wipe the shower screen and gasket with a damp cloth to remove surface oils.
On a weekly basis, a more thorough backflush with a dedicated espresso machine cleaning powder is necessary. This detergent is formulated to dissolve stubborn coffee oils that water alone cannot remove. Perform the backflushing cycle according to the detergent manufacturer’s instructions, typically involving several cycles of engaging and disengaging the pump. Afterward, flush the group thoroughly with water to remove any residual detergent. This weekly task significantly extends the period between necessary deep cleanings.
A step-by-step guide to deep cleaning
A full deep clean should be performed every one to three months, depending on usage. This process involves the complete disassembly and detailed scrubbing of the group head components.
- Step 1: Gather your tools. You will need a flat-head screwdriver that fits the central shower screen screw, a group head brush, a small pick or awl for gasket removal, a blind portafilter basket, and an appropriate cleaning detergent.
- Step 2: Remove the screen and holding plate. With the machine cool, insert the screwdriver into the central screw of the shower screen and turn it counter-clockwise. The screw, screen, and the heavier holding plate will come loose. Take care not to misplace the screw.
- Step 3: Soak and scrub the components. Prepare a solution of hot water and espresso machine cleaner in a small bowl. Submerge the shower screen and holding plate in the solution for at least 30 minutes. After soaking, use a stiff brush to scrub away any remaining residue. Rinse them thoroughly with fresh water.
- Step 4: Clean the group gasket and interior. Use a pick or a small, blunt tool to carefully pry the old gasket out of its seat in the group head. Once removed, use a group head brush and a damp cloth to thoroughly clean the inside of the group head, paying special attention to the groove where the gasket sits.
- Step 5: Inspect and replace the gasket. Examine the old gasket. If it appears brittle, cracked, or excessively hard, it must be replaced to ensure a proper seal. Even if it looks acceptable, gaskets are wear items and routine replacement is good practice. Install the new gasket by pressing it firmly and evenly into the groove, ensuring it is fully seated.
- Step 6: Reassemble the group head. Place the clean shower holding plate back into position, followed by the shower screen. Insert the screw and tighten it until it is snug. Do not overtighten, as this can damage the components.
When to perform a deep clean
Beyond a time-based schedule, several performance indicators signal the need for a deep clean. If you notice persistent channeling issues that cannot be attributed to puck preparation, uneven water flow from the shower screen may be the cause. Another clear sign is a portafilter that no longer seals tightly against the group, which often points to a compressed or dirty gasket. Finally, any noticeable bitterness or rancid off-tastes in the espresso that are not related to the coffee itself should prompt an immediate and thorough cleaning of the group head and portafilter components.
Mastering the maintenance of a Gaggia group head is a fundamental skill for any dedicated manual espresso user. Integrating these cleaning protocols into your workflow moves beyond simple machine ownership and into the realm of technical proficiency. A clean group head is not an optional detail; it is the starting point for achieving clear, consistent, and high-quality extractions. By understanding the function of each component and the signs of buildup, you can ensure your machine performs as intended for years. Regular maintenance preserves the distinct character of your coffee, and the necessary tools for these tasks are readily available from suppliers like papelespresso.com.


 No products in the cart.