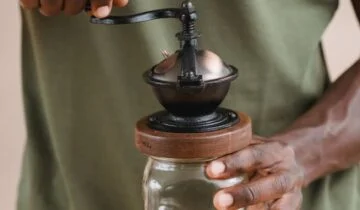
Dialing in light roast coffee on a modded Gaggia Classic
Extracting light roast coffee as espresso presents one of the most significant challenges for a home barista. These dense, less soluble beans demand a level of precision that standard consumer machines often cannot provide. For users of a modified Gaggia Classic, however, this challenge becomes an achievable and rewarding pursuit. A Gaggia Classic equipped with modifications for temperature and pressure control is transformed into a highly capable manual espresso machine. This article provides a systematic guide for experienced baristas to navigate the specific variables involved in dialing in light roasts on this popular platform. The focus is on a repeatable methodology, moving beyond guesswork to achieve clarity and sweetness in the cup.
Understanding the challenge of light roasts
Unlike their medium or dark roasted counterparts, light roast coffee beans are significantly harder and denser. The roasting process has not progressed long enough to make the bean structure brittle and porous. This density makes them less soluble, meaning it is more difficult for water to penetrate the coffee grounds and extract the desirable flavor compounds. As a result, standard extraction parameters often lead to under-extraction, producing a cup that is overwhelmingly sour and thin-bodied.
The primary obstacles are managing water temperature and pressure. Without precise temperature stability, the water may not be hot enough to effectively dissolve the coffee solids. Similarly, the high, unregulated pressure of a stock machine can fracture the coffee puck, creating channels where water bypasses the grounds. This leads to a shot that is simultaneously sour and bitter—a clear sign of uneven extraction. A modified Gaggia Classic directly addresses these limitations.
Essential modifications for the Gaggia Classic
To properly handle light roasts, a Gaggia Classic benefits immensely from a few key upgrades that grant the user manual control over the brewing process. A Proportional-Integral-Derivative (PID) controller is fundamental, as it provides stable and accurate brew temperatures far beyond the wide fluctuations of the stock thermostat. For light roasts, the ability to set and hold a specific temperature, such as 95°C, is critical for achieving adequate solubility.
Equally important is control over brew pressure. The factory setting of a Gaggia Classic is often 12 bars or higher, which is excessive for delicate espresso. Adjusting the over-pressure valve (OPV) to a peak of 9 bars is a common starting point. However, the most impactful modification for light roasts is a flow control device, often implemented with a dimmer switch. This allows the barista to manually profile the pressure throughout the shot, enabling a crucial technique: pre-infusion.
A systematic approach to dialing in
A methodical process is essential when working with so many variables. The goal is to isolate one parameter at a time to observe its effect on the final taste.
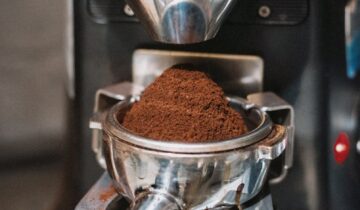
- Establish a baseline: Start by fixing your dose and puck preparation. Use a consistent dose, for example, 18 grams in a 20-gram basket. Meticulous puck preparation is not optional. A thorough Weiss Distribution Technique (WDT) to break up clumps, followed by level distribution and a firm, flat tamp, will minimize the risk of channeling. Your grinder must be capable of making very fine adjustments.
- Set the temperature: With a PID, you have precise control. Light roasts generally require higher brew temperatures to increase solubility. A good starting point is between 94–96°C (201–205°F). This will be one of your primary tools for balancing acidity.
- Execute a pressure profile: This is where the dimmer mod becomes invaluable.
- Pre-infusion: Begin the shot at a low pressure, around 2-3 bars. Hold this until the first drops of espresso appear from the portafilter spouts or bottomless filter. This phase, which may last 8–12 seconds, gently saturates the puck, reducing the chance of it fracturing under full pressure.
- Ramp and hold: Smoothly increase pressure to your target, typically between 8 and 9 bars. Hold this peak pressure through the main phase of the extraction.
- Tapering: As the shot approaches its target yield (e.g., 36 grams out from an 18-gram dose), you can gradually decrease the pressure to finish the extraction gently. This can help reduce the extraction of astringent compounds toward the end.
The following table illustrates a sample profile:
| Phase | Target Pressure | Typical Duration | Objective |
|---|---|---|---|
| Pre-infusion | 2–3 bars | 8–12 seconds | Saturate the puck evenly |
| Ramp-up | 3 to 9 bars | 3–5 seconds | Gradually build pressure |
| Peak Extraction | 9 bars | 15–20 seconds | Extract core flavors |
| Tapering | 9 down to 4 bars | 5–7 seconds | Reduce astringency, smooth finish |
Tasting and troubleshooting
Your palate is the ultimate guide. Once you have a repeatable workflow, make small adjustments based on taste.
- Sourness: This is the most common sign of under-extraction. To correct it, you can increase the brew temperature by a degree, grind finer to slow the shot, or extend the pre-infusion time to increase saturation. Each change should be made one at a time to isolate its effect.
- Bitterness or astringency: This points to over-extraction or, more likely, channeling. First, review your puck preparation to ensure it is flawless. If the issue persists, consider grinding slightly coarser or reducing the brew temperature. A bottomless portafilter is an excellent diagnostic tool for identifying channeling.
- Muddled flavors: If the shot lacks clarity and the distinct flavor notes of the bean are not present, the cause is almost always an uneven extraction. The solution is to focus on improving puck preparation and ensuring the pre-infusion phase fully and evenly saturates the coffee bed before you apply full pressure.
Mastering light roast espresso on a modified Gaggia Classic is a process of disciplined experimentation. It requires moving beyond a simple brew ratio and shot time, instead focusing on the interplay between temperature and a dynamic pressure profile. The key is to leverage the machine’s modifications—particularly PID temperature control and manual flow profiling—to gently and thoroughly extract the complex flavors locked inside these dense beans. By establishing a consistent baseline and adjusting one variable at a time based on taste, you can transform challenging coffees into balanced, sweet, and articulate espresso. For baristas seeking to push their skills, necessary tools and accessories to support this process are available at papelespresso.com.
 No products in the cart.