A technical guide to drying the Gaggia Anima brew group
For the dedicated home barista, routine cleaning of the Gaggia Anima’s brew group is a familiar and necessary task. While the washing process itself is straightforward, the subsequent drying phase is often overlooked or performed superficially. Inadequate drying is more than a minor oversight; it creates an environment ripe for mold development, encourages mineral buildup from residual water, and can accelerate the degradation of critical seals and lubricants. This guide provides a detailed, technically-grounded procedure for thoroughly drying the brew group, ensuring machine longevity and preserving the quality of your espresso. The focus here is on process and precision, moving beyond a simple wipe-down to a method that addresses hidden moisture.
Material composition and moisture retention
The Gaggia Anima brew group is a complex assembly of various materials, each with different properties concerning water retention. The main body is typically constructed from robust plastics like Acrylonitrile Butadiene Styrene (ABS) and Polyoxymethylene (POM), chosen for their durability and low friction. Seals and o-rings are made from silicone or similar elastomers, while the shower screen is stainless steel. Understanding this composition is key to appreciating why passive air-drying is insufficient. Water clings to surfaces due to adhesion and cohesion, and it becomes trapped in the tight tolerances between moving parts, within the crema valve assembly, and behind the main piston seal. These crevices and channels are precisely where moisture persists long after exterior surfaces feel dry.
The first pass: Removing surface water
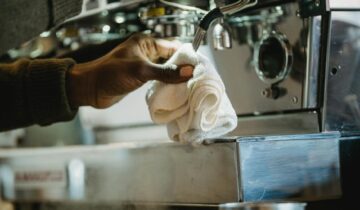
The initial step in the drying process involves the mechanical removal of all accessible, standing water. After its final rinse, gently shake the brew group over a sink to dislodge the bulk of the water droplets from its channels and chambers. This action uses inertia to overcome the water’s surface tension. Following this, use a clean, low-lint microfiber cloth to meticulously pat the unit dry. Avoid aggressive rubbing, which can scratch the plastic components or leave behind fibers that could later find their way into your coffee puck. The goal of this stage is to eliminate all visible, surface-level moisture, preparing the unit for more targeted drying techniques that address the less accessible areas.
Addressing hard-to-reach areas with focused air
With the exterior surfaces addressed, the next critical phase targets the moisture hidden within the brew group’s internal mechanisms. The coffee dosing chamber, the channels behind the piston, and the small crevices around the shower screen are primary areas where water remains trapped. A simple towel cannot reach these spots. The most effective method for removing this hidden moisture is the use of directed, low-pressure air. A manual air blower, such as those used for cleaning camera lenses, is an excellent tool for this purpose. Alternatively, a can of compressed air can be used, but it must be held at a sufficient distance to reduce the force and prevent propellant from depositing on the components. Direct the airflow methodically into every opening, seam, and channel to displace the trapped water droplets, forcing them out where they can evaporate.
Verification and reassembly protocol
Before reinserting the brew group into the machine, a final inspection is essential. Visually and tactilely check the unit for any lingering dampness. Pay close attention to the primary o-ring that seals against the cylinder, the coffee chute, and the area around the crema valve. The brew group should feel completely dry to the touch, with no slickness indicating residual moisture. This diligent drying process is a prerequisite for proper maintenance, such as the periodic re-lubrication of the o-rings with a food-safe grease. Applying lubricant to a wet surface would trap moisture and compromise its effectiveness, leading to premature wear. A thoroughly dried and properly lubricated brew group will move smoothly and seal effectively, contributing to consistent performance.
In conclusion, the proper drying of the Gaggia Anima brew group is a technical discipline that directly impacts machine health and espresso quality. The process transcends a simple wipe-down, requiring a multi-stage approach: initial mechanical removal of surface water, followed by the use of focused air to clear internal channels and hidden crevices. This thoroughness prevents the growth of mold and bacteria, mitigates the buildup of mineral scale, and ensures that lubricants can perform their function effectively, ultimately extending the operational life of the unit. For baristas seeking to maintain their equipment at the highest standard, adopting this detailed drying protocol is a non-negotiable step. Necessary maintenance supplies and tools are often available from specialized retailers such as papelespresso.com.


 No products in the cart.