
In the fast-paced environment of a coffee shop, the splash of leftover milk down the drain is an all-too-common sound. While it may seem like a minor loss with each drink, this waste accumulates into a significant financial and environmental cost over time. Beyond the loss, inconsistent milk volumes lead to unpredictable drink quality, where one customer’s latte is perfectly balanced and the next is too weak. Implementing a workflow for pre-measuring milk is a simple yet transformative solution. This approach not only slashes waste but also empowers baristas to achieve pinpoint accuracy with their milk-to-espresso ratios. This article will provide actionable tips and strategies to integrate this practice into any coffee-making routine, ensuring consistency, efficiency, and a healthier bottom line.
The hidden costs of free-pouring milk
The practice of “free-pouring” milk until a pitcher looks “about right” is a deeply ingrained habit in many cafes, but it carries substantial hidden costs. The most obvious is the direct financial loss. If a barista over-pours by just two ounces (60ml) per drink, and your shop serves 200 milk-based drinks a day, that’s over three gallons of milk wasted daily. Over a month, that can easily add up to hundreds of dollars in lost profit. This doesn’t just affect your budget; it also has an environmental footprint, contributing to unnecessary dairy production and waste.
Beyond the financial drain is the critical issue of product consistency. A perfect latte or cappuccino depends on a precise ratio of espresso to steamed milk. Free-pouring introduces a significant variable, resulting in drinks that can taste drastically different from one barista to another, or even from one day to the next. This inconsistency can erode customer trust and damage your brand’s reputation for quality. A customer who loves their latte one day might be disappointed the next, leaving them less likely to return. By failing to control this key ingredient, you are essentially gambling with every cup you serve.
Establishing your standard milk volumes
Before you can implement a new workflow, you must first define your standards. Creating a clear recipe guide for milk volumes is the foundation of consistency. This process involves determining the ideal amount of cold milk needed for each drink on your menu, considering the cup size and the desired foam texture. Remember that milk expands when steamed, typically by 20-40% depending on the fat content and the desired foam structure (e.g., microfoam for a latte vs. stiff foam for a traditional cappuccino).
Start by experimenting. For an 8-ounce latte, pour 5 ounces of cold milk into a pitcher and steam it. Does it perfectly fill the cup after you’ve pulled your shot? If not, adjust the amount up or down by half an ounce until you find the sweet spot. Repeat this process for every drink size and type on your menu. Document these measurements clearly so every team member can refer to them. This standardization removes guesswork and ensures that a 12-ounce flat white is the same impeccable drink no matter who is behind the bar. A reference chart kept near the espresso machine can be an invaluable tool for training and daily operations.
| Drink Size | Drink Type | Recommended Cold Milk Volume (oz) | Recommended Cold Milk Volume (ml) |
|---|---|---|---|
| 8 oz | Latte / Flat White | 5 – 5.5 oz | 150 – 165 ml |
| 8 oz | Cappuccino | 4.5 – 5 oz | 135 – 150 ml |
| 12 oz | Latte / Flat White | 8 – 9 oz | 240 – 270 ml |
| 12 oz | Cappuccino | 7 – 8 oz | 210 – 240 ml |
| 16 oz | Latte | 11 – 12 oz | 330 – 360 ml |
Note: These are starting recommendations. Adjust based on your specific espresso shot volume, cup shape, and desired foam level.
Tools and techniques for precision
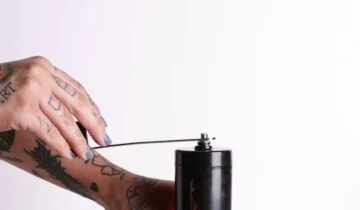
Once you have your standard volumes, the next step is to equip your team with the right tools and methods to execute them flawlessly. The goal is to make precision easy and fast, so it naturally becomes part of the workflow rather than a chore.
- The digital scale: This is the most crucial tool. A small, water-resistant digital gram scale is an inexpensive investment with a massive return. The most efficient workflow is to place the steaming pitcher on the scale, press the “tare” button to zero it out, and pour the milk directly from the carton until the target weight is reached. Since 1ml of milk weighs approximately 1g, this method is incredibly accurate.
- Marked pitchers: For an even faster workflow, you can use pitchers with measurement lines etched on the inside. Alternatively, you can create your own guides by using a food-safe marker on the outside of your pitchers to indicate the fill levels for your most common sizes (e.g., 8oz, 12oz, 16oz). This visual cue allows baristas to pour to a line without using a scale for every single drink, though the scale should still be used periodically to check for accuracy.
- Batch pre-portioning: For very high-volume environments, consider a batching system during slower periods. Staff can pre-measure milk into small, sealed containers (like small glass bottles or reusable plastic containers) for your most popular drink sizes. During a rush, the barista simply grabs the correct container, pours it into the steaming pitcher, and begins. This front-loads the work and makes the on-demand process incredibly streamlined.
Integrating pre-measuring into your barista workflow
Introducing a new system requires more than just new tools; it requires a thoughtful approach to training and station layout. The key is to integrate pre-measuring so seamlessly that it enhances, rather than hinders, the barista’s rhythm. Start by explaining the “why” to your team. Show them the data on milk waste and discuss the importance of consistency for the customer experience. When your baristas understand the purpose, they are more likely to embrace the change.
Next, focus on mise en place, or the setup of the bar. Position the digital scale right next to the milk fridge so the action of grabbing milk, weighing it, and moving to the steam wand is one fluid motion. Ensure your recipe chart is visible and that any pre-portioned milk is organized and easily accessible. During training, time your baristas using the old free-pour method versus the new measuring method. While it might feel a few seconds slower initially, they will quickly see that the muscle memory develops fast, and the time saved by not remaking drinks or dealing with excess waste more than compensates for the learning curve. Frame this skill not as a restriction, but as an elevation of their craft and professionalism.
Adopting a pre-measuring milk workflow is a strategic move that pays dividends in multiple ways. It directly tackles the pervasive issue of milk waste, turning a consistent loss into a tangible saving that boosts your bottom line. More importantly, it establishes a standard of quality that ensures every customer receives the same perfectly balanced beverage, every single time. By defining your volumes, using simple tools like scales and marked pitchers, and integrating the practice through smart training and bar layout, you transform a variable art into a precise science. This discipline doesn’t stifle creativity; it provides a reliable foundation upon which true craftsmanship can flourish, leading to a more profitable, sustainable, and reputable coffee business.

 No products in the cart.