Why your cappuccino tastes watery and how to fix it
There’s nothing quite like the dream of a perfect homemade cappuccino: a rich, intense espresso base beautifully balanced by sweet, velvety steamed milk. Yet, the reality for many home baristas is a frustratingly thin, watery, or bland-tasting cup. You’ve invested in the machine and the beans, but the result tastes more like coffee-flavored hot milk than a luxurious cafe treat. If this sounds familiar, you’re not alone. The good news is that a watery cappuccino is a solvable problem. It almost always comes down to a few key variables in either your espresso extraction or your milk preparation. This guide will walk you through the common culprits and provide clear, actionable steps to transform your disappointing drink into a delicious masterpiece.
The foundation: Perfecting your espresso shot
Before we even think about milk, we must address the heart of the cappuccino: the espresso. A weak, poorly extracted espresso shot is the number one cause of a watery drink. No amount of perfectly frothed milk can save a flawed foundation. The goal is to produce a shot that is concentrated, syrupy, and full of complex flavors. If your espresso runs out of the portafilter too quickly (in less than 20-25 seconds), looks pale, and has a thin, bubbly crema, you are dealing with under-extraction. This means the water passed through the coffee grounds too fast to pull out the desirable oils and solids.
To fix this, focus on these three elements:
- Grind size: This is the most critical factor. Your coffee is likely ground too coarsely. Adjust your grinder to a finer setting. This creates more resistance, slowing down the water and allowing for proper extraction. Make small, incremental changes until your shot takes about 25-30 seconds to pull.
- Dose: Are you using enough coffee? Check the recommended basket size for your portafilter (e.g., 18-20 grams) and use a scale to weigh your grounds. An insufficient dose leaves too much empty space, leading to a fast, watery shot.
- Tamping: A firm and level tamp is essential. Tamping compresses the grounds into a uniform puck, ensuring the water flows through it evenly. If your tamp is too light or crooked, the water will find the path of least resistance (a phenomenon called channeling), resulting in a weak shot.
Mastering your espresso is the first and most important step. A well-pulled shot should taste rich and balanced on its own, a sign it’s ready to be the star of your cappuccino.
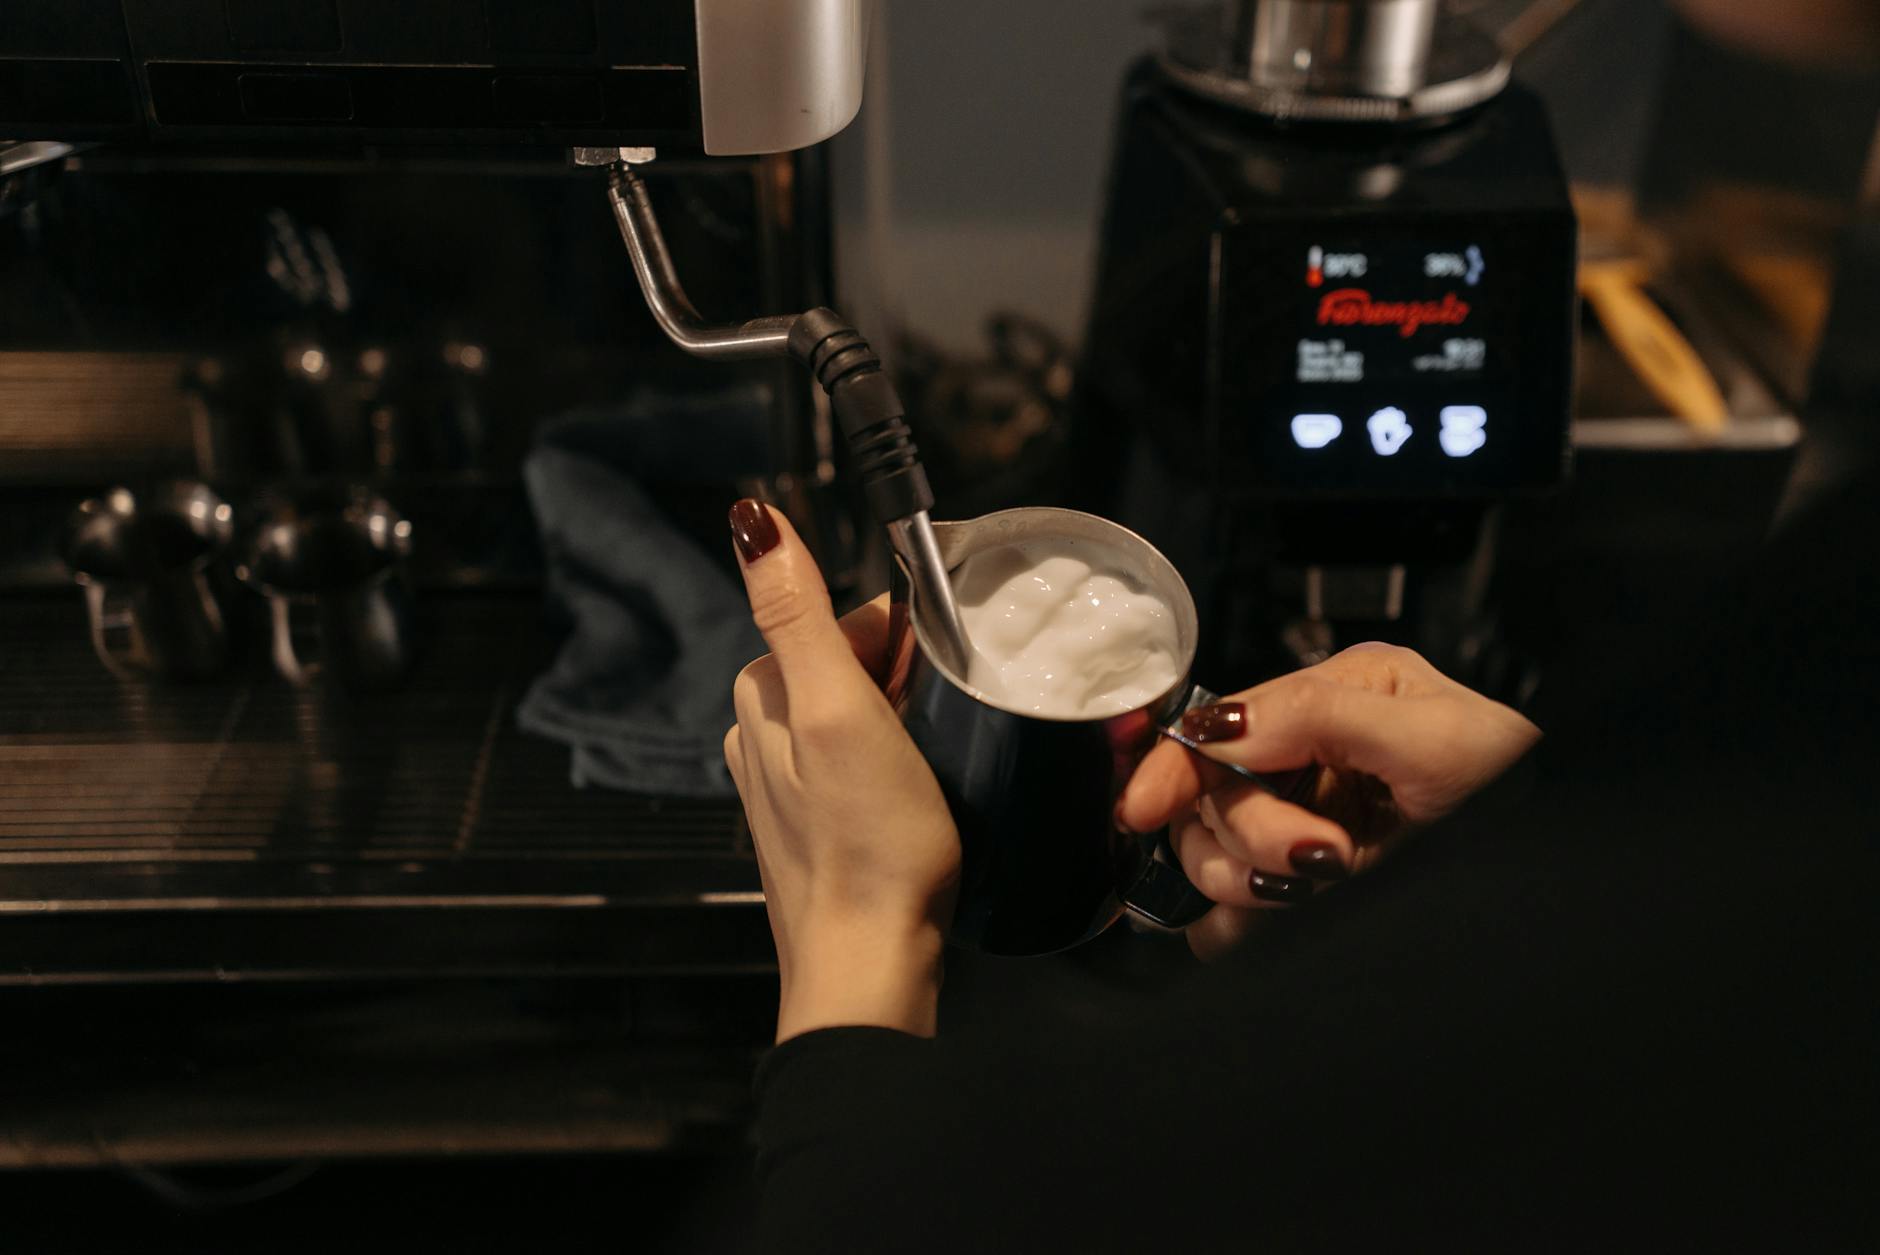
The art of milk: From frothed milk to silky microfoam
The second pillar of a great cappuccino is the milk. The mistake many people make is creating a stiff, airy foam full of large bubbles. This kind of foam sits on top of the liquid like a meringue and doesn’t integrate with the espresso. As you drink it, you get a hit of weak coffee followed by a mouthful of dry foam, which can create a watery sensation. What you’re actually aiming for is microfoam—a velvety, liquid texture with bubbles so small they are invisible to the naked eye. This silky milk mixes completely with the espresso, creating a single, harmonious beverage.
Achieving microfoam requires technique. Start with very cold, fresh whole milk, as its fat and protein content is ideal for creating a stable, creamy texture. When you begin steaming, keep the tip of the steam wand just below the surface of the milk to introduce air. You should hear a gentle “psst” or hissing sound. Only do this for a few seconds to incorporate the right amount of air. Then, plunge the wand deeper into the milk pitcher to create a whirlpool. This vortex breaks down any large bubbles and textures the milk into that desired glossy, paint-like consistency. Be careful not to overheat the milk (above 155°F or 68°C), as this will scorch it and destroy its natural sweetness.
The golden ratio: Balancing espresso and milk
You’ve pulled a perfect espresso shot and steamed beautiful microfoam. The final piece of the puzzle is the ratio. A traditional Italian cappuccino follows a rough rule of thirds: 1/3 espresso, 1/3 steamed milk, and 1/3 foam. However, the most crucial element often overlooked is the cup size. If you are pouring a single shot of espresso (about 1-2 oz) into a giant 12 oz mug, your drink will inevitably taste weak and milky, regardless of how well you prepared the components.
The ideal cappuccino cup is small, typically 5-6 ounces (150-180 ml). This size ensures that the bold flavor of the espresso remains prominent and isn’t drowned out by an excessive amount of milk. When you pour, the dense microfoam should integrate with the espresso, creating a rich brown color, with a final, thinner cap of white foam on top. Understanding how this ratio defines the drink is key. See how it compares to other popular espresso-based drinks:
| Drink | Espresso Volume | Milk Volume | Foam Texture |
|---|---|---|---|
| Cappuccino | 1 Part | 2 Parts | Thick, velvety foam cap (1-2 cm) |
| Latte | 1 Part | 3-4 Parts | Thin layer of foam (<1 cm) |
| Flat White | 1 Part | 2-3 Parts | Very thin, integrated microfoam |
Using the right-sized cup forces you to respect the ratio, ensuring your cappuccino has the punchy, coffee-forward flavor it’s famous for.
Troubleshooting your setup: Water and machine
If you’ve dialed in your espresso and milk technique but still find something lacking, it’s time to look at the less obvious factors: your equipment and your water. Coffee is over 98% water, so the quality of your H2O has a significant impact on the final taste. If you’re using very hard tap water, the high mineral content can interfere with extraction, leading to a dull or chalky taste. Try using a simple charcoal filter pitcher or bottled spring water to see if it makes a difference. You might be surprised at the improvement in clarity and flavor.
Finally, consider your machine’s health. An espresso machine that isn’t at the correct temperature or pressure will struggle to produce a good shot. Ensure your machine is fully preheated before pulling a shot—this can take 15-30 minutes for some models. Regular maintenance is also non-negotiable. A machine clogged with old coffee oils or mineral scale from water will produce bitter and inconsistent espresso. Follow your manufacturer’s instructions for regular cleaning cycles, backflushing (if applicable), and descaling to keep your equipment in peak condition and ready to brew a delicious, non-watery cappuccino.
Fixing a watery cappuccino is a journey of refinement, not a quest for a single secret trick. It begins by honoring the foundation: a properly extracted espresso shot that is rich, syrupy, and full-bodied. This requires dialing in your grind size, using the correct dose of fresh coffee, and applying a firm, even tamp. From there, you must elevate your milk from a bubbly froth to a silky, integrated microfoam through proper steaming technique. Finally, you bring it all together by respecting the classic espresso-to-milk ratio, a balance made possible by using the correct 5-6 ounce cup size. By methodically addressing each of these stages, you can diagnose where your process is failing and make the necessary adjustments. With a little practice and attention to detail, that watery, disappointing cup will become a thing of the past.


 No products in the cart.