Welcome to the next step in your home espresso journey. If you own a Gaggia Classic or a similar Gaggia model, you likely started with the included pressurized portafilter basket. This clever device is designed to be forgiving, helping you pull a decent-looking shot with “crema” even with pre-ground coffee or an inconsistent grind. However, the secret to unlocking your machine’s true potential and crafting café-quality espresso lies in making the switch to a non-pressurized basket. This transition can seem daunting, as it demands more precision and a deeper understanding of the brewing process. This article will guide you through every stage of this upgrade, from understanding the fundamental differences to acquiring the right tools, mastering the new workflow, and troubleshooting common issues you might encounter along the way.
Understanding the difference: Pressurized vs. non-pressurized baskets
Before diving into the process, it’s crucial to understand why this change is so significant. The two types of baskets operate on fundamentally different principles, directly impacting your control over the final cup.
A pressurized basket, often called a “dual-wall” basket, is essentially a basket within a basket. The inner wall has hundreds of tiny holes, just like a standard basket, but the outer wall has only a single, tiny exit hole. When water is forced through the coffee grounds, it builds up behind this single exit hole, artificially creating the pressure needed for extraction. This design cleverly compensates for a less-than-perfect grind or tamp. The result is a consistent, albeit less nuanced, shot with a thick, bubbly foam that mimics true crema. It’s a fantastic training tool, but it puts a ceiling on the quality you can achieve.
A non-pressurized basket, or “single-wall” basket, is the professional standard. It’s a simple metal cup perforated with hundreds of precisely drilled holes on the bottom. With this basket, there’s nothing to artificially create pressure. Instead, the resistance required to build up the necessary 9 bars of pressure must come entirely from the coffee puck itself. This means the quality of your espresso is now directly in your hands. It depends entirely on the fineness and uniformity of your grind, how evenly you distribute the grounds, and the pressure of your tamp. The reward for this effort is complete control over extraction and the ability to produce genuine, rich crema and a cup with incredible depth and flavor clarity.
The essential toolkit for the upgrade
Switching the basket itself is easy, but making it work requires a few key pieces of equipment. A non-pressurized basket is only one part of a system that works together to produce great espresso. Without the right support tools, you will likely only experience frustration.
- A capable burr grinder: This is the single most important investment you will make. The blade grinder in your cupboard or a low-quality burr grinder simply cannot produce the fine, consistent grounds required. You need an espresso-capable burr grinder that allows for tiny, incremental (or stepless) adjustments to fine-tune your shot. This is non-negotiable.
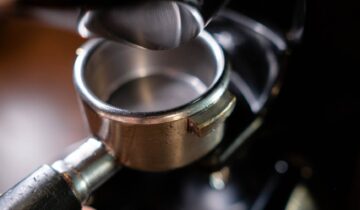
- A non-pressurized basket: You’ll need a standard 58mm single-wall basket to fit your Gaggia portafilter. They come in various sizes, but starting with an 18-gram or 20-gram basket is a popular choice.
- A proper tamper: The flimsy plastic tamper that comes with the machine won’t do. You need a solid, heavy metal tamper that fits the basket snugly (a 58.5mm tamper is often recommended for a precision fit) to apply firm, even pressure.
- A digital scale: Precision is key. You need a scale accurate to at least 0.1 grams to measure your dose (the dry coffee grounds) and your yield (the liquid espresso in the cup). This is the only way to achieve repeatable results.
- Recommended: A bottomless portafilter: While not strictly essential, a “naked” or bottomless portafilter is an invaluable diagnostic tool. It allows you to see the extraction as it happens, immediately revealing flaws in your puck preparation like channeling (when water punches a hole through the puck), which helps you improve your technique much faster.
Dialing in your first shot: The new workflow
With your new tools in hand, your espresso-making routine will change significantly. It becomes a more hands-on, methodical process focused on precision and adjustment. This process is known as “dialing in.”
First, establish a starting recipe. A great place to begin is with a 1:2 brew ratio. This means for every 1 gram of dry coffee you put in the basket, you want 2 grams of liquid espresso out. So, if you’re using an 18-gram basket, your target yield is 36 grams of espresso. Your target time for this extraction should be between 25 and 35 seconds, starting the timer the moment you engage the pump.
Here’s the step-by-step workflow:
- Dose: Weigh out exactly 18 grams of fresh, whole bean coffee.
- Grind: Grind the beans on a fine setting. Start with a grinder setting recommended for espresso if you have one.
- Puck prep: This is the most critical stage. Distribute the grounds in the portafilter so they form a level bed. Many use a Weiss Distribution Technique (WDT) tool, which is a set of fine needles, to break up clumps and evenly distribute the coffee.
- Tamp: Rest the portafilter on a level surface. Hold your tamper like a doorknob, and press down firmly and evenly until the coffee puck feels solid. Give it a gentle twist as you release pressure, but do not tamp again.
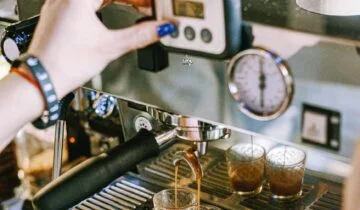
- Extract: Lock the portafilter into the machine, place your cup and scale underneath, and start your pump and timer simultaneously. Stop the shot just before you hit your target yield (e.g., 36g), as a few extra drops will fall.
- Analyze and adjust: Did the shot take 30 seconds? Great! How did it taste? If it ran too fast (e.g., 18 seconds), it’s likely under-extracted and will taste sour. You need to grind finer. If it ran too slow or choked the machine, it’s over-extracted and will taste bitter. You need to grind coarser. Make one small adjustment to your grind size and repeat the entire process until you hit your time and taste targets.
Common problems and how to solve them
The learning curve can be steep, and it’s normal to pull some “bad” shots at first. Don’t get discouraged. Most issues can be traced back to your grind size or your puck preparation. Understanding how to diagnose a shot by taste and sight is the key to improving. A bottomless portafilter will be your best friend here, as it will visually show you if water is gushing through one area instead of flowing evenly. Below is a table to help you troubleshoot.
| Problem or taste | Likely cause | Primary solution |
|---|---|---|
| Shot is gushing out, very fast (under 20 seconds) | Grind is too coarse, or severe channeling | Grind finer. Also, improve puck prep (use WDT). |
| Shot tastes sour, thin, and acidic | Under-extraction (water passed through too quickly) | Grind finer to slow the shot down and increase extraction time. |
| Shot is dripping very slowly or not at all | Grind is too fine (machine is “choked”) | Grind coarser. Make a significant adjustment coarser to start. |
| Shot tastes bitter, harsh, and hollow | Over-extraction (water was in contact with coffee for too long) | Grind coarser to speed the shot up and reduce extraction time. |
| Spurts of espresso spray from the portafilter (channeling) | Uneven coffee distribution or an unlevel tamp | Focus on puck prep. Break up all clumps and ensure an even, level bed of coffee before tamping. |
Making the switch from a pressurized to a non-pressurized basket is arguably the most important upgrade you can make for your Gaggia machine. It marks the transition from simply pushing a button to truly engaging in the craft of making espresso. As we’ve discussed, this move requires more than just a new piece of metal; it necessitates an investment in a quality grinder and a commitment to learning a more precise, methodical workflow. The initial dialing-in process can be challenging, demanding patience as you learn to balance variables like grind size, dose, and puck prep. However, the reward for this effort is immense. You gain complete control over your brew, unlocking the true flavor potential of your coffee beans and producing genuine, delicious espresso that far surpasses what’s possible with a pressurized system.

 No products in the cart.