Mastering microfoam: Your guide to the Olympia Cremina stock steam wand
The Olympia Cremina is a legendary manual lever espresso machine, celebrated for its build quality and the exceptional shots it can produce. However, for many new owners, mastering its steam wand can feel like a steep learning curve. Unlike commercial machines with immense power, the Cremina’s stock single-hole steam wand requires finesse, patience, and a precise technique. It’s often misunderstood, leading to frustration and bubbly, subpar milk. This article is your definitive guide to taming the Cremina’s steam wand. We will walk you through the preparation, process, and troubleshooting necessary to transform cold milk into silky, glossy microfoam perfect for latte art, proving that you don’t need an upgrade to achieve cafe-quality results at home.
Understanding the Cremina’s steam character
Before you even pick up your milk pitcher, it’s crucial to understand the machine you’re working with. The Olympia Cremina operates with a relatively small boiler and, consequently, lower steam pressure than the large pump-driven machines you see in cafes. Its stock wand typically has a single-hole tip. This design isn’t a flaw; it’s a feature that demands a different approach. Instead of relying on raw power to create a vortex, you must rely on perfect positioning and control.
A key concept to grasp is false pressure. As the Cremina heats up, the air trapped in the boiler expands along with the water turning to steam. If you don’t purge this, the initial blast from the wand will be a weak mix of air and water condensation, which will ruin your milk. Properly purging the wand until a steady, dry stream of steam appears is the first and most critical step in your workflow. The Cremina’s steaming is a dance of precision, not a show of force.
Preparation is everything: Milk, pitcher, and machine
Success with the Cremina begins long before the steam wand touches the milk. Getting your setup right will account for at least half of your success. Think of it in three parts:
- The milk: Always start with very cold, fresh milk. Whole milk is the easiest to work with due to its fat and protein content, which provides a wider window for creating stable foam. Store your milk in the coldest part of your fridge.
- The pitcher: Use a high-quality stainless steel pitcher. The size is important; for the Cremina’s steam capacity, a smaller 12 oz (350 ml) pitcher is ideal for single drinks. It allows you to create a vortex more easily with less steam power. For best results, chill your pitcher in the freezer for a few minutes before use.
- The machine: This is the most involved step. Turn your Cremina on and let it heat up fully. Once the pressure gauge indicates it’s ready, open the steam valve with the wand pointed at the drip tray. You’ll first see sputtering water and weak steam. This is the false pressure and condensation. Wait until it turns into a powerful, dry, and consistent jet of steam. Close the valve and wait for the heating element to kick back on to bring the boiler to maximum pressure for steaming. You are now ready to go.
The two-phase steaming technique
Steaming milk is not a single, chaotic action. It’s a deliberate, two-phase process: aerating (stretching) and integrating (texturing). With the Cremina, these phases are very distinct.
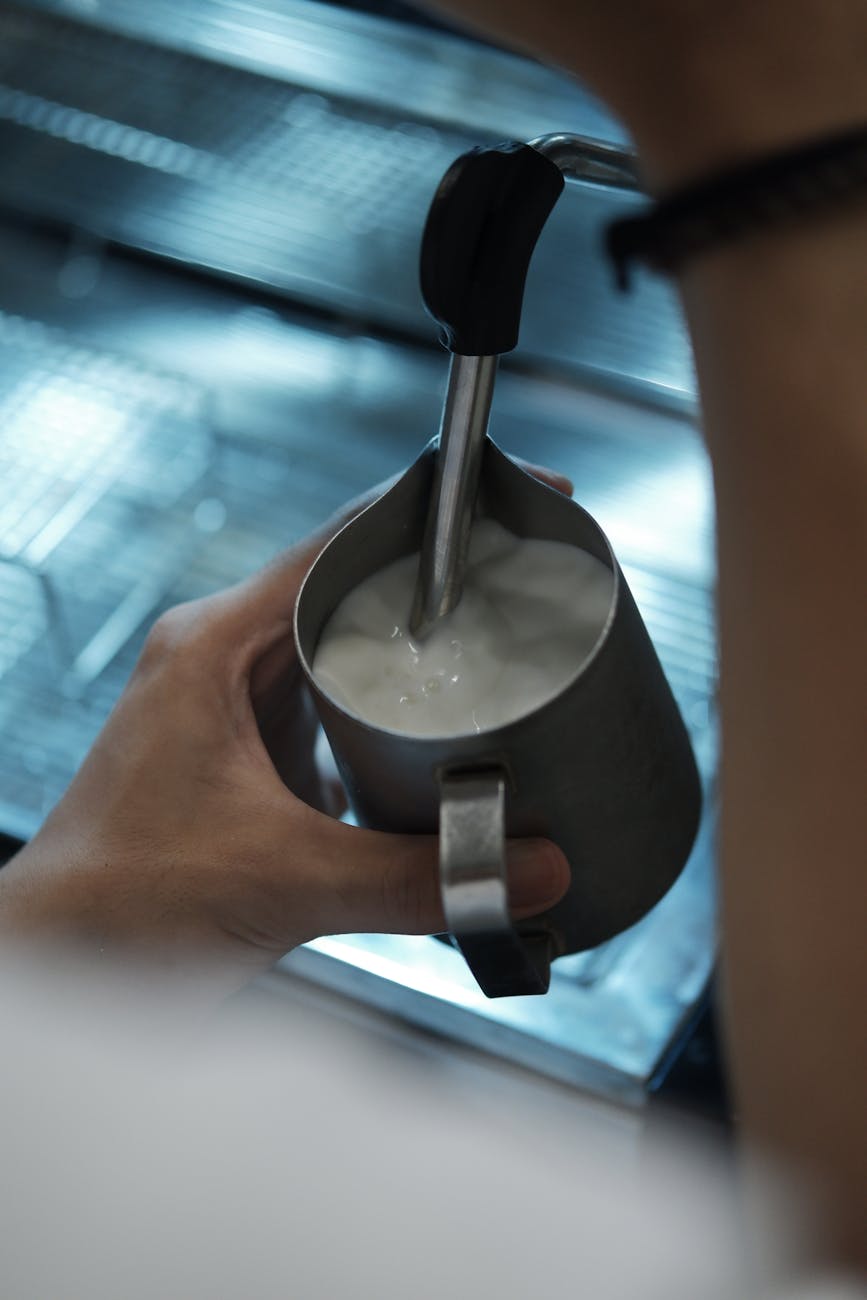
First, begin with the aeration phase. Submerge the steam wand tip just below the surface of the milk, slightly off-center. Open the steam valve fully. You want to hear a gentle, consistent hissing or “tearing paper” sound. This is the sound of air being incorporated into the milk. This phase should be very short, just a few seconds. You are looking for a small increase in volume, about 20-30%. Watching the volume rise is more important than listening to a timer. Avoid creating large, gulping bubbles; if you hear that, your wand tip is too close to the surface.
Next, transition smoothly into the integration phase. Lower the wand deeper into the pitcher, finding a position and angle that sends the milk into a swirling vortex. This vortex is essential. It folds the air you just introduced into the milk, breaking down larger bubbles into a fine, silky microfoam. The milk should be spinning, not sloshing. Continue this vortex until the pitcher is hot to the touch, roughly 140-150°F (60-65°C). Immediately turn off the steam, wipe the wand, and give the pitcher a final swirl to polish your glossy microfoam before pouring.
Troubleshooting common steaming problems
Even with the right technique, you may run into issues. Consistency comes from understanding what went wrong and how to correct it. Here are some common problems and their solutions when using the Cremina.
| Problem | Likely cause | Solution |
|---|---|---|
| Large, soapy bubbles | Too much air was introduced, or the air was incorporated too aggressively. | Shorten the aeration phase. Keep the hissing sound very gentle. Make sure you submerge the wand deep enough for the integration phase. |
| Hot, thin milk with no foam | Not enough air was introduced. The wand was likely too deep from the start. | Keep the steam tip closer to the surface for a few seconds at the beginning to ensure you hear that distinct hissing sound. |
| Milk is “screaming” | The wand is too deep in the milk, and no air is being introduced. | Raise the wand tip closer to the surface until you hear a gentle hiss, then proceed with the integration phase. |
| Weak, watery steam | The machine was not fully heated, or you did not purge the false pressure. | Ensure the machine is at full pressure. Always purge the wand until a dry, powerful jet of steam is released before steaming your milk. |
Conclusion
Steaming beautiful microfoam with the Olympia Cremina’s stock wand is not only possible but also incredibly rewarding. It forces you to move beyond the brute-force methods of more powerful machines and embrace a technique rooted in precision and control. The journey requires understanding your machine’s unique character, from managing its boiler pressure to purging false pressure effectively. By focusing on meticulous preparation with cold milk and a chilled pitcher, and by mastering the distinct two-phase process of a short, gentle aeration followed by a vortex-driven integration, you can achieve consistently silky results. While there may be a learning curve, patience and practice are your greatest allies. Embrace the process, and you will unlock the full potential of your Cremina, crafting lattes and cappuccinos that are as delightful to drink as they are to look at.

 No products in the cart.