Replicating the cafe caramel macchiato: A step-by-step workflow
The caramel macchiato holds a special place in the hearts of coffee lovers. It’s a beautifully layered drink that perfectly balances sweet vanilla, rich espresso, and buttery caramel. While it may seem like a complex creation reserved for trained baristas, replicating this iconic beverage at home is entirely achievable. The secret lies not just in the ingredients, but in the technique. This guide will take you beyond a simple recipe, offering a step-by-step professional workflow to craft a caramel macchiato that rivals your favorite coffee shop. We will delve into the nuances of creating the perfect milk base, achieving velvety microfoam, pulling a quality espresso shot, and assembling the drink with an artist’s touch. Prepare to transform your kitchen into your personal cafe.
Mastering the foundation: The vanilla milk base
Before the espresso is pulled or the caramel is drizzled, the foundation of a great caramel macchiato is laid with perfectly prepared vanilla-infused milk. This is not merely milk with syrup added; it’s a cohesive, aromatic base that sets the stage for the other flavors. For the richest taste and texture, whole milk is the professional’s choice due to its higher fat content, which creates a creamier, more stable foam. However, oat milk is an excellent dairy-free alternative that also froths beautifully.
The key technique here is to integrate the vanilla syrup before you start steaming. Add one to two tablespoons of your favorite vanilla syrup directly into the cold milk in your frothing pitcher. This allows the syrup to heat and blend completely with the milk, creating a more uniform flavor profile rather than a layer of sweet syrup at the bottom of your cup. Aim for a final milk temperature between 140-155°F (60-68°C). Any hotter and the milk proteins will begin to break down, resulting in a burnt, flat taste.
The art of frothing: Achieving velvety microfoam
The texture of the milk is what separates an amateur drink from a professional one. A caramel macchiato doesn’t call for the stiff, dry foam of a traditional cappuccino. Instead, you are aiming for microfoam—a silky, liquid foam with the consistency of wet paint. This texture allows the espresso to be “marked” on top and integrates smoothly with the rest of the drink as you sip it.
To achieve this using a steam wand:
- Stretching: Submerge the tip of the steam wand just below the surface of the milk. You should hear a gentle hissing sound. This incorporates air, increasing the volume. Do this for only 3-5 seconds.
- Texturizing: Plunge the wand deeper into the milk, positioning it off-center to create a spinning vortex. This vortex breaks down larger air bubbles into the tiny bubbles that form microfoam. Continue until the pitcher is hot to the touch.
- Finishing: Once done, immediately tap the pitcher on the counter to pop any remaining large bubbles and give it a swirl to polish the foam into a glossy sheen.
If you don’t have a steam wand, a handheld frother can work well. Froth the milk first while it’s cold, then gently heat it in the microwave or on the stovetop, being careful not to boil it.
Pulling the perfect espresso shot
The term macchiato is Italian for “marked” or “stained.” In this drink, the milk foam is marked by the espresso. Therefore, the quality of your espresso is paramount. A perfect shot is characterized by a rich, dark body and a stable layer of golden-brown crema on top. This crema is essential for holding the caramel drizzle and providing a robust coffee flavor that cuts through the sweetness of the vanilla and caramel.
For the best results, use an espresso machine. Aim for a double shot (around 2 ounces or 60ml) extracted over 25-30 seconds. This timing ensures a balanced extraction, avoiding the sourness of an under-extracted shot or the bitterness of an over-extracted one. If you lack an espresso machine, several alternatives can produce a strong, concentrated coffee that works well in a pinch.
| Brewing method | Characteristics | Pro tip |
|---|---|---|
| Espresso machine | Richest flavor, thickest crema. The gold standard. | Use finely ground, fresh coffee beans for optimal results. |
| Moka pot | Strong, robust, and concentrated. Creates a brew very similar to espresso. | Remove from heat as soon as it starts gurgling to avoid a metallic taste. |
| AeroPress | Produces a clean, smooth, and strong concentrate. | Use the inverted method and a fine grind to build more pressure. |
| Strongly brewed coffee | The most accessible option. Lacks crema and intensity. | Use double the amount of coffee grounds you normally would for a standard cup. |
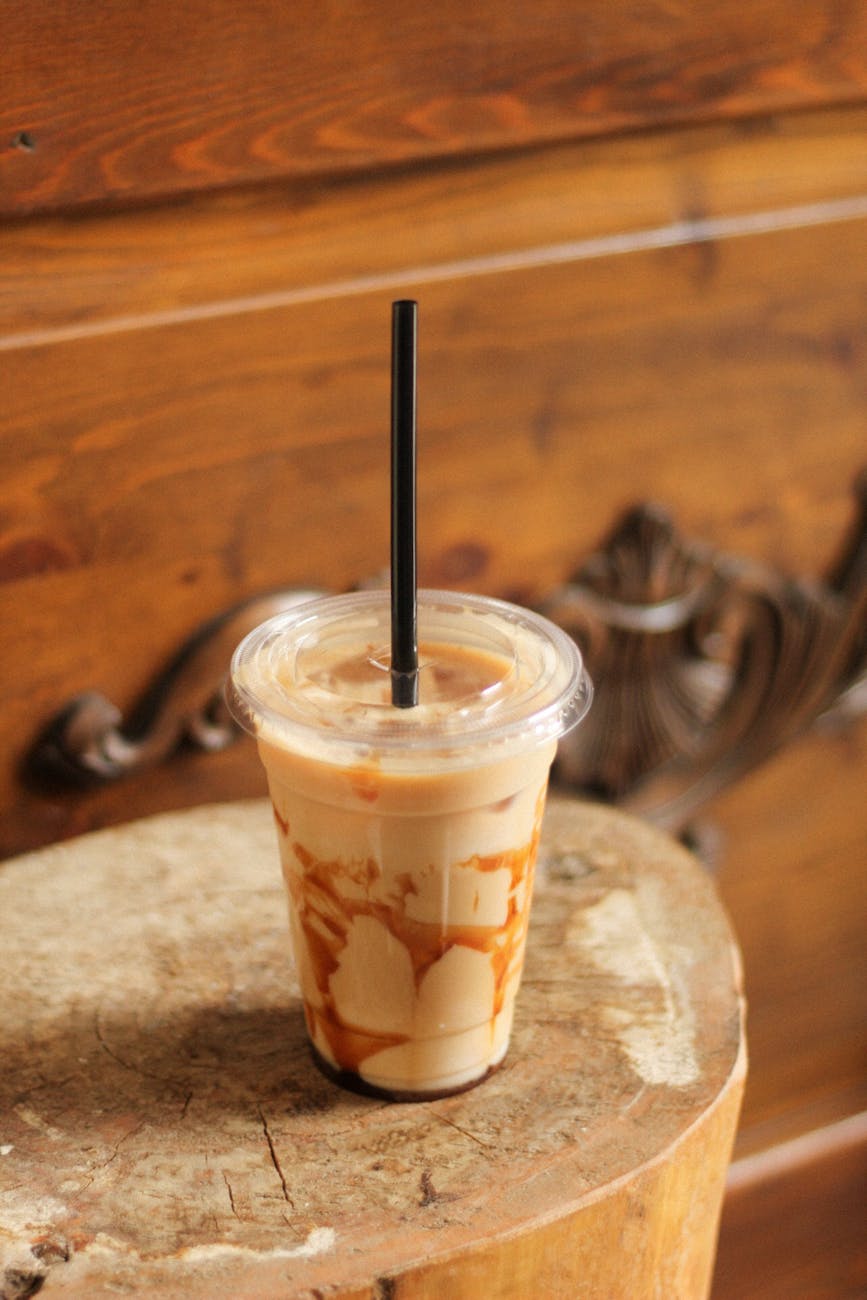
The final assembly and signature drizzle
With all your components prepared, the final assembly is a methodical process that creates the drink’s iconic layers. Unlike a traditional latte where espresso goes in first, the Starbucks-style caramel macchiato is built in reverse, making it technically a latte macchiato.
Follow these steps for a flawless presentation:
- Pour your steamed, vanilla-infused milk into a clear glass or mug, holding back the foam with a spoon.
- Top the liquid milk with the remaining dollop of rich foam.
- Slowly and gently pour the freshly brewed espresso shots directly through the center of the foam. The espresso will pierce the foam, “marking” it, before settling into a layer between the milk and the foam.
- Finish with the signature caramel drizzle. For the classic crosshatch pattern, create several parallel lines of caramel sauce across the top of the foam. Then, turn the cup 90 degrees and draw another set of parallel lines, creating a grid.
Using a thick, high-quality caramel sauce will ensure your drizzle holds its shape on top of the foam instead of sinking immediately.
Conclusion
Crafting a cafe-quality caramel macchiato is an art of precision and technique. By moving beyond a simple recipe and embracing a professional workflow, you can elevate your homemade coffee game immensely. It begins with creating a perfectly integrated vanilla milk base, followed by the crucial step of texturizing that milk into velvety microfoam. Pulling a rich, crema-topped espresso shot provides the necessary punch to “mark” the drink, and the final assembly, complete with a signature caramel crosshatch, brings it all together. Mastering these individual steps ensures each component is at its best, resulting in a layered, delicious, and visually stunning beverage. You no longer need to visit a coffee shop to enjoy this decadent treat; you now have the skills to become your own expert barista.


 No products in the cart.