
Unlocking silky microfoam: A guide to optimizing steam pressure on your Gaggia Classic Pro
The Gaggia Classic Pro is a legend in the world of home espresso, celebrated for its robust build and ability to pull fantastic shots. However, many new owners find themselves on a challenging quest to create the silky, velvety microfoam needed for beautiful latte art. The machine’s stock steam performance can feel a bit underwhelming, often producing large, soapy bubbles instead of the glossy, paint-like texture you see in cafes. This article is your comprehensive guide to conquering the Gaggia’s steam system. We’ll explore everything from no-cost techniques like temperature surfing to game-changing modifications, empowering you to optimize your machine’s steam pressure and pour cafe-quality drinks right in your own kitchen.
Understanding the Gaggia’s single boiler challenge
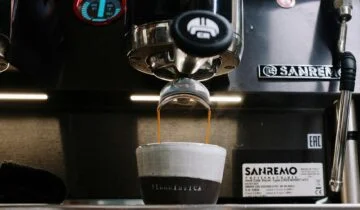
Before we dive into solutions, it’s crucial to understand why the Gaggia Classic Pro (GCP) can be tricky for milk steaming. The heart of the issue lies in its single boiler design. This means the same small boiler is responsible for heating water to two very different temperatures: one for brewing espresso (around 93°C or 200°F) and a much higher one for creating steam (well above 100°C or 212°F). When you flip the steam switch, the machine’s simple thermostat tells the heating element to kick on and superheat the water in the boiler, turning it into steam. The limitation here is twofold: the boiler’s small capacity means it can run out of steam power during a longer steaming session, and the basic thermostat leads to a wide temperature band, causing pressure to fluctuate. This inconsistency is the primary culprit behind lackluster foam.
Mastering the temperature surfing technique
The most effective way to improve your steam power without spending a dime is a technique called temperature surfing. The goal is to start steaming at the peak of the heating cycle, ensuring you have the maximum possible pressure and heat stored in the boiler. This method requires a bit of timing but quickly becomes second nature. It effectively tricks the machine into delivering more power than it would if you simply waited for the ready light.
Here’s a step-by-step guide:
- Step 1: Press the steam button to activate the steam mode. The machine will begin heating.
- Step 2: Wait for the steam ready light next to the button to turn on. This indicates the boiler has reached the thermostat’s target temperature. Do not start steaming yet.
- Step 3: Open the steam valve for a few seconds to purge the wand. This clears out any condensed water and slightly cools the boiler, which is key.
- Step 4: Close the valve and watch the light. After the purge, the ready light will turn off, meaning the heating element has kicked back on to bring the temperature up again. This is the heating cycle you want to capture.
- Step 5: Insert the steam wand into your milk pitcher and open the valve to start steaming about 5-10 seconds after the light has turned off. You’ll be steaming while the element is actively heating, giving you a powerful and sustained burst of steam. Continue steaming until your milk is textured and at the desired temperature.
By starting your steaming process during this active heating phase, you leverage the machine’s full power, helping you create a better vortex in the milk and integrate air more effectively for true microfoam.
Hardware upgrades for better control
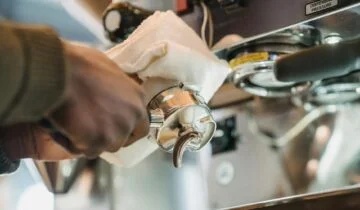
Once you’ve mastered temperature surfing, the next logical step involves simple hardware modifications. While the Gaggia Classic Pro comes with a capable commercial-style steam wand, changing the steam tip can have a dramatic impact on performance. The stock tip often has two larger holes, which can release steam too quickly for a small boiler, leading to a rapid drop in pressure. Many users find more success by switching to a tip with a single, smaller hole. This concentrates the steam flow, increasing its velocity and making it easier to control the aeration process. A single-hole tip allows for a more focused jet of steam, which helps in creating a consistent vortex in your milk pitcher—a critical element for breaking down large bubbles and achieving a silky texture.
Another popular, though more involved, upgrade is installing a PID (Proportional-Integral-Derivative) controller. A PID replaces the machine’s basic thermostat with a sophisticated digital controller. For steaming, this is a revolutionary change. You can set the steam temperature to a precise and much higher value (e.g., 145°C or 293°F) than the stock thermostat allows. The PID holds this temperature with incredible stability, eliminating pressure fluctuations and the need for temperature surfing entirely. With a PID, you get powerful, dry, and consistent steam on demand, transforming the GCP into a steaming powerhouse that rivals much more expensive machines.
Comparing steaming methods at a glance
Choosing the right path for your machine depends on your budget, technical comfort, and desired results. Each approach offers a distinct level of performance and involvement. Below is a table summarizing the different methods to help you decide which is best for you.
| Method | Cost | Difficulty | Steam Performance |
|---|---|---|---|
| Stock Technique | Free | Easy | Low & Inconsistent |
| Temperature Surfing | Free | Medium (Requires timing) | Moderate & More Consistent |
| Upgraded Steam Tip | Low ($15 – $30) | Easy | Focused & Controllable |
| PID Controller | High ($150 – $200) | High (Requires installation) | High, Dry & Very Consistent |
Conclusion: Your path to perfect microfoam
Achieving cafe-quality microfoam with a Gaggia Classic Pro is not a myth; it’s an attainable skill that comes with understanding your machine and applying the right techniques. We’ve journeyed from the simple, no-cost method of temperature surfing, which maximizes the potential of a stock machine, to hardware upgrades like a new steam tip that can offer more control. For the ultimate enthusiast seeking unwavering consistency and power, installing a PID controller completely transforms the steaming experience. Regardless of the path you choose, the key is practice. By combining these optimizations with proper milk texturing technique, you can elevate your home barista game and finally pour the beautiful, silky lattes and cappuccinos you’ve been aiming for.
 No products in the cart.