The Gaggia Velasca is a fantastic super-automatic machine capable of producing rich, flavorful espresso with a single touch. However, to truly elevate your coffee from good to exceptional, you need to master the art of extraction. Many owners leave their machine on factory settings, often resulting in shots that are either sour and weak or bitter and harsh. This article will guide you through the process of optimizing your Gaggia Velasca’s extraction time and flow rate. We will delve into the core principles of a perfect shot and explore how to use the machine’s built-in adjustments, primarily the grinder and aroma strength settings, to achieve that coveted balanced and delicious espresso, every single time.
Understanding the fundamentals of espresso extraction
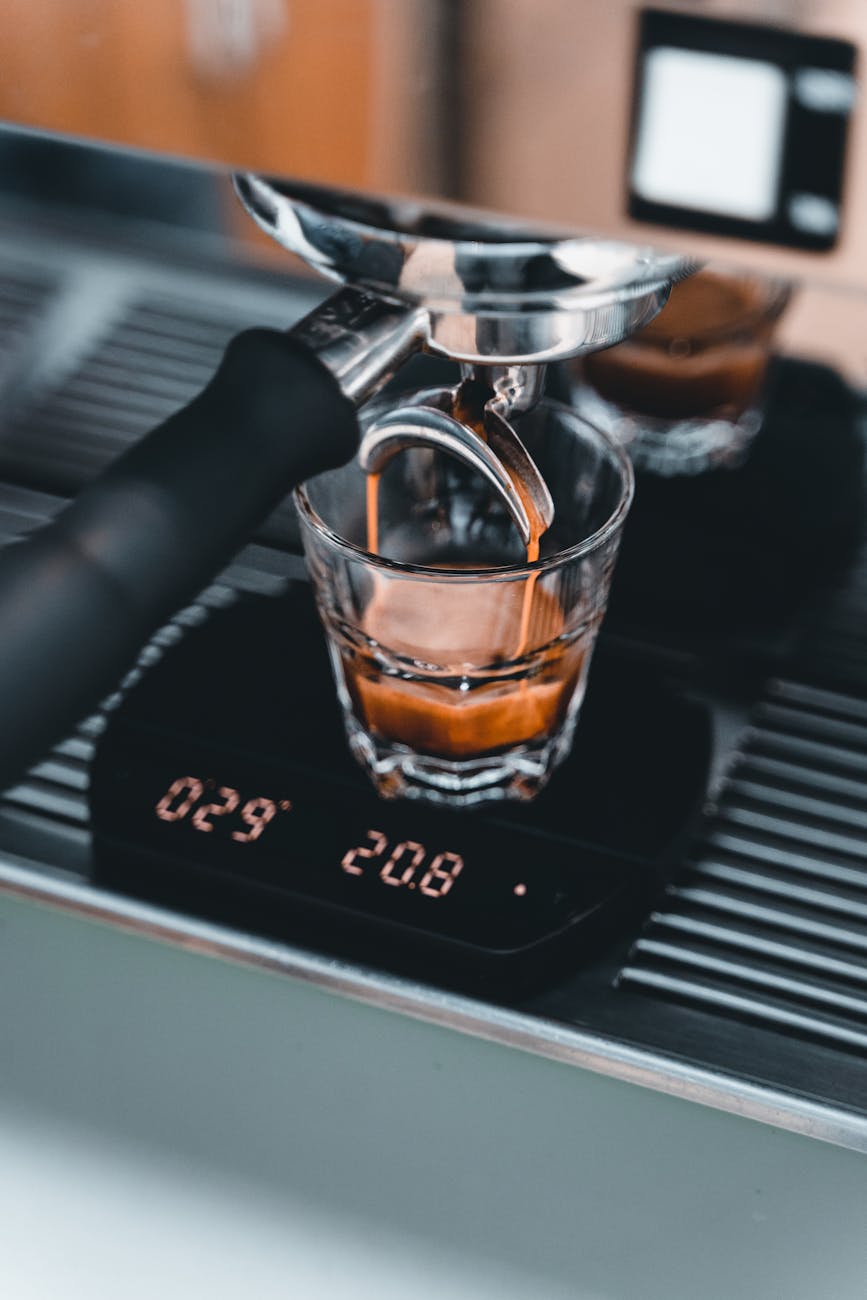
Before you can adjust your machine, it’s crucial to understand what you’re trying to achieve. Espresso extraction is the process of hot, pressurized water passing through a compressed puck of finely ground coffee, dissolving its soluble flavors, oils, and aromas. The flow rate refers to how quickly this water passes through the coffee, and the extraction time is the total duration of this process, from the moment you press the button until the shot is complete.
These two elements are intrinsically linked. A fast flow rate results in a short extraction time, while a slow flow rate leads to a longer one. The goal is to find the sweet spot. The general guideline for a double espresso is an extraction time of around 25 to 30 seconds. This is a starting point, not a strict rule. The most important tool is your palate.
- Under-extraction: If the flow is too fast and the time is too short (e.g., under 20 seconds), the water doesn’t have enough contact time to pull out the desirable sweet flavors. The result is a sour, acidic, and thin-bodied shot.
- Over-extraction: If the flow is too slow and the time is too long (e.g., over 35 seconds), the water extracts too much from the grounds, including unpleasant, bitter compounds. The result is a harsh, bitter, and hollow-tasting shot.
Mastering your Gaggia Velasca is about controlling these variables to land right in the middle of that perfectly balanced extraction.
The primary controller: adjusting your grind size
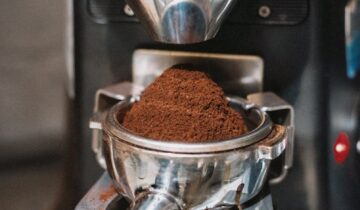
The single most impactful adjustment you can make on your Gaggia Velasca is the grind size. Inside the bean hopper, you’ll find a dial or knob that controls the fineness of the coffee grounds. This machine features a durable ceramic burr grinder, which offers consistent results. The grind size directly dictates the resistance the water encounters as it pushes through the coffee puck.
Think of it like this: trying to pour water through a bucket of sand (fine grind) is much slower than pouring it through a bucket of pebbles (coarse grind). The same principle applies here:
- A finer grind creates a more compact coffee puck with less space between particles. This increases resistance, slows down the flow rate, and therefore increases the extraction time.
- A coarser grind creates a less dense puck with more space. This reduces resistance, speeds up the flow rate, and decreases the extraction time.
Important: To avoid damaging the grinder, only adjust the grind setting while the grinder is in operation. Press the button to make an espresso and change the setting one click at a time as the beans are being ground. It will take two or three shots for the new setting to take full effect, so be patient and methodical with your changes.
Fine-tuning with aroma strength and coffee dose
Once your grind size is getting you close to the ideal extraction time, you can use the Gaggia Velasca’s “Aroma Strength” or “Optiaroma” setting for fine-tuning. This setting, often indicated by coffee bean icons on the display, doesn’t add aroma; it controls the dose, which is the amount of coffee ground for each shot. Most Velasca models have 3 to 5 levels of adjustment.
The dose also affects resistance and flow rate. A larger dose of coffee creates a thicker, more compressed puck, which can help slow down a shot that is running slightly too fast. Conversely, a smaller dose creates a thinner puck, which can speed up a shot that is choking the machine.
Here’s how you can use dose in tandem with your grind setting:
- If your shot is a little too fast (e.g., 22 seconds) and your grind is already quite fine, try increasing the aroma strength from three beans to four. This larger dose might add just enough resistance to push your extraction time into the ideal 25-30 second range.
- If your shot is a little too slow (e.g., 34 seconds) and making the grind coarser causes it to gush out too quickly, try decreasing the aroma strength. This smaller dose might be all you need to bring the time back down.
Think of the grind setting as your main steering wheel and the aroma strength as the trim control for making small, precise adjustments.
A practical guide to dialing in your shot
Now, let’s combine this knowledge into a step-by-step process. The key is to only change one variable at a time. Start with fresh, good-quality espresso beans, as old beans will produce poor results regardless of your settings.
- Set a baseline: Set your grinder to a middle setting (e.g., 3 out of 5) and the aroma strength to the middle setting (e.g., 3 beans).
- Pull and observe: Make a double espresso and time the shot from the moment the pump starts until it stops. Note the time and, more importantly, taste the espresso.
- Analyze and adjust: Use the results to decide your next move. Refer to the table below for a simple diagnostic guide.
| Observation | Problem | Primary Adjustment | Secondary Adjustment |
|---|---|---|---|
| Shot time < 20 seconds. Tastes sour, thin, and acidic. | Under-extracted | Make grind one step finer. | Increase aroma strength (dose). |
| Shot time > 35 seconds. Tastes bitter, harsh, and burnt. | Over-extracted | Make grind one step coarser. | Decrease aroma strength (dose). |
| Shot time is 25-30 seconds. Tastes balanced and sweet. | Dialed in! | No adjustment needed. | Enjoy your coffee. |
Remember to pull at least two shots after each grind adjustment to allow the change to fully take effect. Keep tasting and tweaking until you find a result you love. Your personal taste is the ultimate goal, so if a 24-second shot tastes perfect to you, then that’s the right setting for those beans.
In conclusion, unlocking the full potential of your Gaggia Velasca lies in understanding and manipulating a few key variables. By moving beyond the factory presets, you take control of your coffee’s final taste. The core of this process is the interplay between grind size, which makes the largest impact on flow rate and extraction time, and the aroma strength setting, which controls the dose for finer adjustments. Remember to be methodical: change only one setting at a time and allow a couple of shots for the adjustment to settle in. Use the 25-30 second extraction time as your guide, but let your palate be the final judge. This process of dialing in transforms your super-automatic machine into a personalized barista, delivering exceptional espresso tailored perfectly to your preference.


 No products in the cart.