
Mastering latte art with the Gaggia Classic: a single boiler guide
The Gaggia Classic is a legend in the world of home espresso, celebrated for its ability to produce café-quality shots in a compact, durable package. For many aspiring baristas, it’s the first step into a larger world of coffee. However, when it comes to a delicate skill like latte art, its single boiler design presents a unique set of challenges. Can you really create silky microfoam and pour intricate designs with this machine? The answer is a resounding yes. This article is your comprehensive guide to overcoming the quirks of a single boiler system. We will explore the specific workflow, temperature management techniques, and milk texturing secrets needed to transform your Gaggia Classic from a great espresso maker into a true latte art powerhouse.
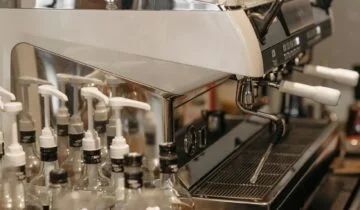
Understanding the Gaggia Classic’s single boiler system
Before you can master steaming, you need to understand what’s happening inside your machine. The Gaggia Classic uses a single boiler to handle both brewing espresso and generating steam. This means it cannot do both simultaneously. Brewing requires water heated to around 90-95°C (195-205°F), while steaming demands much higher temperatures, closer to 120-130°C (250-265°F), to create steam pressure.
This design necessitates a specific workflow and a technique known as temperature surfing. When you flip the steam switch, you are telling the heating element to raise the boiler’s temperature. However, the machine doesn’t hold a perfectly stable steam temperature. Instead, a thermostat cycles the heating element on and off to maintain a temperature range. The key to powerful, consistent steam is to start steaming when the heating element is actively on, providing maximum power. If you start when the element has just switched off, you’ll get weak, wet steam that’s incapable of creating the microfoam needed for latte art.
Perfecting your canvas: the espresso shot
You can have the best milk in the world, but without a quality canvas, your art will fall flat. A perfect espresso shot, rich with a stable layer of crema, is the foundation of any good latte. On a single boiler machine like the Gaggia Classic, the order of operations is non-negotiable: you must pull your espresso shot first.
Attempting to steam your milk before pulling the shot would mean leaving the boiler at a very high temperature. If you then tried to brew, the superheated water would scorch your coffee grounds, resulting in a bitter, astringent shot. The correct workflow is as follows:
- Prepare your portafilter with freshly ground coffee.
- Heat the machine for brewing and pull your espresso shot into your cup.
- Immediately after the shot is finished, flip the steam switch.
This sequence ensures your espresso is brewed at the correct temperature and allows the boiler to begin heating for steam while you prepare your milk pitcher. This efficient workflow is the first step toward repeatable success.
The art of steaming milk on a single boiler
This is where technique becomes paramount. With your espresso shot waiting, you’ve flipped the steam switch. Now is the time to create that silky, paint-like microfoam. Follow these steps precisely for the best results:
- Purge the wand: Once the steam-ready light comes on, open the steam valve for a few seconds into the drip tray. This expels any condensed water from the wand, ensuring you start with powerful, dry steam. Close the valve.
- Temperature surf for power: The steam-ready light indicates the boiler has reached its target temperature range, but it often turns on just as the heating element turns off. The secret is to wait for this light to go off and then come back on again. As soon as that light comes on for the second time, you’re ready. This means the heating element is at peak power.
- Stretching the milk (aeration): Submerge the tip of the steam wand just below the surface of the milk in your pitcher. Open the steam valve fully. You want to hear a gentle “tssss-tssss” or hissing sound. This is air being incorporated into the milk. This phase should only last for a few seconds, until the milk has expanded by about 20-30%.
- Texturing the milk (creating the vortex): Once you’ve incorporated enough air, submerge the wand deeper into the milk and angle your pitcher to create a whirlpool or vortex. This motion is crucial. It breaks down any large bubbles into a homogenous, silky microfoam. Continue this vortex until the outside of the pitcher becomes too hot to comfortably hold for more than a second (around 55-60°C or 130-140°F).
- Finish clean: Immediately turn off the steam valve, remove the wand, and wipe it with a damp cloth before purging it one last time to clear any milk from the tip.
Your milk should now look like glossy, wet paint with no visible bubbles. Swirl it immediately to keep it integrated.
Pouring your first latte art designs
With a beautiful shot of espresso and perfectly textured milk, you are ready to pour. The final step combines everything you’ve worked on. Don’t worry about perfection initially; focus on the fundamental pouring mechanics.
First, groom your milk by swirling the pitcher to ensure the foam and liquid are fully combined. Tap the pitcher on the counter once or twice to pop any remaining large bubbles. Now, follow these basic pouring steps:
- Set the base: Tilt your cup at a 45-degree angle. Begin pouring the milk from a height of about 4-5 inches into the center of the espresso. This allows the milk to dive beneath the crema, mixing with the coffee and creating your canvas. Fill the cup about half to two-thirds full this way.
- Get close for the design: As the cup fills, bring the spout of your pitcher as close as possible to the surface of the drink. You should almost be touching the crema.
- Pour the heart: Straighten the cup and continue pouring in the center. A white dot will appear. Once it’s the size you want, lift the pitcher slightly and pull the stream of milk straight through the dot to create the classic heart shape.
This is the simplest design and the best one to master first. Once you are comfortable with the heart, you can move on to more complex designs like tulips and rosettas. Consistency is more important than complexity in the beginning.
Here are some common issues and how to fix them:
| Problem | Likely Cause | Solution |
|---|---|---|
| Milk is too bubbly and foamy. | Too much aeration (stretching). | Incorporate air for a shorter period. Focus more on creating a strong vortex to break down bubbles. |
| Milk is thin and art disappears. | Not enough aeration. | Keep the steam wand tip closer to the surface for a bit longer at the start to introduce more air. |
| The design is blurry or “washes out”. | Pouring from too high or not setting a proper base. | Remember to set the base by pouring high, then bring the pitcher spout very close to the surface for the design phase. |
Mastering latte art on the Gaggia Classic is a journey of patience and practice. By understanding the unique nature of its single boiler, you can work with the machine, not against it. Remember the crucial workflow: pull your espresso shot first, then immediately begin the steaming process. Learn to temperature surf by starting to steam just as the ready-light indicates the heating element is at full power. Focus on the two distinct phases of milk texturing—a short period of stretching followed by a longer texturing vortex—to create silky microfoam. Finally, practice the fundamentals of pouring, starting with a simple heart. The Gaggia Classic is more than capable of producing stunning results; it simply requires the right technique and a dedicated barista. Embrace the process, and soon you’ll be pouring lattes that look as good as they taste.
 No products in the cart.