
Mastering microfoam: a guide to managing steam pressure on your Gaggia
The Gaggia Classic and its siblings are beloved single boiler espresso machines, known for their ability to produce fantastic espresso shots. However, many new owners find themselves frustrated when trying to create the silky, velvety microfoam needed for latte art. The challenge lies in the single boiler design, which requires a specific technique to generate powerful, sustained steam. This article is your guide to mastering that process. We will explore why single boiler machines are unique, delve into the critical technique of “temperature surfing” to maximize steam power, and provide a step-by-step workflow. By understanding how your Gaggia works, you can unlock its full potential and start pouring cafe-quality drinks right in your own kitchen.
Understanding the single boiler challenge
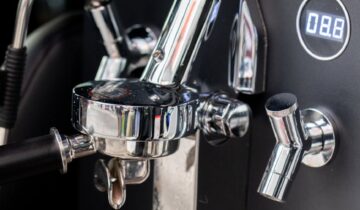
To effectively manage steam pressure, you first need to understand the mechanics of your machine. A single boiler Gaggia uses one heating element for two different tasks: brewing espresso and steaming milk. These tasks require drastically different temperatures. For brewing, water needs to be around 90-96°C (195-205°F). For creating dry, powerful steam, the water in that same boiler needs to be heated well beyond boiling, typically to around 120-140°C (250-285°F).
Because there’s only one boiler, you can’t do both at once. When you flip the steam switch, you are telling the machine to raise the boiler’s temperature from brew temp to steam temp. The challenge is that the thermostat inside the machine is designed to maintain a temperature range. The steam-ready light will turn on when the boiler hits the bottom of this range, but the heating element then clicks off. If you start steaming at this point, you’ll get an initial puff of steam followed by a rapid drop in pressure as you use up the limited supply. The key is to steam when the heating element is actively on, giving you maximum power.
The art of temperature surfing for steam
Temperature surfing is the technique of intentionally manipulating the machine’s heating cycle to your advantage. It’s about catching the “wave” of maximum heat and pressure. While it sounds complex, the process is quite simple once you understand the cues your machine gives you. This is the single most important skill for achieving great steam on a Gaggia.
Here’s the core process:
- Pull your shot first. Always prepare your espresso before you begin the steaming process. Once steamed, milk begins to separate quickly.
- Engage the steam switch. This tells the boiler to begin heating up to steam temperature.
- Wait for the ready light. This typically takes 30-60 seconds. Remember, this light indicates the minimum steam temperature has been reached, and the heating element has just turned off.
- Purge the wand briefly. Open the steam valve for 2-3 seconds. This serves two purposes: it clears out condensed water from the wand and, more importantly, it drops the boiler temperature slightly. This drop tricks the thermostat into kicking the heating element back on to reheat the boiler.
- Start steaming at the right moment. You will notice the steam-ready light turns off. This is your cue! The light turning off means the heating element is actively working, generating maximum steam pressure. This is the perfect moment to insert the steam wand into your milk and begin texturing.
By starting your steaming cycle as the heater engages, you work with the machine, not against it. You’ll have a much more powerful and sustained flow of steam, which is essential for properly stretching and incorporating air into your milk.
Essential techniques for silky microfoam
Once you’ve mastered generating steam pressure, the next step is using it effectively. Great microfoam is a result of two distinct phases: aeration (stretching) and incorporation (texturing).
Aeration Phase:
- Start with cold milk in a cold pitcher. This gives you more time to work with the milk before it gets too hot.
- Position the steam wand tip just below the surface of the milk, slightly off-center.
- Open the steam valve fully. You should hear a gentle “tiss-tiss-tiss” or tearing paper sound. This is the sound of air being introduced into the milk.
- Continue aerating until the milk has expanded by about 20-30% for a latte. The pitcher will feel lukewarm to the touch.
Incorporation Phase:
- Submerge the steam wand deeper into the milk. This stops the aeration process.
- Angle the pitcher and position the wand to create a swirling vortex. This vortex is crucial; it breaks down any large bubbles and folds the airy foam into the liquid milk, creating a uniform, glossy texture.
- Continue until the pitcher is hot to the touch—too hot to hold comfortably for more than a second (around 60-65°C or 140-150°F). Do not overheat the milk, as it will lose its sweetness and texture.
Immediately after steaming, turn off the steam valve and wipe the wand with a damp cloth, followed by a quick purge to clear any milk from the tip. Tap the pitcher on the counter to remove any large bubbles and give it a swirl to keep the texture glossy before pouring.
Workflow and common troubleshooting
Bringing it all together into a repeatable workflow will help build consistency. A little practice and this will become second nature.
Your Gaggia Steaming Workflow:
- Prepare and pull your espresso shot into your cup.
- Flip the steam switch on.
- While it heats, pour cold milk into your pitcher.
- When the steam light comes on, open the steam valve for 2-3 seconds to purge water. Close it.
- Wait for the steam light to turn off (this signals the heater is on).
- Immediately submerge the wand tip into the milk and open the steam valve fully.
- Aerate the milk until the pitcher is lukewarm.
- Submerge the wand deeper to create a vortex and texturize until the pitcher is hot.
- Close the steam valve. Wipe and purge the wand.
- Tap and swirl your milk, then pour your latte art.
Even with the right technique, you might run into issues. Here’s a quick guide to troubleshooting common problems:
| Problem | Possible Cause | Solution |
|---|---|---|
| Big, soapy bubbles | Too much air was introduced, or the wand was too deep during aeration. | Keep the steam tip just at the surface. Aerate for a shorter period. |
| Milk is hot but thin | Not enough air was introduced. The wand was likely too deep from the start. | Ensure you hear the “tearing” sound at the beginning. Keep the tip higher for longer. |
| Steam pressure dies mid-way | You started steaming after the heating element cycled off. | Wait for the steam light to go out before you begin steaming. Be quicker to start. |
| Screaming, violent noise | The wand is too deep or pressed against the side/bottom of the pitcher. | Reposition the wand to be submerged but not touching the pitcher walls to create a smooth vortex. |
Mastering steam on a single boiler Gaggia is a journey of timing and technique, not a matter of luck. The primary hurdle is learning to work with the machine’s heating cycle. By understanding the concept of temperature surfing—purging the wand to activate the heater and then steaming while it’s on—you provide yourself with the powerful, continuous steam needed for excellent results. This, combined with proper wand placement for both aeration and incorporation, is the secret to transforming cold milk into the silky, glossy microfoam that defines a great latte or cappuccino. It requires practice, but with this knowledge, you are no longer at the mercy of your machine. You are in control, fully capable of producing drinks that rival your favorite cafe.

 No products in the cart.