

Maintaining your Gaggia group head gasket for a leak-free seal
A perfect shot of espresso is a beautiful thing. It’s a symphony of aroma, flavor, and rich crema. But that symphony can be quickly ruined by a single, faulty component: the group head gasket. This small rubber or silicone ring is one of the hardest working parts of your Gaggia espresso machine. Its job is to create a high-pressure, leak-free seal between the portafilter and the group head, forcing hot water through your coffee grounds. Over time, constant heat and pressure cause this gasket to wear out, harden, and fail. This leads to frustrating leaks, a loss of pressure, and ultimately, a disappointing cup. This guide will walk you through everything you need to know about maintaining, diagnosing, and replacing your gasket for a perfect seal every time.
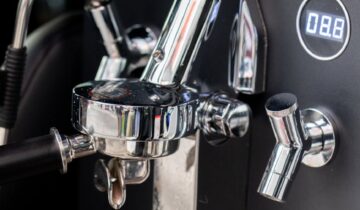
Understanding the gasket’s critical role
Think of the group head gasket as the gatekeeper of pressure in your Gaggia machine. When you lock your portafilter into the group head, the rim of the basket presses up against this gasket. This action creates an airtight seal that is strong enough to contain the nine bars (or about 130 PSI) of pressure generated by the pump. Without a perfect seal, that pressurized water will find the path of least resistance. Instead of being forced evenly through the coffee puck, it will spurt out and leak around the sides of the portafilter.
This failure has several negative consequences. First, the most obvious is the mess of hot water leaking onto your counter. Second, and more importantly for your coffee, a leak means a significant loss of brewing pressure. You will not achieve a proper extraction, resulting in a weak, watery, and under-extracted espresso shot, completely lacking in body and crema. Over time, the materials gaskets are made from, usually rubber or food-safe silicone, degrade. The constant cycle of heating and cooling makes them hard and brittle, reducing their ability to create a pliable, effective seal.
Signs it is time for a gasket check or replacement
Your Gaggia machine will give you several clear signs that its group head gasket is nearing the end of its life. Learning to spot these signs early can save you from messy failures and bad coffee. Pay close attention to these indicators:
- Visible leaks. This is the most unmistakable sign. If you see water dripping or spraying from around the top edge of the portafilter while pulling a shot, your seal has been compromised. It’s time for an immediate replacement.
- A wandering portafilter handle. When your gasket is new, your portafilter handle will likely lock in firmly around the 6 o’clock position. As the gasket ages, hardens, and compresses, you’ll find you have to turn the handle further and further to the right to get a tight seal. If your handle is traveling to the 4 or 5 o’clock position, the gasket is worn out.
- A hard and brittle feel. When the machine is cool, feel the gasket with your fingertip. A healthy gasket should feel soft and pliable, like a new rubber band. If it feels hard, crusty, or cracked, it has lost its elasticity and can no longer seal effectively.
- Excessive coffee residue. While some coffee grounds on the gasket are normal, a build-up of old, oily residue can prevent a good seal and also impart stale, bitter flavors into your espresso. If regular cleaning doesn’t solve sealing issues, the gasket itself is likely the problem.
Your routine for cleaning and care
Preventative maintenance is the key to extending the life of your gasket and ensuring consistent performance. A few simple steps integrated into your coffee routine can make a world of difference. The goal is to prevent coffee oils and fine grounds from baking onto the gasket, which accelerates its degradation.
Your first line of defense is a daily wipe-down. After you finish making coffee for the day, and with the machine still warm, take a damp microfiber cloth and thoroughly wipe the gasket and the shower screen. For a more effective clean, use a dedicated group head brush. These brushes have angled bristles designed to get up into the groove and scrub away any stubborn coffee grounds that your cloth can’t reach.
For a deeper clean, you should periodically remove the shower screen. Make sure the machine is unplugged and fully cooled. Use a screwdriver to remove the central screw holding the shower screen in place. With the screen removed, you have clear access to the gasket. You can now give it a much more thorough cleaning with your brush and cloth. While you’re at it, soak the shower screen in a solution of hot water and an espresso machine cleaner to dissolve any built-up oils. Rinse all parts thoroughly before reassembling. This deeper clean keeps the entire group head assembly in top shape.
How to replace your Gaggia group head gasket
Even with perfect maintenance, you will eventually need to replace the gasket. Thankfully, it’s an inexpensive and straightforward job you can easily do at home. First, ensure you have the correct replacement gasket for your model. For most Gaggia Classic and Pro models, this is a 73x57x8.5mm gasket. You’ll also need a small pick or a flathead screwdriver.
Follow these steps for a successful replacement:
- Safety first. Make sure the machine is turned off, unplugged from the wall, and has had at least an hour to cool down completely.
- Remove the screen. Just as with deep cleaning, use a screwdriver to remove the central screw and take off the shower screen and the metal dispersion plate behind it.
- Pry out the old gasket. This can be the trickiest part. Carefully work the tip of your pick or screwdriver between the gasket and the group head wall and pry it out. Old gaskets can be very hard and may break apart, so take your time and be careful not to scratch the brass group head.
- Clean the groove. Once the old gasket is out, it’s critical to clean the groove it sat in. Use a cloth and a brush to remove every last bit of old rubber and coffee residue. A clean surface is essential for the new gasket to seal properly.
- Install the new gasket. Take your new gasket and press it into the groove. If it has a beveled or angled side, that side should face up into the machine. Push it in evenly all around with your fingers. You can use the back of a spoon or even lock in the portafilter (without its basket) to help press it securely into place.
- Reassemble. Reinstall the dispersion plate and shower screen, and you’re done!
When choosing a new gasket, you have a couple of options. Here’s a quick comparison:
| Gasket material | Pros | Cons | Lifespan (approx.) |
|---|---|---|---|
| Rubber (Standard) | Inexpensive, widely available | Hardens and becomes brittle over time, absorbs coffee oils | 6-12 months |
| Silicone | Longer lasting, more flexible, doesn’t harden as quickly, easier to install/remove, doesn’t absorb oils | More expensive, can feel “stickier” initially | 2-5 years |
Conclusion: the small part that makes a big difference
The group head gasket is a small, unassuming component, but its impact on your espresso quality is enormous. A well-maintained gasket ensures that every bit of pressure your Gaggia creates is used to extract delicious flavor from your coffee grounds. We’ve seen how its function is central to the brewing process and how to spot the tell-tale signs of wear, such as leaks and a wandering portafilter handle. By incorporating simple cleaning habits into your routine and knowing how to perform the easy replacement process, you take control of your machine’s performance. Investing a few minutes in maintenance and a few dollars in a new gasket is one of the most cost-effective ways to guarantee a perfect, leak-free espresso shot every single time.


 No products in the cart.