
Mastering latte art: How to texture milk with the Gaggia Classic steam wand
There’s a special kind of magic in pouring a beautiful rosetta or a crisp heart into a freshly pulled shot of espresso. This is the allure of latte art, a skill that elevates your home coffee experience from routine to ritual. For owners of the venerable Gaggia Classic, a powerful and capable home espresso machine, achieving that silky, paint-like milk can feel like a challenge. Its steam wand, particularly the standard version, has a reputation for being tricky. But fear not. With the right technique, a little understanding of the science behind steaming, and a lot of practice, you can transform that humble jug of milk into the perfect microfoam. This guide will walk you through everything you need to know, from preparation to pouring.
Preparing for success: Tools and setup
Before you even turn on the steam switch, setting yourself up correctly is half the battle. Great milk texturing starts with the right ingredients and equipment. Think of this as your mise en place for making the perfect latte.
First, consider your milk. For beginners, cold, whole cow’s milk is your best friend. The higher fat and protein content makes it more forgiving and provides a wider window for creating stable, glossy microfoam. As you get more advanced, you can experiment with lower-fat options or dairy alternatives like oat milk, but be aware they behave differently and require a more delicate touch. Always start with milk straight from the fridge; the colder it is, the more time you have to work with it before it gets too hot.
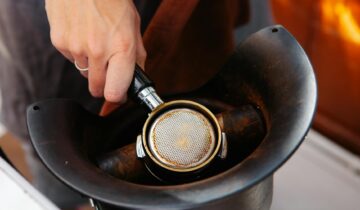
Next is your pitcher. A stainless steel pitcher is non-negotiable. It allows you to feel the temperature progression accurately with your hand. The size matters too; for a single latte, a 12oz (350ml) pitcher is ideal. Fill it with milk to just below where the spout begins. This gives the milk enough room to expand without overflowing. Finally, make sure your Gaggia Classic is fully heated. Turn it on at least 15-20 minutes before you plan to use it. For maximum steam power, wait for the brew light to turn off, indicating the boiler is at temperature, then hit the steam switch. Wait for the ready light to come on again. Just before steaming, open the steam valve for a couple of seconds to purge the wand of any condensed water. This ensures you’re hitting the milk with pure, dry steam.
The two phases of milk steaming
Texturing milk is not a single, chaotic action; it’s a controlled process with two distinct phases: aeration and incorporation. Understanding and separating these two steps is the absolute key to success. Getting the balance right between them is what separates bubbly, stiff foam from silky, pourable microfoam.
Phase 1: Aeration (Stretching)
This is where you introduce air into the milk. The goal is to increase the volume of the milk by creating tiny bubbles.
- Technique: Submerge the tip of the steam wand just below the surface of the milk, about half an inch. Position it slightly off-center.
- Sound: Open the steam valve fully. You are looking for a gentle hissing or a “ripping paper” sound. If you hear a loud, violent screech, the tip is too deep. If you see large bubbles erupting, it’s too shallow.
- Duration: This phase is very short. You only want to aerate until the milk has expanded by about 20-30% and the pitcher starts to feel lukewarm. This is often just the first 5-10 seconds of the process.
Phase 2: Incorporation (The Vortex)
Once you’ve introduced enough air, your next job is to break those bubbles down and fold them into the milk to create a smooth, homogenous texture.
- Technique: Plunge the steam wand deeper into the milk, keeping it off-center. Find the sweet spot where the milk begins to spin rapidly, creating a whirlpool or vortex. This motion is crucial for breaking down larger bubbles and creating that silky sheen.
- Sound: The hissing should stop completely. You should now hear only a gentle whirring sound as the milk spins.
- Endpoint: Keep the vortex going and continue to heat the milk. Use your free hand to gauge the temperature of the pitcher. When it becomes too hot to comfortably hold for more than a second (around 140-150°F or 60-65°C), immediately turn off the steam valve.
After steaming, immediately wipe the wand with a damp cloth and purge it again to keep it clean. Give the pitcher a firm tap on the counter to pop any remaining large bubbles and gently swirl the milk to keep it glossy and incorporated until you are ready to pour.
The standard pannarello vs. an upgraded wand
If you’re struggling to get good results, it might not be entirely your fault. The Gaggia Classic has historically shipped with a “pannarello” wand. This is a plastic sheath that fits over the steam pipe and has a large air intake hole. It’s designed to be foolproof for making thick, bubbly cappuccino foam, but it offers almost no control for creating the fine microfoam needed for latte art. It injects too much air too quickly, leading to stiff, dry foam.
For anyone serious about latte art, the single best investment you can make is to replace the pannarello with a single-hole tip steam wand. The most popular modification is installing the steam wand from a Rancilio Silvia machine. This “pro-style” wand gives you precise control over aeration, allowing you to execute the two phases of steaming properly. The transition from a pannarello to a single-hole wand is a genuine game-changer, turning a frustrating experience into a rewarding one.
| Feature | Standard Pannarello Wand | Upgraded Single-Hole Wand |
|---|---|---|
| Ease of use | Very easy for foamy drinks | Steeper learning curve |
| Foam quality | Large, stiff bubbles (cappuccino foam) | Silky, fine microfoam (latte art) |
| Control | Very little control over air incorporation | Full control over aeration and texturing |
| Best for | Beginners wanting simple, foamy milk | Aspiring baristas wanting to pour latte art |
Troubleshooting common milk steaming problems
Even with the right technique, things can go wrong. Don’t get discouraged! Learning to identify and fix common issues is a huge part of the process. Here are some of the most frequent problems and how to solve them.
- Problem: My milk is too bubbly and stiff, like soap suds.
Cause: You aerated for too long. Too much air was introduced, creating a foam that is too dry to pour properly.
Solution: Shorten your aeration phase. Remember, you only need to hear that “ripping” sound for a few seconds until the milk volume increases slightly. Focus more time on creating the vortex to incorporate the air. - Problem: My milk is hot but thin and watery, with no foam.
Cause: You didn’t aerate enough, or at all. The steam wand tip was likely buried too deep in the milk from the very beginning.
Solution: Make sure you start with the tip just at the surface. Listen for that distinct hissing sound before you plunge the wand deeper to start the incorporation phase. - Problem: The milk is making a loud, awful screeching sound.
Cause: The steam tip is too deep in the milk, essentially just boiling it without texturing. It can also happen if steam pressure is low.
Solution: Raise the wand slightly until the noise stops and you get a gentle whir. Ensure your machine is fully up to temperature and purged before you begin.
Mastering milk texturing is a journey of a thousand lattes. Each attempt, whether a success or a failure, teaches you something new. Pay attention to the sounds, the feel of the pitcher, and the look of the milk, and you will quickly develop the muscle memory needed for consistent results.
In conclusion, texturing milk for latte art on the Gaggia Classic is an entirely achievable skill that transforms your coffee-making. Success hinges on a methodical approach: start with the right tools, especially cold whole milk and a proper pitcher, and ensure your machine is fully prepped. The core of the technique lies in mastering the two distinct phases—a short, controlled aeration to introduce air, followed by a longer incorporation phase to create a silky, swirling vortex. While the standard pannarello wand can be a source of frustration, upgrading to a single-hole tip wand is a transformative step for any aspiring latte artist. Remember to troubleshoot your mistakes, as each bubbly or thin pitcher of milk is a learning opportunity. With patience and consistent practice, you’ll soon be pouring beautiful designs that taste as good as they look.

 No products in the cart.