
How to tell if your E61 internal valves need replacement
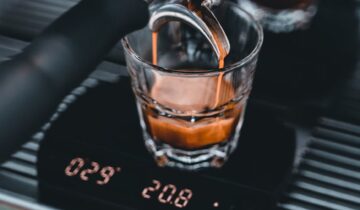
The E61 group head is an iconic piece of espresso engineering, celebrated for its thermal stability and mechanical pre-infusion. At its heart is a complex system of internal valves and a cam lever that directs the flow of hot water. Over time, these critical components can wear out, leading to leaks, inconsistent shots, and frustration. Understanding the signs of valve failure is key to maintaining your machine’s performance and longevity. This guide will walk you through the essential E61 valves, the common symptoms of their failure, and how to accurately diagnose whether it’s time for a simple cleaning or a full replacement. Don’t let a small drip turn into a major problem; let’s explore how to keep your E61 in top-notch condition.
Understanding the key valves in your E61 group head
Before you can diagnose a problem, you need to understand the moving parts. The E61 group head’s operation relies on a mechanical cam that actuates three key valves. While they work in concert, each has a distinct and vital role in the espresso-making process. Misdiagnosing which valve is failing can lead to wasted time and money, so getting to know them is the first step.
- The brew valve: This is the uppermost valve. When you lift the brew lever, the cam pushes this valve open, allowing hot water from the boiler to flow into the group head and onto your coffee puck. When the lever is down, this valve is closed, sealing the group head from the boiler.
- The pre-infusion valve: Located in the middle, this valve works with the brew valve. In the first stage of lifting the lever, it allows a small amount of water at low pressure to enter the chamber, gently saturating the coffee puck. This is the “pre-infusion” the E61 is famous for.
- The drain valve: Also known as the exhaust valve, this is the lowest valve. Its job is to release the built-up pressure from the group head after you finish pulling a shot. When you lower the brew lever, this valve opens, venting excess water and pressure out through the drain spout at the bottom of the group.
These three valves are essentially small pistons with rubber or silicone seals. Over thousands of cycles of intense heat and pressure, these seals can harden, crack, or become misshapen, preventing them from creating a perfect seal. This is the root cause of most E61 group head leaks.
Common symptoms of a failing valve
Once you understand the function of each valve, connecting a symptom to a specific part becomes much easier. A failing E61 valve doesn’t always result in a catastrophic failure; more often, it starts as a minor annoyance that gradually worsens. Paying attention to these early warning signs can save you from poor-tasting espresso and potential water damage to your machine or countertop. The location and timing of a leak are your biggest clues.
Here are the most common symptoms to watch for:
- A constant drip from the shower screen when idle: If your machine is hot and at pressure, but you notice a steady drip of water coming from where the coffee brews, this is a classic sign of a failing brew valve. The seal is no longer able to hold back the boiler pressure, allowing water to constantly seep into the group.
- Water sputtering from the drain spout during brewing: When the brew lever is up and you’re pulling a shot, the drain valve should be completely sealed. If you see water or steam sputtering from the drain outlet, it means the drain valve seal is compromised and can’t handle the nine bars of pressure.
- A persistent drip from the drain spout when idle: After pulling a shot, you expect a gush of water from the drain spout. However, if it continues to drip long after, or if it starts dripping when the machine has been idle for a while, this also points to a failing drain valve or, in some cases, a leaking brew valve that is overwhelming the system.
- Slow pressure build-up: If you notice your shots are taking longer to reach full pressure, or if the pressure gauge seems sluggish, it could be related to a leaking pre-infusion or brew valve. The leak prevents the system from pressurizing efficiently, which will negatively impact your extraction and shot quality.
Diagnosing the specific problem
Pinpointing the exact failing valve is a process of elimination based on the symptoms you observed. While some issues are straightforward, others can be tricky. For example, a severe brew valve leak can sometimes manifest as a drain spout drip, as the excess water has nowhere else to go. Using a systematic approach will give you the most accurate diagnosis.
The most effective tool is a portafilter with a blind basket (a solid metal basket with no holes). This allows you to fully pressurize the group head without making coffee.
The blind basket test:
- Let your machine fully heat up.
- Insert the portafilter with the blind basket into the group head.
- Lift the brew lever as if you were pulling a shot. The pressure should quickly ramp up to 9-10 bars.
- Observe the drain spout at the bottom of the group. If you see any water dripping or spraying out, your drain valve is definitely faulty. It should be bone dry during this test.
- Lower the lever. You should hear a “whoosh” and see a strong stream of water exit the drain spout. If it continues to drip for more than a minute after, the drain valve seal is likely worn.
- Remove the portafilter and observe the shower screen. With the machine hot and idle, any dripping here points directly to a failing brew valve.
This table summarizes the diagnostic process:
| Symptom | When It Happens | Likely Culprit |
|---|---|---|
| Water dripping from the shower screen | Machine is hot and idle (lever down) | Failing Brew Valve (top valve) |
| Water sputtering from the drain spout | During brewing (lever is up) | Failing Drain Valve (bottom valve) |
| Water dripping from the drain spout | Machine is hot and idle (lever down) | Failing Drain Valve (most likely) or severe Brew Valve leak |
| Slow pressure ramp-up with a blind basket | During brewing (lever is up) | Failing Pre-infusion/Brew Valve or pump issue |
To clean or to replace: Making the right call
After diagnosing the issue, you’re faced with a choice: can you get away with a deep clean, or is it time for a full replacement? Often, problems can be caused by a buildup of coffee oils or scale that prevents a valve from seating correctly. A simple cleaning and re-lubricating with food-safe silicone grease can sometimes restore function, especially if the issue is minor or intermittent.
However, the gaskets on these valves are wear-and-tear items. They operate under high heat and pressure, causing them to become hard, brittle, and compressed over time. If a valve has been leaking for a while, the gasket is almost certainly misshapen and will no longer create a proper seal, no matter how clean it is. Given that a full set of E61 valve gaskets is inexpensive, replacement is almost always the recommended long-term solution. If you’re going to take the time to disassemble the cam and valves for cleaning, you might as well install fresh gaskets to ensure reliable performance for years to come.
Conclusion
Maintaining the internal valves of your E61 group head is fundamental to achieving consistently great espresso. A small, persistent drip is more than just an annoyance; it’s a sign that a critical component is failing, which can affect thermal stability, brew pressure, and the overall health of your machine. By understanding the roles of the brew, pre-infusion, and drain valves, you can effectively interpret the symptoms your machine presents. Using a blind basket test provides a clear and definitive diagnosis, allowing you to pinpoint the exact source of the leak. While a thorough cleaning can sometimes offer a temporary fix, replacing the hardened or worn valve seals is the most reliable and cost-effective solution for restoring your machine’s performance and ensuring its longevity.

 No products in the cart.