Stop channeling: a guide to perfect espresso puck prep
There is nothing more frustrating for a home barista than pulling a beautiful-looking espresso shot only to taste a sharp, sour, and watery flavor. You used expensive, freshly roasted beans and your equipment is top-notch, yet the result is disappointing. The likely culprit is espresso channeling, a common issue that plagues beginners and experts alike. This occurs when water finds a path of least resistance through your coffee puck, leading to uneven extraction. Some parts of the coffee get over-extracted and bitter, while others are left under-extracted and sour. This article will serve as your comprehensive guide to mastering puck preparation, transforming your inconsistent shots into consistently delicious, balanced, and syrupy espresso.
Understanding the enemy: what is espresso channeling?
Before you can fix a problem, you must understand it. In espresso, channeling is the enemy of a good extraction. Imagine your coffee puck as a compact barrier that water must pass through evenly. When you brew, the machine forces hot water through this puck at high pressure (typically around 9 bars). If the puck has any inconsistencies—denser spots, looser spots, cracks, or gaps—the water will exploit them. It will rush through these “channels” instead of saturating the entire coffee bed uniformly.
This process creates a dual-problem shot. The coffee directly in the channel’s path is hit with too much water too quickly, leading to over-extraction and bitter, harsh flavors. Meanwhile, the denser, surrounding areas are largely bypassed, leading to under-extraction and a sour, acidic taste. The result is a shot that is paradoxically both sour and bitter, lacking sweetness and body. If you use a bottomless portafilter, you can see this happen in real-time: instead of a single, uniform cone of espresso, you’ll see spurts of watery, blond coffee shooting out from different spots.
The foundation: consistent grinding and dosing
Excellent puck prep begins before the coffee even lands in your portafilter. The first two variables you must control are your grind and your dose. Without consistency here, any subsequent steps will be less effective.
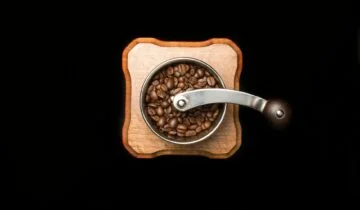
Your grinder is paramount. A quality burr grinder is non-negotiable for espresso. Blade grinders produce an inconsistent mix of fine dust and large chunks, which is a guaranteed recipe for channeling. A burr grinder, on the other hand, creates much more uniform particles. This uniformity is key to building a puck with even density, allowing water to flow through it at a consistent rate.
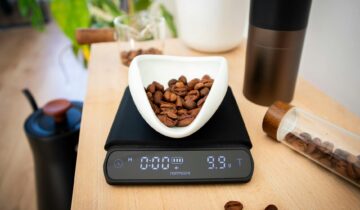
Dosing with precision. Don’t eyeball your dose. Using a coffee scale with 0.1-gram precision is one of the most impactful changes you can make. Every espresso basket is designed for a specific dose range (e.g., 18-20 grams). Under-dosing leaves too much headspace, and the puck can be easily disturbed by the water, while over-dosing can press the puck against the shower screen, preventing even water distribution. Weighing your beans before grinding or weighing the grounds in your portafilter ensures you have the same amount of coffee for every shot, creating a repeatable foundation.
The essential tools: distribution and leveling
Once you have a consistent dose of well-ground coffee in your portafilter, the next goal is to arrange those grounds into a homogenous, fluffy, and level bed. This is where most channeling is either created or prevented.
The most effective method for this is the Weiss Distribution Technique (WDT). This technique involves using a tool with several very fine needles to stir the coffee grounds. As you grind, coffee tends to form clumps and pile up unevenly. The WDT tool breaks up these clumps and distributes the grounds evenly throughout the basket, from bottom to top. The proper technique involves moving the needles in circular or back-and-forth motions, ensuring you reach the bottom of the basket to eliminate any hidden pockets of density. The goal is to create a light, fluffy, and uniform bed of coffee.
After WDT, you might consider a coffee distribution or leveling tool. These tools rest on the rim of the portafilter and use a blade to skim the surface of the grounds, creating a perfectly flat top. It’s crucial to understand that these are leveling tools, not primary distribution tools. They should only be used after WDT has already de-clumped and distributed the grounds. Using a leveler on a clumpy puck can simply compress those clumps, hiding a density problem rather than solving it.
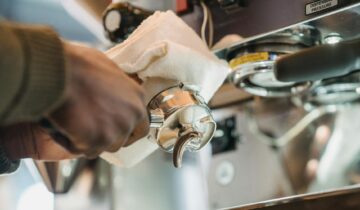
The final seal: mastering your tamping technique
Tamping is the final step in puck prep. Its purpose is to compact the loose grounds into a dense, solid puck that will provide even resistance to the high-pressure water from your machine. While many people fixate on how hard to tamp, the most important factor is tamping perfectly level.
An uneven tamp creates a puck that is denser on one side and less dense on the other. Water will naturally flow toward the less dense side, creating a massive channel. To ensure a level tamp, focus on your form. Keep your wrist straight and your elbow directly above the portafilter, applying pressure straight down. A self-leveling tamper can be a great investment as it has a built-in collar that ensures the tamper is always parallel to the basket.
In terms of pressure, consistency is more important than raw force. A firm press of about 15-30 lbs is sufficient. Press down until you feel the coffee puck stop compressing, and that’s it. Avoid the old habit of “polishing” or twisting the tamper at the end, as this can break the seal around the edge of the puck and create micro-cracks that invite channeling.
Common puck prep mistakes and solutions
| Common Mistake | Consequence | Solution |
|---|---|---|
| Not breaking up clumps | Creates pockets of high and low density, the primary cause of channeling. | Use a WDT tool to thoroughly de-clump and fluff the grounds. |
| Tamping on an angle | Creates an unevenly dense puck, forcing water to one side. | Focus on form or use a self-leveling tamper to ensure a perfectly level bed. |
| Inconsistent coffee dose | Varies puck density and headspace, making results unrepeatable. | Use a scale to weigh your coffee dose to a 0.1-gram precision every time. |
| Tapping the portafilter | Can fracture or crack the compressed puck after tamping. | Once you tamp, do not tap. Lock the portafilter directly into the group head. |
By understanding and addressing these common mistakes, you can systematically remove the variables that lead to bad shots.
Conclusion: the path to perfect espresso
Espresso channeling is the ultimate thief of flavor, but it is a problem that can be solved with a methodical and mindful approach. The secret to consistently delicious espresso lies not in expensive machines, but in mastering the ritual of puck preparation. By focusing on a consistent grind and a precise dose, you create a solid foundation. From there, using a WDT tool to meticulously distribute the grounds eliminates clumps and ensures uniformity. Finally, a firm and, most importantly, level tamp seals the deal, creating a puck that is ready to withstand the intense pressure of brewing. By integrating these techniques into your workflow, you take control of the variables, turning chance into craft and transforming frustrating, sour shots into the rich, sweet, and balanced espresso you’ve been chasing.
 No products in the cart.