How to master temperature surfing on the Gaggia Classic for consistent shots
The Gaggia Classic is a legendary entry-point into the world of home espresso. Its robust build and powerful steam wand have made it a favorite for decades. However, its greatest strength—simplicity—is also the source of its most significant challenge: temperature instability. The machine’s small boiler and basic thermostat create a wide temperature swing that can turn a potentially perfect shot into a sour or bitter disappointment. Don’t despair, though. There is a technique that empowers you to take control. It’s called temperature surfing, a manual process of timing your shot to coincide with the ideal point in the machine’s heating cycle. This guide will walk you through mastering this essential skill, transforming your Gaggia Classic into a remarkably consistent espresso maker.
Understanding the Gaggia Classic’s heating cycle
Before you can control the temperature, you must first understand why it fluctuates. The Gaggia Classic is a Single Boiler, Dual-Use (SBDU) machine. This means one small aluminum boiler is responsible for heating water for both brewing espresso (around 93°C or 200°F) and creating steam (around 140°C or 284°F). To manage this, it uses a simple bimetallic thermostat, not a sophisticated digital controller.
Think of this thermostat like one in an old home radiator. It doesn’t maintain a precise temperature; instead, it operates within a wide range, often called a deadband. Here’s how the cycle works:
- Heating phase: The thermostat senses the water is too cold. It closes the circuit, the heating element kicks on, and the orange “brew” light on the front of the machine illuminates.
- Peak temperature: The water heats up until the thermostat reaches its upper limit. The circuit opens, the heating element shuts off, and the orange brew light goes out.
- Overshoot and cooling: Even after the element is off, residual heat causes the water temperature to continue to rise for a short period before it begins to cool down.
- Cycle repeats: The water cools until it hits the thermostat’s lower limit, and the entire process starts over again.
This cycle can create a temperature swing of 10-15°C (20-30°F) inside the boiler. Pulling a shot at the bottom of this swing will be too cold and result in a sour, underdeveloped taste. Pulling one at the very peak will be too hot, leading to a bitter, scorched flavor. Temperature surfing is the art of navigating this cycle to pull your shot at the exact same point every single time.
The principles of temperature surfing
Temperature surfing is the manual process of initiating the brew cycle at a specific, repeatable moment to achieve a consistent brew temperature. Your goal is to eliminate the guesswork and make temperature a controlled variable rather than a random one. The key to this process is using the machine’s brew light as your guide.
The most common and reliable method is to “surf down” from the peak temperature. This is because the rate of cooling is generally more predictable than the rate of heating. The process involves letting the boiler reach its maximum temperature (indicated when the brew light turns off) and then waiting a specific amount of time for it to cool to your desired brew temperature before starting the shot.
By using a timer, you can precisely control this cooling period. A shorter wait after the light goes out means a hotter brew temperature, which is often ideal for lighter roasts. A longer wait results in a cooler brew temperature, which typically suits darker roasts and helps to avoid extracting bitter flavors.
A step-by-step guide to your first surf
Ready to pull a consistent shot? Grab a timer (your phone works perfectly) and follow these steps. The key is to make this process a repeatable ritual.
- Warm up the machine: This is non-negotiable. Turn on your Gaggia Classic with the portafilter locked in for at least 15-20 minutes. This ensures the boiler, group head, and portafilter are all thoroughly heated and won’t sap heat from your brew water.
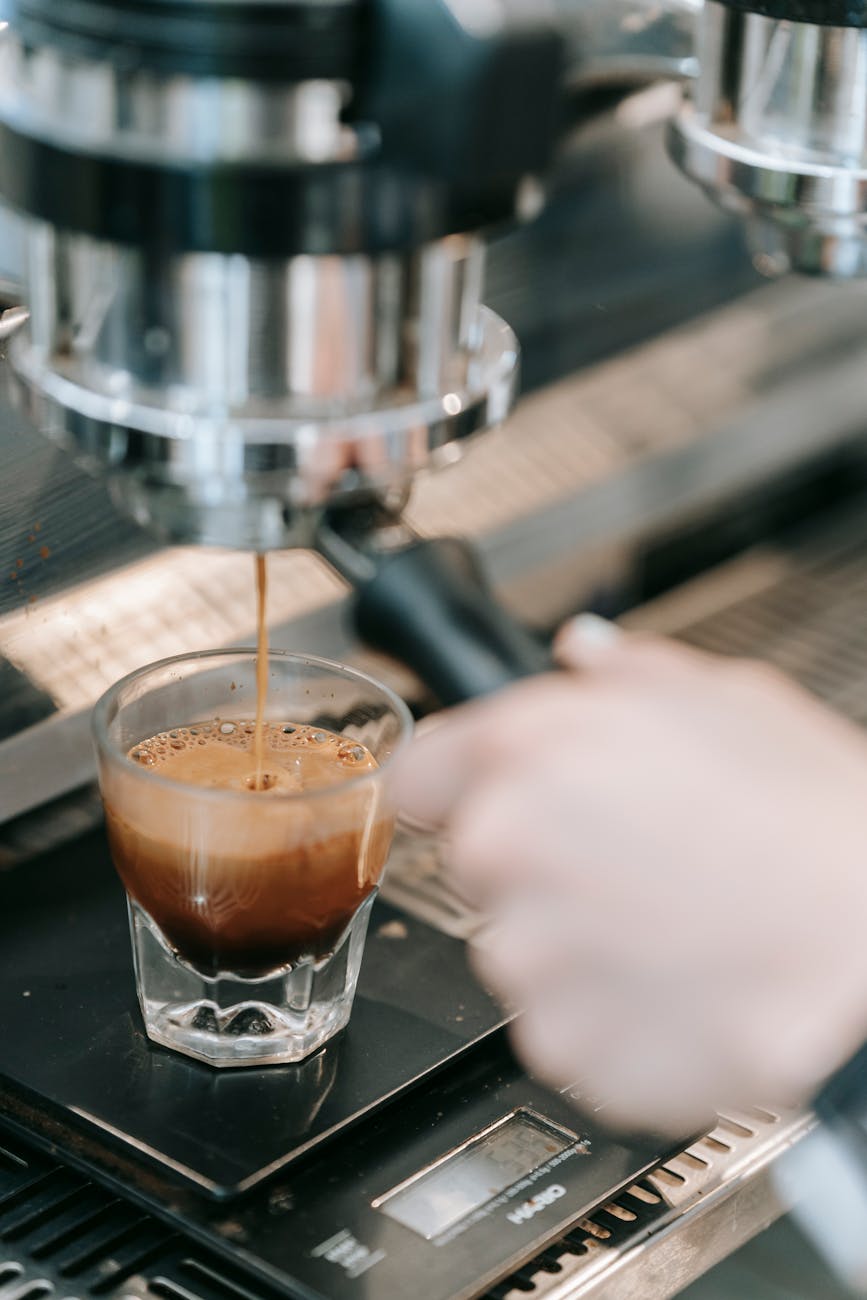
- Start the cycle: Open the steam wand and flick on the brew switch to run a few ounces of water through the group head. This is often called a “priming flush.” It purges any old water and, more importantly, drops the boiler temperature enough to force the heating element to kick on. The orange brew light will illuminate. Close the steam wand and turn off the brew switch.
- Wait for the light: Now, you wait. The machine is heating up. The moment the orange brew light turns off, the boiler has reached its peak temperature. This is your cue.
- Start your timer: As soon as the light goes off, start your timer. At this exact moment, the water in the boiler is too hot for brewing due to thermal overshoot. Your waiting period allows it to cool down to the target range.
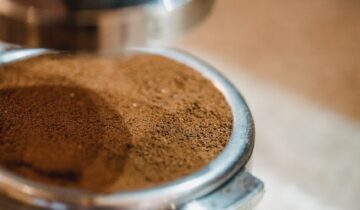
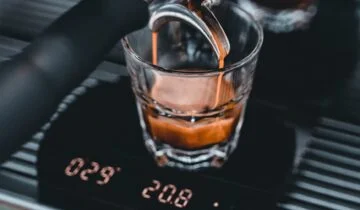
- Prepare and pull: While the timer is running, get your portafilter dosed and tamped. When your timer hits your target time (for example, 10 seconds), lock the portafilter into the group head and immediately hit the brew switch.
- Taste and adjust: How did the shot taste? If it was too bitter, increase your wait time (e.g., to 15 seconds) for the next shot. If it was a bit sour, decrease your wait time (e.g., to 5 seconds). This is how you dial in the perfect temperature for your specific beans.
Refining your technique and finding the sweet spot
Once you have the basic steps down, consistency becomes your primary focus. Every action you take should be identical from shot to shot. If you do a priming flush, make it the same duration every time. Perform your puck prep at the same speed so you are always ready to pull the shot at the correct moment.
Different coffee roasts extract best at different temperatures. While you will ultimately dial this in by taste, here is a starting point to guide your experiments. Remember, these are just guidelines; your palate is the final judge.
| Roast Level | Suggested Wait Time (after light off) | Target Flavor Profile |
|---|---|---|
| Light Roast | 3 – 8 seconds | Bright, acidic, floral, fruity |
| Medium Roast | 8 – 15 seconds | Balanced, sweet, chocolate, nutty |
| Dark Roast | 15 – 25 seconds | Rich, low acidity, dark chocolate, roasty |
A final note: if you steam milk, always pull your espresso shot first. The steaming process heats the boiler far beyond brewing temperature. Bringing it back down requires a significant “cooling flush” by running water through the group head until the brew light comes on, and then starting your surfing routine from there. For the ultimate in temperature stability, many Gaggia Classic owners eventually upgrade to a PID controller, which automates this entire process with digital precision. However, mastering temperature surfing is a free and incredibly effective way to elevate your espresso game significantly.
Conclusion
The Gaggia Classic is a fantastic machine whose full potential is unlocked by the home barista willing to understand its behavior. Its simple thermostat creates a wide temperature swing, making shot-to-shot consistency a challenge. By mastering temperature surfing, you overcome this limitation entirely. The technique is a simple but powerful ritual: warm up the machine properly, trigger the heating cycle, and start a timer the moment the brew light turns off. By waiting a specific, repeatable amount of time, you can pull your shot at the exact same temperature every single time, giving you control over one of the most critical variables in espresso extraction. With a little practice, this skill becomes second nature, transforming your Gaggia Classic into an instrument of precision and allowing you to produce consistently delicious, cafe-quality espresso at home.

 No products in the cart.