
The satisfying ritual of pulling a perfect espresso shot is a joy for any coffee enthusiast. You have the grind dialed in, the temperature is stable, and the rich, syrupy liquid flows beautifully into your cup. But then, as you stop the shot, a loud pssshh sound is followed by a messy splash of hot water erupting from your machine’s drip tray, splattering your counter and the machine itself. This common frustration is the result of the 3-way solenoid valve doing its job, but its interaction with a shallow drip tray can turn a clean workflow into a daily cleanup chore. This article will delve into why this happens and explore practical, effective methods to manage this discharge, ensuring your coffee station remains pristine.
Understanding the 3-way solenoid valve discharge
Before we can manage the splash, it’s crucial to understand its origin. Most prosumer and commercial espresso machines are equipped with a 3-way solenoid valve. Its primary purpose is to control the flow of water to the group head and, more importantly, to relieve the pressure after the brew cycle is complete. When you pull a shot, the valve allows water to flow from the boiler to the coffee puck under high pressure, typically around 9 bars.
The moment you stop the shot, the valve’s “third way” opens. This instantly vents the built-up pressure and any remaining hot water from the group head through an exhaust tube, directing it straight into the drip tray. This rapid depressurization is what gives you a dry, solid coffee puck that’s easy to knock out. However, this high-pressure release of superheated water is violent. When it hits the hard surface of a shallow tray, the energy has nowhere to go but up and out, creating the infamous splash.
Simple and immediate techniques to reduce splashing
Fortunately, you don’t necessarily need to buy new equipment to solve this issue. A few simple adjustments to your workflow can make a significant difference. These methods focus on absorbing or redirecting the force of the water discharge before it can create a mess.
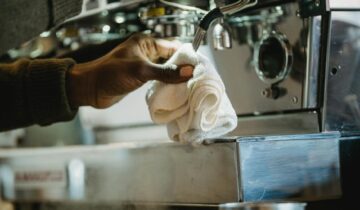
- The dampening method: This is the easiest and most common solution. Place a small, dedicated sponge or a folded microfiber cloth on the drip tray grate, directly underneath the discharge outlet. The porous material absorbs the initial impact of the water, dampening the force and preventing it from splashing. You will need to rinse and squeeze it out regularly, but it’s a highly effective, low-cost fix.
- The catch cup technique: This method requires a bit of speed but is completely effective. As soon as you stop your shot, quickly place an empty demitasse or a small, heat-resistant cup under the group head to catch the discharge. You can then simply empty the cup into the sink or the drip tray more gently. It becomes second nature after a few tries.
These techniques are about changing your habits slightly to work in harmony with your machine’s design, providing an immediate fix to the splashing problem.
Using espresso tools for a dual purpose
Moving from workflow changes to accessories, one of the most popular tools in modern espresso making also happens to be a fantastic solution for solenoid splash: the puck screen. While its primary function is to improve water distribution over the coffee bed for a more even extraction and to keep the group head cleaner, it has a valuable secondary benefit.
When you end your shot, the metal puck screen acts as a physical barrier and a heat sink inside the portafilter. It holds back the initial violent rush of water. The mesh structure breaks up the solid stream, dissipating its energy before it exits the group head. The result is a much gentler release—more of a controlled, steamy fizzle than an explosive splash. For many users, simply adding a puck screen to their routine completely eliminates the problem, all while potentially improving the quality of their espresso.
Modifications and advanced solutions
For those looking for a more permanent or integrated solution, there are more advanced options. Some machine owners turn to modifications, though these should be approached with care. A popular DIY fix involves extending the machine’s discharge tube. By fitting a short piece of high-temperature silicone tubing over the outlet, you can direct the water to discharge closer to the bottom of the tray or even under the surface of any existing water, which completely negates splashing. Always ensure the tubing is food-safe and can handle high temperatures.
Additionally, the community of coffee lovers has produced custom-designed drip tray grates, often 3D printed, that include built-in splash guards or angled louvers to redirect the discharge downwards. Below is a comparison of the various methods discussed.
| Solution | Approximate cost | Effort level | Effectiveness |
|---|---|---|---|
| Dampening sponge/cloth | Low (under $5) | Low (requires regular rinsing) | High |
| Catch cup technique | Free (using existing cup) | Medium (requires speed/timing) | Very High |
| Puck screen | Medium ($10 – $25) | Low (part of shot prep) | High |
| Custom grate or tube | Medium ($15 – $40) | Medium (requires installation) | Very High |
Ultimately, a messy drip tray doesn’t have to be an accepted part of your espresso routine. The aggressive discharge from a 3-way solenoid valve is a byproduct of a feature designed to improve your coffee-making workflow, but its impact on a shallow tray is certainly manageable. We have explored the reasons behind the splash, from the mechanics of pressure release to the physics of impact. From simple, no-cost solutions like using a dampening sponge or a catch cup to integrating beneficial tools like a puck screen, the options are varied. For the dedicated enthusiast, even minor modifications can provide a permanent fix. By choosing the method that best suits your setup and workflow, you can eliminate the daily annoyance of counter splashes and maintain a cleaner, more enjoyable coffee corner.

 No products in the cart.