
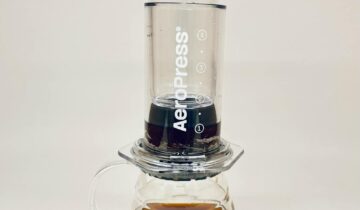
The bottomless portafilter, often called a naked portafilter, is more than just a tool for capturing beautiful espresso videos. It’s an unfiltered window into the heart of your extraction, revealing every detail of how water interacts with your coffee puck. While a standard spouted portafilter hides imperfections, the bottomless portafilter puts them on full display. For the home barista, this is an invaluable diagnostic tool. It can be intimidating at first, with shots spurting and spraying, but learning to read the signs is the fastest way to improve your espresso. This guide will walk you through how to identify common extraction issues simply by watching your shot unfold, helping you turn frustrating mornings into consistently delicious coffee.
What a perfect shot looks like
Before we can diagnose problems, we need a benchmark for success. A great extraction is a beautiful and clean process. It begins with the first few seconds of the shot, where you should see small, dark droplets of espresso begin to “sweat” or bead across the entire surface of the filter basket. This even beading indicates that the water is saturating the coffee puck uniformly. Shortly after, these droplets will coalesce into several small streams, which should quickly merge into a single, steady, and centered stream. This unified stream will be viscous and syrupy, resembling warm honey. As it flows, you may notice beautiful “tiger striping”—alternating bands of dark and reddish-brown crema—which is often a sign of a fresh, well-extracted coffee. The entire process should be clean, with no random spurts or jets shooting out from the basket.
Diagnosing channeling: The main culprit of bad espresso
Channeling is the most common and frustrating issue that a bottomless portafilter reveals. It occurs when water finds a path of least resistance through the coffee puck instead of flowing through it evenly. This means some parts of the coffee are over-extracted (bitter) while others are under-extracted (sour), resulting in a terribly unbalanced cup.
You can spot channeling through several distinct visual cues:
- Spurting or jets: This is the most obvious sign. You’ll see tiny, aggressive streams of watery, light-colored coffee shooting out from the basket at odd angles. Your countertop might get messy.
- Multiple streams that don’t merge: If your shot develops into several separate streams that never form a single cone, it’s a sign that your puck has multiple low-density areas.
- Bald spots: Notice areas on the bottom of the basket where no coffee is emerging at all. This means the water is completely bypassing those denser sections.
- Early blonding in one area: If one stream turns pale yellow much faster than the rest of the flow, that’s a channel where the coffee has already been exhausted.
Channeling is almost always a result of poor puck preparation. Clumps in your coffee grounds create weak spots, and an uneven or tilted tamp will create less-dense areas along the edges. Using a distribution technique like the Weiss Distribution Technique (WDT) to break up clumps and a distribution tool to level the grounds before tamping are the most effective ways to prevent it.
Reading the flow: Under-extraction vs. over-extraction
Beyond the chaos of channeling, the speed and color of the flow itself tell a story about your extraction. By connecting what you see with what you taste, you can quickly dial in your grind size. An ideal shot often follows the general rule of a 1:2 ratio (e.g., 18 grams of coffee in, 36 grams of liquid out) in about 25-30 seconds. Your bottomless portafilter gives you visual clues about this timing.
If you are experiencing under-extraction, you will notice:
- A very fast flow that begins just a few seconds after starting the pump.
- The stream will look thin and watery, lacking a syrupy texture.
- The color will become pale or “blond” very quickly, often in under 15 seconds.
- In the cup: The shot will taste sour, acidic, and lack sweetness or body.
If you are experiencing over-extraction, you will see:
- A very slow start, with the shot taking 10-12 seconds or more just to produce the first drops.
- The flow will be drippy and struggle to form a stream, sometimes even choking the machine.
- The stream will be extremely dark, and you may see dark, burnt-looking spots on the basket.
- In the cup: The shot will taste intensely bitter, astringent, and hollow, with no pleasant flavors.
These issues are primarily controlled by your grind size. A fast, sour shot means your grind is too coarse. A slow, bitter shot means your grind is too fine. Adjusting your grinder is the key to finding the sweet spot.
A quick reference guide to espresso issues
To help you quickly diagnose your shots, here is a simple table summarizing the visual cues, the likely problem, and the solution.
| Visual symptom | Likely problem | Common cause | How to fix |
|---|---|---|---|
| Aggressive spurts or jets | Channeling | Clumpy grounds or an uneven tamp. | Use a WDT tool to break up clumps and ensure a level, firm tamp. |
| Flow starts too fast and is pale | Under-extraction | Grind size is too coarse. | Adjust your grinder to a finer setting. |
| Shot struggles to start, flow is slow and dark | Over-extraction | Grind size is too fine. | Adjust your grinder to a coarser setting. |
| Coffee flows from the edges but not the center | Doughnut extraction | Grounds are less dense on the sides. | Distribute grounds evenly from the center outwards before tamping. |
| Flow is concentrated on one side of the basket | Uneven extraction | Tamp was not level. | Focus on applying even pressure and keeping your tamper perfectly flat. |
Ultimately, the bottomless portafilter is your best teacher. It provides instant, honest feedback on every aspect of your espresso-making process, from puck prep to grind size. While it can be daunting to see your flaws so clearly, embracing this feedback is the key to progress. Pay attention to the initial beading, the formation of the stream, and its color and speed. By methodically addressing issues like channeling and incorrect flow rate, you are not just fixing a single bad shot; you are refining your technique. With patience and observation, the naked portafilter will transform from a source of frustration into an indispensable tool for pulling consistently balanced and delicious espresso shots every single time.

 No products in the cart.