A persistent drip from your espresso machine’s group head is more than just an annoyance; it’s a sign that a crucial component needs attention. That dripping is often the tell-tale symptom of a dirty 3-way solenoid valve. This small but mighty part is responsible for regulating pressure during and after you pull a shot. When it becomes clogged with coffee grounds, oils, and mineral scale, it can’t seal properly, leading to leaks and soupy coffee pucks. Don’t let a small issue compromise your coffee quality or potentially damage your machine. This guide will walk you through why this valve is so important, how to spot the signs of a problem, and a complete step-by-step process to clean it, ensuring a perfect, leak-free espresso every time.
What the 3-way solenoid valve does
Before diving into the cleaning process, it’s essential to understand what the 3-way solenoid valve does. Think of it as a traffic controller for water pressure in your espresso machine. When you start your shot, this electromagnetic valve opens, allowing hot, pressurized water to flow from the boiler to the group head and into your portafilter. This is its first position.
Once you finish the extraction and turn off the pump, the magic happens. The valve switches to its second position, simultaneously closing the path from the boiler and opening a third channel. This third path vents the excess pressure and water from the group head, usually through a drain tube into the drip tray. This rapid pressure release is what gives you a dry, solid coffee puck that’s easy to knock out. Without it, you’d have a messy, high-pressure “portafilter sneeze” of hot water and coffee grounds. Over time, this constant interaction with coffee grounds and mineral-rich water causes buildup, which is the root cause of most leaks.
Signs that your valve needs cleaning
Your espresso machine will give you clear signals when the 3-way solenoid valve is clogged. Ignoring them can lead to poor performance and potential damage. The most common and obvious sign is a constant drip from the group head long after you’ve finished pulling a shot. This happens because coffee particles or scale are physically preventing the valve’s plunger from creating a complete seal, allowing water to seep through.
Other key indicators include:
- Wet, soupy pucks: If the valve is partially blocked, it can’t properly vent the pressure. This leaves excess water in the portafilter, turning your coffee puck into a muddy mess instead of a dry, compact disc.
- A weak or sputtering water release: When you stop your shot, you should hear a distinct “whoosh” sound as the pressure is released into the drip tray. If this sound is weak, gurgling, or nonexistent, it points to a blockage in the exhaust line.
- Inconsistent shot pressure: In severe cases, a blockage can interfere with the flow of water during extraction, leading to fluctuating pressure and a poorly extracted espresso.
If you’re experiencing any of these symptoms, especially the persistent drip, it’s time to give your valve a thorough cleaning.
A step-by-step guide to cleaning the valve
Cleaning the solenoid valve is a straightforward process, but it requires care and attention to detail. Always put safety first.
1. Preparation and safety
Before you begin, unplug your espresso machine from the wall and allow it to cool down completely. This can take at least an hour. Working on a hot, pressurized machine is extremely dangerous. Gather your tools: you will likely need a set of screwdrivers, an adjustable wrench, a small brush (like a stiff-bristled pipe cleaner or toothbrush), a bowl for small parts, and a dedicated coffee machine cleaning detergent like Cafiza or Puly Caff.
2. Locating and removing the valve
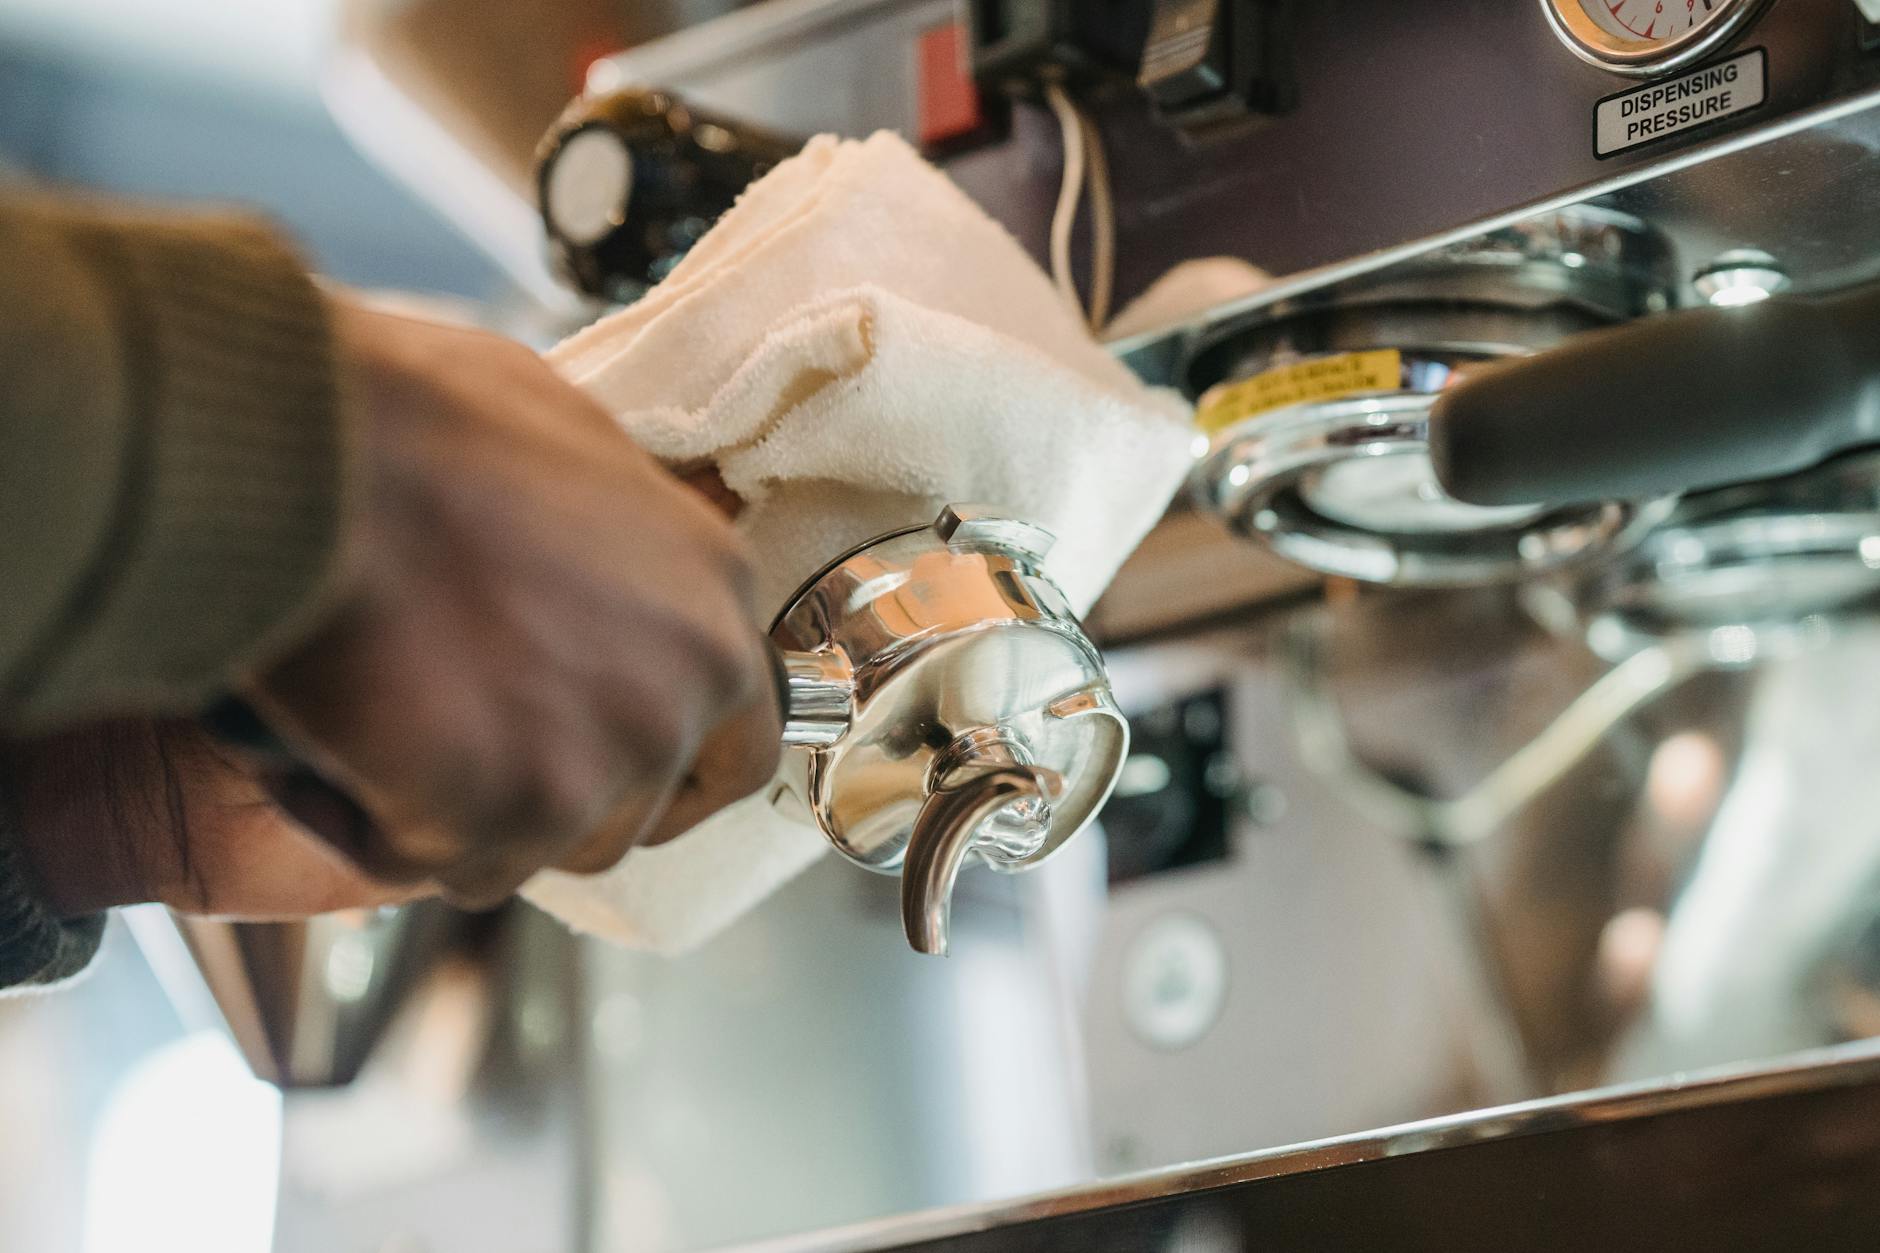
You will need to remove the outer panels or casing of your machine. The 3-way solenoid valve is typically a brass or steel block connected to the group head with copper tubing and has two wires attached. Take a photo of the wiring before you disconnect anything. This will be your reference for reassembly. Carefully disconnect the electrical connectors. Then, use your wrench to gently unscrew the nuts connecting the tubing and the valve itself from its mounting point.
3. Disassembly and cleaning
With the valve removed, carefully disassemble it over your bowl to catch any small parts. It usually consists of the main body, a shaft (or plunger), and a spring. Inspect the inside of the valve body and the plunger for black, tarry coffee residue and white, chalky scale.
- Soak the metal components (not any electrical parts) in a hot water solution with your coffee machine detergent for about 30 minutes. This will dissolve the built-up coffee oils and residues.
- After soaking, use your small brush to scrub away any remaining debris from the inside of the valve body and off the plunger. Pay close attention to the tiny orifices, as this is where blockages occur.
- If you see significant mineral scale, you may need a separate soak in a descaling solution. However, the coffee detergent is usually sufficient for common blockages.
- Rinse all parts thoroughly with clean water to remove any trace of the cleaning solution.
4. Reassembly and testing
Carefully reassemble the valve, ensuring the spring and plunger are correctly seated. Re-install it in the machine, tightening the nuts firmly but not excessively to avoid stripping the threads. Reconnect the electrical wires using your photo as a guide. Replace the machine’s casing, plug it in, and turn it on. Allow it to heat up fully. Run the pump a few times without the portafilter to check for leaks and confirm that the pressure release is working correctly when you stop the pump.
How to prevent future clogs and leaks
A deep clean is effective, but prevention is always better. Integrating a few simple habits into your coffee routine can dramatically extend the time between deep cleans and keep your machine running smoothly. The single most important preventive measure is regular backflushing. This process sends water and a cleaning agent backward through the group head and solenoid valve, flushing out a majority of the coffee grounds and oils before they have a chance to harden and build up.
Here is a simple maintenance schedule you can follow:
| Frequency | Maintenance Task | Purpose |
|---|---|---|
| Daily | Water backflush | Rinses out fresh coffee grounds from the valve and shower screen after your last shot of the day. |
| Weekly | Chemical backflush | Uses a specialized detergent to dissolve stubborn coffee oils and fine particles that water alone can’t remove. |
| Ongoing | Use filtered water | Minimizes the buildup of mineral scale, which is a primary cause of valve failure and blockages. |
By staying on top of this routine, you address the root causes of buildup. A quick, daily water backflush takes less than a minute, and a weekly chemical clean takes only a few minutes more, saving you the bigger job of a full valve disassembly down the line.
In conclusion, a clean 3-way solenoid valve is fundamental to the performance and longevity of your espresso machine. That frustrating drip from the group head is a direct call for maintenance, signaling that coffee residue and scale have compromised its ability to seal. By understanding its function, recognizing the warning signs like wet pucks and leaks, and following the detailed steps for disassembly and cleaning, you can restore your machine to perfect working order. While the process requires some care, it is well within the reach of most home baristas. Most importantly, adopting a preventive maintenance routine, centered around regular backflushing and the use of filtered water, is the key to preventing the problem from recurring, ensuring your machine is always ready to produce delicious, leak-free espresso.

 No products in the cart.