How to avoid overfilling your low profile drip tray during backflushing
A clean espresso machine is the foundation of great coffee, and regular backflushing is a non-negotiable part of that maintenance. For owners of machines with sleek, low profile drip trays, however, this essential task can quickly turn into a messy ordeal. The sudden rush of water released from the group head can easily overwhelm the tray’s limited capacity, leading to a frustrating puddle on your countertop. This isn’t just an annoyance; it can damage cabinets and floors over time. The good news is that a flooded workspace is not an inevitable consequence of good machine hygiene. This article will guide you through the reasons this overflow happens and provide practical, easy-to-implement techniques to ensure your backflushing routine is clean, efficient, and splash-free.
Understanding why your drip tray overflows
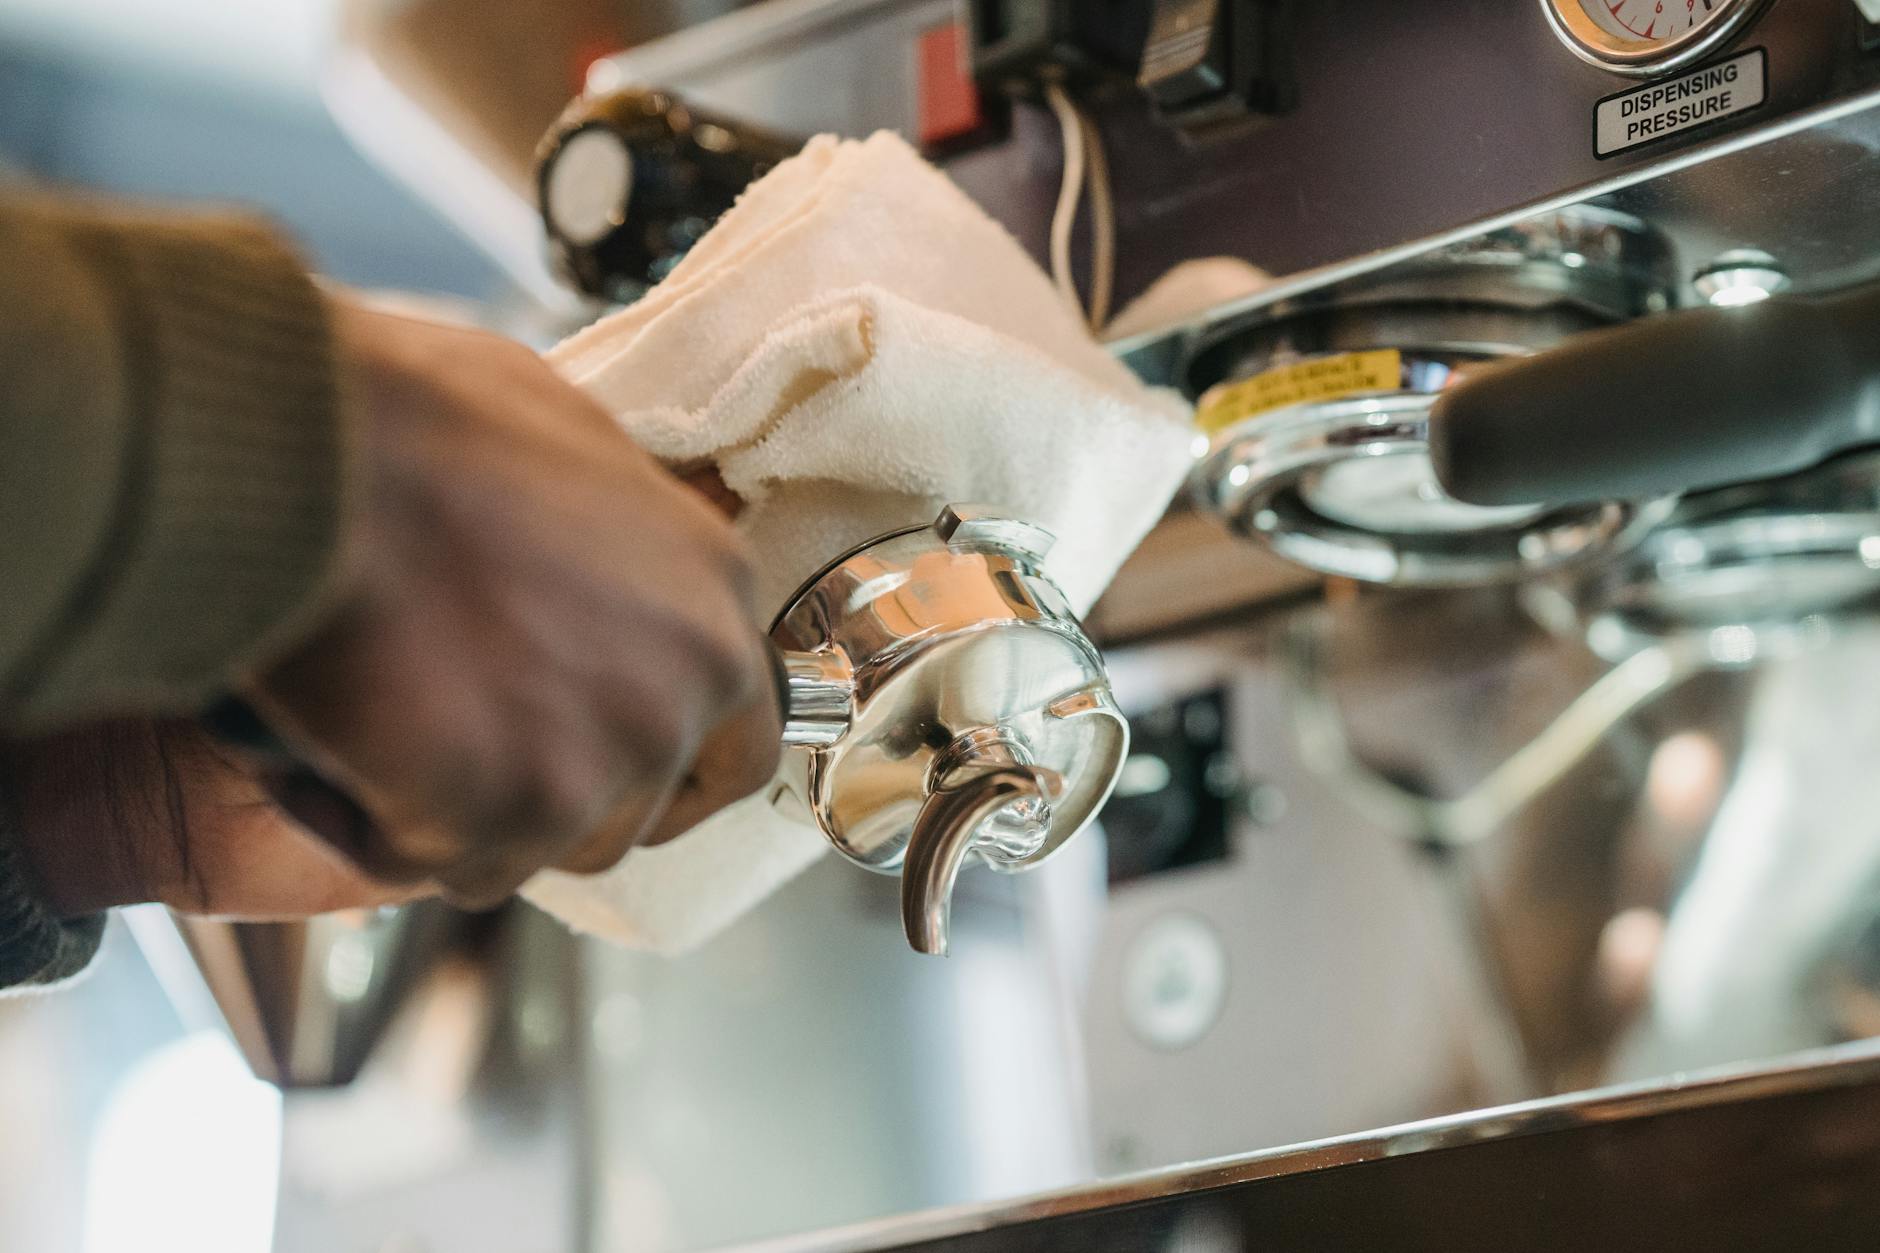
To prevent the overflow, it’s crucial to first understand what’s happening inside your machine during a backflush. Backflushing is the process of cleaning the group head’s internal components, including the shower screen and the three-way solenoid valve. You achieve this by replacing your regular portafilter basket with a “blind basket,” which has no holes. When you engage the pump, water is forced into the group head, but because it can’t exit through the basket, pressure builds up. When you stop the pump, the three-way solenoid valve opens, releasing this built-up pressure and flushing water, coffee oils, and grounds out through a drain tube and into the drip tray. The issue with a low profile tray is purely one of volume. A typical 10-second backflush cycle can discharge anywhere from 100 to 150ml of water. A compact drip tray might only hold 300-400ml in total, meaning just two or three cycles can push it to its limit.
Mastering the ‘pulse and pause’ technique
The single most effective way to manage water volume during backflushing is to abandon the traditional “10 seconds on, 10 seconds off” method. Instead, adopt a more controlled approach we’ll call the ‘pulse and pause’ technique. This method breaks the process into smaller, manageable steps, giving you complete control over the water level in your drip tray.
Here’s how to do it:
- Step 1: Start with a completely empty drip tray. This may seem obvious, but any residual water from pulling shots will reduce your available capacity.
- Step 2: Insert your portafilter with the blind basket.
- Step 3: Engage the brew lever or pump for just 3 to 4 seconds. This is long enough to build sufficient pressure for cleaning but short enough to limit the water volume.
- Step 4: Disengage the pump. You will hear the characteristic “whoosh” as the pressure is released and water drains into the tray.
- Step 5: Pause and observe. Wait about 5 to 10 seconds. This allows the water to settle and gives you a moment to check the level in the drip tray.
- Step 6: Repeat this short pulse-and-pause cycle four to five times to complete one round of backflushing. If at any point the tray looks too full, simply remove and empty it before continuing.
This technique turns a potentially messy flood into a controlled and deliberate cleaning process. You are still achieving the same cleaning effect by building and releasing pressure, but you’re doing so in a way that respects the physical limitations of your equipment.
Proactive strategies and useful tools
Beyond refining your technique, a few proactive measures can make the process even more foolproof. The most direct approach is to know exactly how much water your machine releases. Take a small measuring cup and perform one full 10-second backflush cycle, catching the discharged water. This simple test demystifies the process; if you know your machine releases 120ml per cycle and your tray holds 400ml, you know you can safely perform three cycles before needing to empty it.
For deep cleans that involve a chemical detergent, consider bypassing the drip tray for the first few flushes. You can hold a small bowl or milk pitcher directly under the group head’s discharge spout. This allows you to perform the initial, dirtiest flushes without filling your drip tray at all. Once the water starts running clear, you can remove the pitcher and finish the rinsing cycles using the ‘pulse and pause’ technique with the drip tray in place.
Building a clean and consistent maintenance routine
Integrating these methods into a regular schedule is the key to long-term success. A messy backflush often happens when we wait too long between cleanings, forcing a more aggressive and lengthy session. By making it a quick and easy part of your coffee workflow, you prevent significant buildup and reduce the overall cleaning time needed for each session. A consistent routine ensures your machine is always in top condition and you never have to deal with a major cleaning session that risks an overflow.
Consider this sample routine that incorporates the techniques discussed:
| Frequency | Task | Method |
|---|---|---|
| Daily (End of day) | Water-Only Backflush | Perform one set of 4-5 cycles using the ‘pulse and pause’ technique. Start with an empty tray. |
| Weekly | Detergent Backflush | Use a small pitcher to catch the first 2-3 detergent flushes. Then, use the drip tray and ‘pulse and pause’ for the final water-only rinses. |
| As Needed | Check Water Volume | If you get a new machine or feel the output has changed, re-measure the backflush water volume into a cup. |
By adopting a structured approach, you turn backflushing from a dreaded chore into a simple, two-minute task that protects your investment and keeps your coffee tasting pure.
In conclusion, a low profile drip tray doesn’t have to be a source of frustration. The anxiety of a potential overflow can be completely eliminated by understanding the mechanics of backflushing and adjusting your technique accordingly. Moving away from a long, continuous pump cycle to the more deliberate ‘pulse and pause’ method is the most critical change you can make. This gives you direct control over the water entering your drip tray. Supplementing this technique with proactive habits like starting with an empty tray, measuring your machine’s output, and building a consistent cleaning schedule will ensure your countertop remains as pristine as your machine’s internals. Ultimately, mastering this simple process allows you to enjoy all the benefits of a clean espresso machine without any of the mess.


 No products in the cart.