
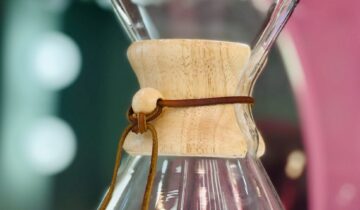
Installing a PID (Proportional-Integral-Derivative) controller on a Gaggia Classic is one of the most popular and rewarding DIY upgrades for any home barista. This modification transforms the machine’s notoriously wide temperature swings into a rock-solid, stable system, unlocking a new level of consistency and quality in your espresso shots. However, this project involves working directly with your machine’s electrical components, mains voltage, and high-heat elements. It is not a task to be taken lightly. Rushing the process or overlooking fundamental safety precautions can lead to electrical shock, fire hazards, or permanent damage to your beloved espresso machine. This guide is dedicated to providing the essential safety tips you need to follow for a successful and, most importantly, safe DIY Gaggia Classic PID installation.
Preparation is paramount: Before you begin
The foundation of a safe installation is laid long before you ever pick up a screwdriver. Proper preparation minimizes risks and ensures you have everything you need to complete the job without interruption or dangerous improvisation. Start by thoroughly reading the specific installation manual that came with your PID kit from start to finish. Different kits have slightly different wiring schemes and components, and assuming they are all the same is a critical mistake. Understand the entire process before you start disconnecting wires.
Next, prepare your workspace. Ensure you are working in a well-lit, dry, and clean area with plenty of space. Gather all your tools beforehand so you are not searching for them mid-project. A typical installation requires:
- Phillips and flathead screwdrivers
- Wire strippers and crimpers
- A set of small wrenches or a socket set
- Needle-nose pliers
Before disassembling anything, take clear, well-lit photos of the existing wiring inside your Gaggia Classic from multiple angles. These pictures are an invaluable reference if you get confused about where a stock wire needs to be reconnected. This simple step can prevent serious wiring mistakes later on.
Working with electricity: The biggest risk
This is the most critical phase for safety. You are working with household mains voltage, which can be lethal. The single most important rule is to unplug the Gaggia Classic from the wall outlet before you open the case. Simply turning the power switch off is not sufficient, as the machine can still hold a charge and wiring before the switch remains live. After unplugging it, press the power and steam buttons to help discharge any residual electricity stored in the components.
Once inside, pay close attention to grounding. The ground wire (typically green or green with a yellow stripe) is a crucial safety feature that protects you from electric shock in case of a fault. Ensure it is, and remains, securely connected to the machine’s metal chassis. When you are running new wires for the PID, handle them carefully. When stripping wires, make sure you only remove enough insulation to make a solid connection. Exposed copper can lead to short circuits if it touches the chassis or another component. Use the proper connectors supplied with your kit and ensure all crimps are tight and secure. A loose connection can cause arcing, creating a fire hazard.
The installation process: Careful and methodical steps
With the machine de-energized and your plan in place, the physical installation requires a careful and deliberate approach. The inside of a Gaggia Classic has sharp metal edges; be mindful of where you place your hands and how you route wires to avoid cutting yourself or damaging the wire insulation. This is directly connected to electrical safety, as a nick in a wire’s insulation can create a new, unforeseen short-circuit risk.
One of the biggest considerations during installation is heat. The boiler operates at high temperatures, and you must route all new wiring, especially for the thermocouple and the Solid State Relay (SSR), well away from it. Do not drape wires directly over the boiler. Use the zip ties often included in PID kits to secure the new wiring to the existing loom or the chassis, keeping them neat and safely away from hot surfaces or moving parts like the pump. When mounting the SSR, ensure it is attached securely to a metal surface that can act as a heat sink, and always apply a thin layer of thermal paste between the SSR and the mounting surface to ensure proper heat dissipation.
Powering up and post-installation checks
Before you close up the machine and call the job done, you must perform a series of careful checks. With the top case still off, do one final visual inspection. Ensure there are no loose strands of wire, no tools left inside, and that all your new connections are insulated and secure. Double-check that all wires are clear of the boiler. Place the machine on a non-conductive surface for its first power-up.
Plug the machine into a GFCI (Ground Fault Circuit Interrupter) or RCD (Residual Current Device) protected outlet for the initial test. This provides an extra layer of protection. When you turn it on for the first time, be vigilant. Watch for any sparks, listen for unusual buzzing sounds, and be aware of any smell of burning plastic. If you notice any of these things, unplug the machine immediately and re-check your wiring. If everything appears normal, the PID controller should light up. You can then proceed with the initial configuration and testing of the heating element before fully reassembling the case.
| Checkpoint | Pre-Installation Status | Post-Installation Check |
|---|---|---|
| Power Source | Machine completely unplugged from the wall. | Plug into a GFCI/RCD outlet for the first test. |
| Wiring | Photos taken of original wiring for reference. | All new connections are secure, crimped tightly, and insulated. |
| Grounding | Original ground wire location noted. | Ground wire is securely re-fastened to the chassis. |
| Component Placement | Plan for routing wires away from heat/sharp edges. | Wires are secured away from the boiler; no risk of chafing. |
| Visual Inspection | Workspace is clean and dry. | No smoke, sparks, or burning smells on first power-up. |
Upgrading your Gaggia Classic with a PID is a fantastic journey into the heart of your espresso machine, and the results are well worth the effort. However, the success of this project is measured not just by the quality of the coffee but by the safety of the process. By prioritizing careful preparation, respecting the dangers of electricity, performing a methodical installation, and conducting thorough post-installation checks, you can ensure a safe and successful outcome. Rushing through the steps or ignoring these fundamental precautions is simply not worth the risk. Take your time, follow your kit’s instructions precisely, and apply these safety principles throughout. You will be rewarded with a safer, more capable machine and the deep satisfaction of a job well done.
 No products in the cart.